How to Use Schmincke ‘Medium-W’ as an Oil Painter

Schmincke 'Medium-W'

The Oil Painting Medium Nobody Fully Explains

If you’ve been searching for less toxic mediums to use with traditional oil paints, you may have come across a mysterious product by Schmincke, ‘Medium-W’.

It sounds more like a character from a Bond film than an artist’s medium, but it’s actually quite an ingenious solution for turning traditional oil paints into water-mixable ones.

Seems like magic?

In this guide, we’ll look at what Medium-W actually is, what it does to the handling of your paint, how much to add, the difference between the fluid and gel versions, and if it’s the right medium for you.

Schmincke 'Medium-W'

What Is Medium-W?

Medium-W is a painting additive produced by Schmincke.

It’s a modified alkyd resin that’s been developed to transform traditional oil paints into water-mixable oils. It has been chemically adjusted to accept water into its structure, so instead of repelling water as conventional oils would, it can combine with and work alongside them.

The “W” stands for water, and at the moment I haven’t come across another manufacturer producing a product quite like this (if you have, let me know in the comments)

With traditional oils, you would typically use Turpentine or Odourless Mineral Spirits (OMS) to thin the paint. Medium-W offers an alternative approach for artists looking to reduce their reliance on more traditional solvents. By mixing the medium in with your oil paint, you can then use water as a way to dilute it further.
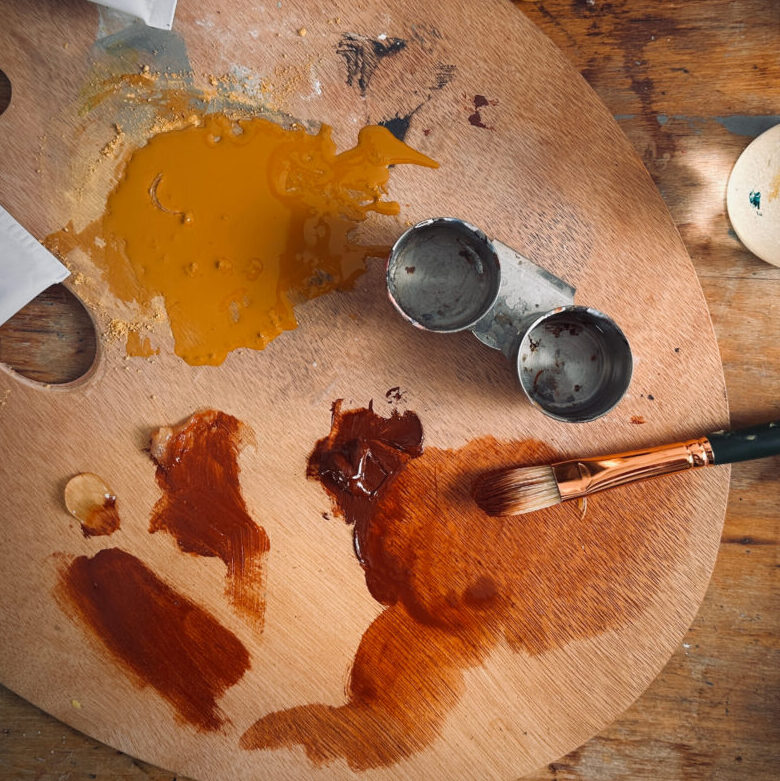
The Control

old holland oil paint

Here is some Old Holland traditional Oil paint. Old Holland is often thicker than other oil paints straight from the tube, so it will be a good paint to use when you’re adding another medium to dilute it.

diluted-with-gamsol-oil

Here, the Old Holland traditional oil paint is diluted with a small amount of Odourless Mineral Spirits. In this example, I’m using Gamsol from Gamblin.

Notice how the paint thins very easily and has smooth brushstrokes while still retaining a bit of texture. This is only with a small amount of OMS.

water-vs-oil-dilution-paints

For experimental purposes only, I’ve also shown diluting the traditional oil paint with a small amount of water, and you can see how it’s kind of separating and not really holding a fluid film.

Mixing 2 Parts Oil Paint: 1 Part Medium-W Fluid – (Recommended amount by Schmincke)

I’ve mixed the recommended 2 parts oil paint to 1 part Medium W. I found the easiest way to do this was to put out 2 blobs of oil paint, then a third blob of Medium W (roughly 50%)

Then mixed well together with a palette knife.

The photo above shows it further diluted with water.

Adding Medium-W to your paint changes several properties at once, which is why it can feel quite different from simply thinning paint with a mineral spirit.

Medium-W loosens the paint’s consistency and improves its flow across the surface. It will also add a bit of body to the paint compared to diluting it with OMS alone.

The only drawback was that when I came to clean the brush with water, it still diluted it, but a lot of the oil paint was left in the bristles.

On the Schmincke website, it says, ‘if necessary, add more medium W,’ and I’ve found from experience that using it at a slightly higher ratio makes it easier to clean brushes and adds a nice flow to the paint.

Paint Film Integrity

I must point out at this stage that increasing the amount of Medium W works if you’re working alla prima.

If you’re working in layers, it adds a bit more complexity. The higher dilution is only recommended for the thin underpainting, always respecting the fat-over-lean approach.

If you are painting in thicker layers, keep your added medium W to the recommended ratio to preserve the structural integrity of the paint film.

Mixing 1 Part Fluid Medium-W: 1 Part Oil Paint

adding-1-1-medium-w

I’m now mixing 1 part Fluid Medium-W to 1 part oil paint, so they’re equal in volume.

I’m using a pipette to slowly add the medium to the paint, then thoroughly mixing everything together with a palette knife.

medium-w-diluted

Here you can see the fluidity when fully mixed at a 1:1 ratio. Once mixed, the paint can be thinned further with water, and your brushes and palette can be cleaned with water as well.

Which brings us on to colour shift.

The Colour Shift Issue With Water

When traditional oils are mixed with Medium-W and then further thinned with water, you’ll often notice a visible colour shift between the wet and dry paint films. This shift is much more noticeable than when using a dedicated thinner or painting medium.

Colours dry lighter, flatter, and less saturated than they initially appear when first applied.

While wet, the paint can sometimes appear slightly milky or cloudy before drying back clear. The darker the pigment colour and the higher the water ratio, the more noticeable this shift becomes.

So, although Medium-W can seem like a perfect solution for making your existing oils water-mixable, it also introduces another variable you need to learn to compensate for while painting.

Can you clean your brushes with water?

water-cleaning-oils

Kind of.

You can see above that I’m now cleaning out the brush, using the dilution of a 1:1  ratio. I’m then rinsing the brush in clean water to see how effectively the paint releases from the bristles.

cleaning-just-water-bristles-hog-brush

At this ratio, it’s removed most of the pigment quite well.

This pink is quite a staining colour, so it’s giving me a bit more of a challenge.

What I’m going to do now is place the brush into some odourless mineral spirits to see if there’s any remaining pigment still trapped in the bristles that can be lifted out.

removing-pigment-water-oils

So on the right, you can see there was still some additional pigment left in the brush that I couldn’t fully remove with water alone. The odourless mineral spirits cut through the remaining oil residue a little more effectively.

Schmincke Medium-W Gel

medium-w-gel

Schmincke Medium-W comes in two forms: Gel and Fluid. They both do similar things in terms of the chemistry, but have different handling properties. The gel medium offers greater viscosity and a thicker starting point for diluting the paints, so you don’t get as fluid or runny a consistency.

Medium-W Fluid

This is the standard version, a pourable, liquid medium. It has the consistency of oil, and it integrates smoothly and quickly into paint on the palette. It’s best to give the bottle a shake (with the lid on!) before using it.

When to use it: Use Schmincke ‘Medium-W’ Fluid to improve the flow of your paint while reducing its body. Use for any passage where you’re painting in thin-to-mid layers.

Medium-W Gel

The gel version has the consistency of a soft, translucent gel. It doesn’t pour; you squeeze it out from the tube.

The gel form does everything the fluid form does but has more body. When you mix it into paint, it increases the paint’s viscosity while simultaneously making it more workable.

When to use it: Use Medium-W Gel when you’re after thicker marks, more textural, impasto-style effects.

If you’re trying to decide between the two, ask yourself what your paint needs to do:

  • If you want paint to flow more easily and move smoothly, use the Fluid.
  • If you want paint to hold its shape while becoming more responsive, use the Gel

2 parts paint: 1 part Gel

Here is the consistency of the paint when mixed: 2 parts traditional oil paint to 1 part Medium-W gel, mixed with a palette knife.

So the gel is probably the version I tend to lean towards, unless you’re going to be using very sketchy, loose painting. Personally, it gives me better consistency for the type of paintings I’d be working with.

Michael Harding’s Miracle Medium

miracle-medium-michael-harding

Michael Harding Miracle Medium for traditional oils

“Derived from renewable vegetable sources, the Miracle Medium™ range is odourless, solvent-free, and designed to provide a safer, cleaner studio environment”

An alternative to working solvent-free and non-toxic with traditional oils is to use Michael Harding’s Miracle Medium.

I often use this in the studio, and you only need to add a small amount to increase flow and dilute the paint. You don’t get the same dramatic colour shift from wet to dry as you do when thinning heavily with water.

The drawback of this medium is that the recommended ratio for adding to your traditional oil paints is only 5 to 10%. This means you can’t really achieve a thin consistency for underpainting as you could with Odourless Mineral Spirit.

Also, it takes longer to dry than using Odourless Mineral Spirit.

gamblin-solvent-free-gel

A solvent-free alternative to the medium W gel is solvent-free gel from Gamblin

You can also get solvent-free alternatives for traditional oil gels, like this one from Gamblin.

Can you use linseed oil with the Medium-W

No. The linseed oil will work against the water-mixability you’ve added with the gel/fluid.

Can I use water-mixable Linseed Oil with Medium-W

Yes, you can; the water-mixable linseed oil will mix well and is easier to clean when washed with water.

How do Water-mixable Oils compare?

cobra-watermixable-oil

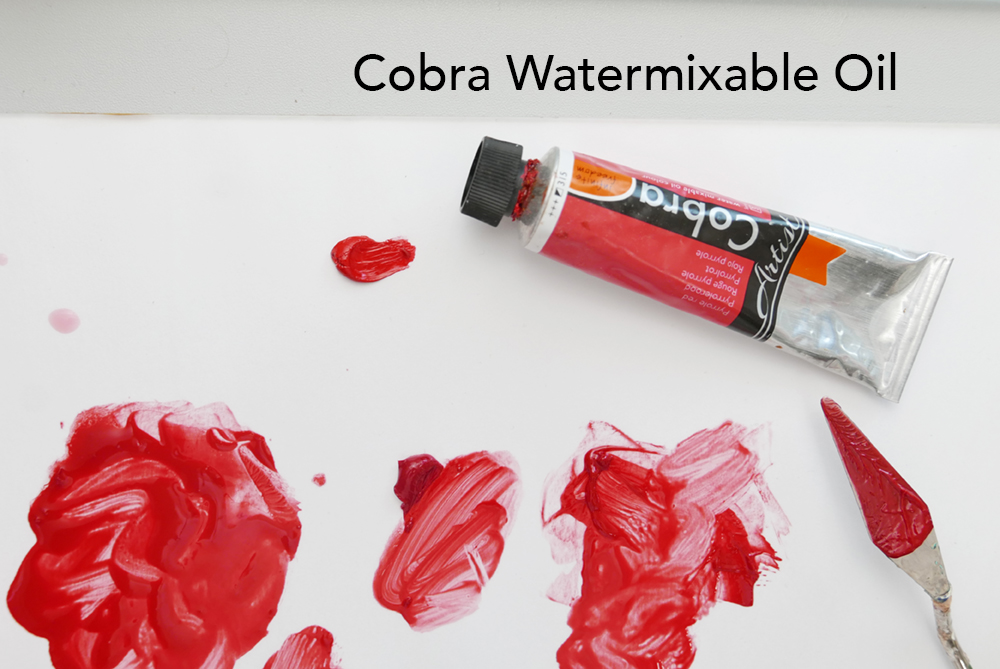
Here I’ve poured out a small amount of Pyrrole Red from Cobra water-mixable oils, and then I’m going to dilute it with a touch of water (about the same amount of OMS that I put in the first control dilution)

diluted-cobra-water

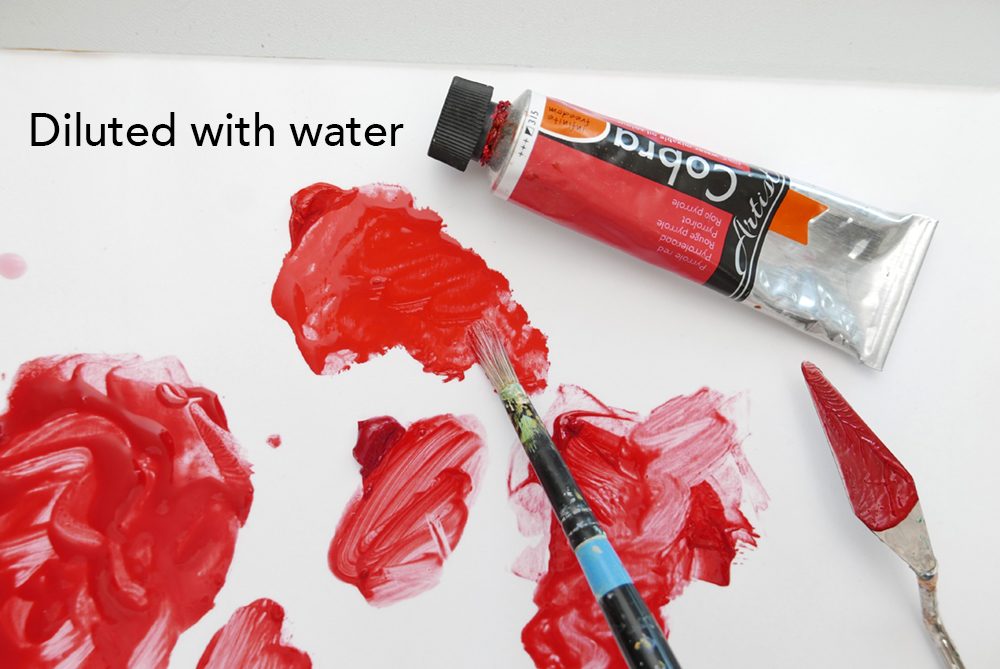
You can see the flowing paint, just diluted with a dash of water, and it’s got a nice even consistency. Personally, I much prefer using a water-mixable thinner or medium instead of water.

Thinning heavily with water can still introduce some of the wet-to-dry colour shift issues discussed earlier, so there are always a few technical variables to learn and work around.

water-mixable-thinner-winsor-newton

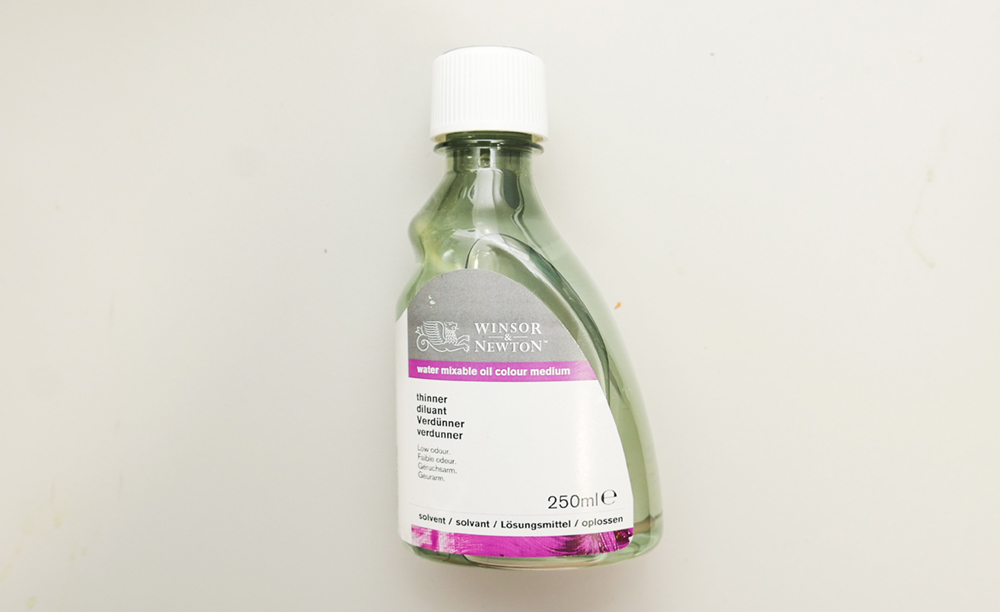
Winsor & Newton water mixable oils thinner. I often use this when working with water-mixable oils. Water is used for cleaning your brushes, but the thinner gives better flow control and feel when painting.

Would I Recommend Schmincke ‘Medium-W’ ?

Yes, in the right circumstances.
For certain situations, Medium-W can be super useful.

If you have an oil colour you love but can’t find in a water-mixable range, Medium-W can be a clever way to integrate that colour into your palette.

Also, if you’ve already got a studio full of expensive traditional oil paints, it might be worth experimenting with.

If you’re painting away from the studio and want a water-based cleanup, it can be great.

For fluid sketching and cleanup with water, Medium-W fluid provides flow without excessive solvent use. However, if your goal is to work with water as cleanup, I would recommend building your palette around water-mixable oil paints.

Cost Comparison: Medium W to Water-mixable Oils.

If you mix in the Medium W, this means that for every small squeeze of paint, you need to add half f as much fluid or gel medium.

When you scale that up across six or eight colours on your palette, you can end up using quite a lot of medium, which quickly adds to the cost.

  • 40ml of the Medium W gel works out at around £9.49
  • 40ml of Cobra Yellow Ochre water-mixable oil paint (an earth colour and one of the more affordable pigments) is around £6.70
  • 40ml of Cobra Cadmium Yellow Deep is around £13.50.

If you’d like to explore these differences further, I have several free YouTube videos that compare water-mixable oils, traditional oils, mediums, and solvent-free approaches in greater depth.

Water-mixable Oils vs Traditional Oils
Differences between Acrylic and Oil Paint

Further training

And if you’d like a more structured introduction, I also have :

Beginner’s Water-Mixable Oil Painting Course

Beginner’s Traditional Oil Painting Course

Both are designed to guide you step-by-step through the materials, techniques, and painting process from the ground up.


Continue ReadingHow to Use Schmincke ‘Medium-W’ as an Oil Painter

NEW! Beginners Oil Painting Course

Morning class, I’d like to introduce you to a new beginner’s oil painting course.

Welcome to my NEW Traditional Oil Painting Course for Beginners!

Over 5+ hours of tuition

This is a simple, easy-to-follow downloadable video course with over 5 hours of tuition, where you will discover the essentials of creating an oil painting. It has been designed as a step-by-step, rounded learning experience that brings together all my knowledge as a student, painter, and teacher.

What’s in the Beginners Oil Painting Course?

  •  5 x traditional oil painting demonstrations, taking you step-by-step from preparation and mixing and matching colours through to the final brush strokes. ✅
  • 16 downloadable video lessons, split into separate chapters that follow on sequentially.✅
  • Over 5 hours of detailed video instruction so that you can follow along at your own pace.✅
  • Downloadable reference JPEG images, line drawings, and a full materials list.✅
  • Lifetime access, downloadable on separate devices.✅

You receive more than five hours of video lessons, reference images, my drawings, colour swatches, and lifetime access with a one-time payment.

Learn at your own pace and complete your first oil paintings with a clear and structured approach.

You will complete five guided studies using downloadable reference images.

  • We begin with a wipe-out study that lets you carve out the form like a sculptor.
  • Then we move onto a limited palette jug study, a thin couche layer that allows the paint to blend and flow across the surface.
  • In the monochrome cup study, you learn the importance of value and brush choice using an alla prima approach.
  • The lemon study introduces a four-stage, layered, indirect approach using the fat-over-lean method and teaches you to think ahead to make the most of your glazing.
  • Our final study is a classical still life of figs on a plate. This tutorial enables us to build layers and expand our colour mixing, working with a split primary palette and balancing realism with impressionism through painterly brush strokes.

If you’ve ever wanted to start oil painting but don’t know where to begin, what materials you need, how to clean your brushes or how to avoid muddy colours, you are not alone!

Oils can feel confusing at first.

I help complete beginners learn to paint using classical techniques. I want to give you a clear plan so you can start oil painting with confidence.

Oil paints are a fantastic medium. They dry slowly, giving you more time to refine shapes, create smooth transitions, and build subtle shifts in light. With the right foundation, you can avoid the usual frustrations and enjoy the process.

When you’re first starting with traditional oils, there’s a lot to take in! To avoid overwhelm, in this course, I want to address some of the most common questions to help aspiring oil painters understand the theory and practice of painting in this medium.

Each of the five painting studies builds on the last and teaches a different approach, from direct painting to an indirect classical method.

By focusing on still life subjects, you’ll gain confidence with setups that you can easily find at home to continue your studies.

I trained in classical oil painting in Florence, Italy, and have over 15 years of online teaching experience and more than 300,000 YouTube followers. My focus is always on practical methods that give repeatable results.

Designed with the home studio oil painter in mind

On this Beginner’s oil painting course, we’re keeping it simple and practical, with an approach designed to work at home.

You only need a small brush kit (from Princeton Brush Company) a limited palette of pigments, minimal tools, and a safe home setup. The short video lessons show each stage step-by-step so you can follow along without feeling overwhelmed.

You will learn how to prepare a canvas, see values, avoid muddy colours, control edges, and create the right consistency for your paint. We cover the essentials of traditional oil painting: Underpainting, fat over lean, glazing, simple colour mixing, and when it comes to materials, I want you to understand the options available, from quick-drying oil paint to creating your own medium recipes.

If you work from a small room at home, the idea of Traditional Oil paints and the use of strong-smelling solvents and mediums is a real consideration.

But you do not have to use solvents! You can paint with oils straight from the tube, adding nothing to them.

Mediums and solvents, such as turpentine or odourless mineral spirits, are optional; they simply change how the paint behaves. So you could dilute with a natural oil, like walnut oil, or with a solvent-free gel. Think of them as ways to tweak consistency rather than requirements; it’s about balancing paint handling, drying times, sensitivity and where you are painting.

In the course, I demonstrate using a low-odour solvent and work in a well-ventilated space. Throughout the course, I’ve tried to cover less toxic alternatives. A guide to a safe working environment is included.

beginners oil painting course

What makes this beginner’s oil painting course different?

  • Calm and methodical, which builds skill in the right order.
  • Real-time decision making explained clearly as you paint with me
  • Simple printables and references, so practice is easy to repeat.
  • Both alla prima and indirect methods are taught.

So grab a brew, maybe a couple of biscuits, and join me on this Absolute Beginner’s Traditional Oil Painting Course to explore the magic of oils and surprise yourself with what you can create.

You might also enjoy these articles:
Oil Painting Terms for Beginners
Water-mixable Oils vs Traditional Oils

Continue ReadingNEW! Beginners Oil Painting Course

7 Oil Painting Truths That Could Sabotage Your Progress

oil painting mediums

I’m back in the studio, knee deep in a series of oil paintings.

And I’m really enjoying working with the fantastic malleability of oil paint. You can push it around, layer it thickly, and enjoy a long working time and soft, smoky blends.

But.

Even as a seasoned oil painter, when I’m sorting out my brushes, choosing paints and deciding on mediums, the sharp reality hits. Lack of preparation, a few poor habits, and rose-tinted expectations could easily counteract your efforts and enthusiasm.

Here are 7 Oil Painting Truths, so if you encounter any of them, you can smile and dust yourself down instead of letting them derail you.

1. You will get messy, drop paint, and get oil paint in areas you never realised you could.

I’ve found that no matter how careful you are, you will undoubtedly get oil paint on your hands, your brush handle and then get it on your top!

Wearing rubber gloves can improve your clean-up process, and I’d advise wearing an apron or an old shirt. Knowing that you will get it somewhere and being prepared for that.

Also, make sure not to eat or drink in that area, just because the oil paint will turn up where you least expect it. So the more dedicated space you have, the better.

2. You will get overwhelmed by the range of oil colours and different brushes for different techniques.

oil painting brushes

A small selection of my brushes! why do I still order more?

Every time I open an art magazine, there seems to be another new paint from a manufacturer.

 “Is this the colour I’ve been missing?”

But honestly, the simpler you keep your colour mixing, the better. Just start with a few key colours and maybe a couple of dark earth tones. Those darker colours are great for underpainting or dropping the chromatic intensity. If you choose them well, you can do a huge number of paintings with just two or three colours.

I recently had a bit of a shock when it comes to brushes. I looked through mine and realised I had hundreds. But when I actually paid attention, I noticed I’d been buying the same two or three types over and over again. It turns out those are the ones I keep reaching for.

With oil paint, the biggest difference compared to acrylics is how many brushes you need. With acrylics, you can often get away with using one brush, rinsing it in water, and moving on. But with oils, especially if you want to avoid using lots of solvents, it’s much easier to just have extra brushes ready to go.

You should set aside a few for your darks, a few for your mids, and a few for your lights.

That way, you’re not constantly cleaning, and you reduce the risk of muddy colours from brush contamination. It’s one of the easiest ways to keep your painting clean and your process flowing.

3. You will try to put out too little paint to save money – this is a false economy

With oils, you can squeeze out a blob of paint, and it will last for days, sometimes even weeks. So don’t be afraid to put out more than you think you’ll need and mix more generously. It won’t go to waste like acrylics, where once it dries, it’s gone.

When you’re just starting out, using a student grade white can be a really smart move. Something like Winsor & Newton Winton Titanium White is great value. ( There is an offer on at Cass Arts for £14.50 for two 200 ml tubes)

In this case, unlike acrylics, artist-quality white isn’t as important.

That’s because with oils, to get a clean colour application on top of your existing wet colours,  you usually need to paint thicker and then leave the brushstroke alone.

With acrylics, the opposite is true. You can use thinner layers and still get solid coverage, as long as the paint is high quality and opaque. So with acrylics, I’d always recommend getting the best artist-grade white you can (I like Golden Brand Titanium white). But with oils, a good student white will do the job and actually encourages you to be more generous with your paint, which really helps when you’re learning.

4. You will compare yourself to an artist in a museum. Even one of the best over the last 400 years, against their best work, trained since 11 and drawn every day

Give yourself a break.

I was reading something today about the idea of making a hundred bad paintings. I think it originally came from a film director who said you should make a hundred bad movies. The idea is that if you approach painting with that mindset, you won’t get so precious, and it takes the pressure off.

When you’re starting out, it’s easy to think you’re going to make one incredible painting and that will be it. But usually, that’s not how it works. It might be pretty good, but the real progress comes when you stop comparing your work to other people’s and start comparing it to your own.

Take inspiration from others, of course, but ideally, you want to be able to look back at a painting you did three months ago and think, “I can’t believe I thought that was good at the time.” That’s how you know you’re improving.

You’re becoming your own reference point.

It’s also worth remembering that when you go to a gallery or an exhibition, the work you see is surrounded by so much extra context.

There’s the grandeur of the museum space, the history of the artist, and even the fact that you may have seen the image before, all of which add to its impact. In his 1935 Essay, “The Work of Art in the Age of Mechanical Reproduction,” Walter Benjamin introduced the concept of “aura,” the unique presence and authenticity of an original artwork that stems from its particular history, location, and singular existence.

Benjamin argued that an artwork’s aura is tied to its “here and now”. Imagine your painting being shown on television or displayed in a gallery. It would feel different, too, simply because of the way it’s presented.

5. You will learn more at the easel in 30 minutes than you will from 30 hrs of YouTube videos

It’s so easy, especially with all the content available these days, to fall into the trap of thinking that if you just watch one more video or learn one more thing, then you’ll finally be ready to start painting. But often, that just becomes another form of procrastination.

The truth is, if you pick the simplest subject, one brush, and one tube of oil paint, you will learn so much more by actually painting for an hour than by watching videos for days. Everything that goes wrong and everything that goes right in that session will teach you far more than you expect.

Oils are great for this because the paint stays wet the whole time. You can keep adjusting, softening edges, layering colours, and really exploring how it moves. You’ll learn what kind of brush feels right, how much medium you enjoy using, what colours you naturally reach for, and even what frustrates you.

All of that only comes from doing. The act of painting is the best teacher.

You’ll be surprised at how much you can accomplish in just one hour, even if it doesn’t feel perfect. That hands-on time builds your skills and confidence far more than waiting to feel “ready.”

6. You will feel exhilarated, then deeply depressed, all within the same painting

Painting can really feel like a rollercoaster. When you first start blocking in or sketching out the composition, there’s a rush of excitement. You feel like this could be the one. This painting might turn out amazingly well! And that initial energy is such a great boost.

But as the painting starts to develop, doubts often creep in.

You might start to wonder if you chose the right subject, if your colours are working, or why the paint isn’t handling the way you expected. You start questioning yourself. That’s when the energy can drop, and it’s easy to hit a low point where you think, “This is rubbish, why am I even doing this?”

Then, often out of nowhere, you’ll paint one little section that surprises you. It turns out better than you thought it would. That small win can give you just enough encouragement to keep going.

That’s why taking regular breaks is so helpful.

Step back from the easel.

Squint down at the painting.

Look at it with fresh eyes.

That reset in perspective can really shift how you feel and help you make decisions more clearly. And often, it’s in those final moments that the magic happens. The last highlight, a sharper edge, or a touch of contrast, those small finishing touches can transform the whole piece.

So, the key is to stay with it, ride the ups and downs, and trust that each stage is part of the process. Keep going.

7. You will judge, question, challenge and rebel against the process

When you’re following a tutorial or trying out a new technique, especially if someone has already laid out a process that works, it’s really tempting to think you know better. I found that when I was first starting to paint, even if I was following someone to get specific results, I would still start questioning the steps. I’d think, “This can’t work,” or “Why am I doing it this way?”

For example, if you’re painting on a coloured ground for the first time, it might feel pointless. You might wonder why you’re not just starting on white. Or if you’re asked to work from the negative space first to reveal the positive forms, that can feel really counterintuitive. (this tutorial of drawing the negative of a bike is a good example)

But these techniques often make a lot more sense once you’ve seen them through.

It’s a bit like following a recipe. I think people tend to fall into two camps.

One group follows the instructions closely, measuring everything precisely. The other group wings it, adding a bit of this or that and hoping it all comes together. Both can end up with a cake, but the results can vary.

When you’re first learning, it really helps to be in that first group. Just follow the steps. Try the full process as it’s laid out, even if it doesn’t make perfect sense yet. That way, you get to experience how these techniques work in practice, and you’ll start to build a foundation you can later adapt to suit your own style.

For students wanting to make the leap from acrylics to Oils, many of the techniques throughout the teaching on the site stem from my training in classical oil painting. So if you’ve been working through the tutorials, you’ve been developing oil painting skills by stealth!

Hope this helps, have a great creative weekend.

Cheers,

Will

Continue Reading7 Oil Painting Truths That Could Sabotage Your Progress

How to Paint a Cornish Lane in Oils

Morning class,

This week, I’ve been painting a small postcard study of a street scene in Mousehole on the Cornish Coast. It was a really grey day, full of a mizzle sky and lots of rain reflected on the road.

I liked how this view had dashes of yellow from the double yellow lines that had faded out. These matched the same colours as the hedge on the right-hand side.

There is some warmer orange yellow in the roof, and in the very far distance, just above the chimney, you can see the little cottages that go around the harbour. (You can see a sketch of the harbour towards the end of this article)


Downloadable Reference Image for the Painting:

mousehole lane cornwall

If you click here is a 20 x 20cm larger scale version

Materials you will need:

  • 4 x 4-inch or 6 x 6-inch square canvas board or canvas (It would also work on a larger scale)
  • Palette Knife for mixing Oils Paints
  • Pencil or Acrylic marker to draw out
  • Hog hair round brush for blocking-in
  • Small Round brush

Oil Paint Colours

This was the palette I used on for the painting, I wanted some low chroma colours. (You can learn about Chroma here)

Continue ReadingHow to Paint a Cornish Lane in Oils

How to Paint a Realistic Landscape (With Only 4 Colours)

Morning Class,

Last week, we explored Carlson’s theory on angles, and I received an interesting comment from a reader asking how complicated it would be to apply the principles to colour.

“I especially love black and white painting.  I’m looking forward to trying this.  How does it work then with colour?  Seems it could get quite complicated.” – Laura

Well, it’s simpler than you might think!

I thought it would be handy to demonstrate painting trees using just four colour mixes. I’m using water-mixable oils, but you can follow along with acrylics or traditional oils too.

Continue ReadingHow to Paint a Realistic Landscape (With Only 4 Colours)

Beginner Landscape Painting Concepts – The Theory of Angles

In this lesson, I want to show you how to start recognising light and dark relationships in a landscape.

Once you ‘see’ how the light falls on the main masses, such as the ground, trees, and mountains, painting the values accurately will be much easier.

I first encountered this simplification of the Four Planes of Landscape Painting in Carlson’s 1929 book ‘Carlson’s Guide to Landscape Painting’.

Continue ReadingBeginner Landscape Painting Concepts – The Theory of Angles

​How to Begin Painting (Without Wasting Your Time or Money)

Painting can open up a world of creativity, relaxation, and self-expression; the hardest part is beginning.

Are watercolours harder than acrylics? What if you can’t draw?

Often, the biggest obstacle to success is overcoming the worry you’re wasting your time learning a new medium that doesn’t ‘fit’ your style, or you don’t have the talent to be an artist or, worse, wasting your money buying loads of art materials that you end up not using!

Getting over the Frustration Barrier

“Many things aren’t fun until you’re good at them. Every skill has what I call a frustration barrier, a period of time in which you’re horribly unskilled and you’re painfully aware of that fact.” Josh Kaufman – The First 20 Hours

Even uttering the phrase “I am an artist” can stir feelings of self-doubt. But take heart – every creative feels this impostor syndrome. What matters is moving forward anyway.

(Insights from art psychology books like Art & Fear, The War of Art, and Big Magic prove invaluable companions on the journey.)

The main thing to grasp is that painting is a teachable skill anyone can develop, regardless of innate talent. Some people prefer to take classes with a live instructor, while others prefer to learn independently.

There is a place in the art world for every single artist, and it’s never too late to begin painting.

The main thing to realise is that painting can be learned; it’s a skill that can be developed.

I hope this guide gives you insight into not just materials and mediums, but also a window into the possibilities.

Skill vs Talent (Talent is Overrated)

A Fan Brush used for blending

Can I learn art if I have no talent?

Sure you can.

Can you learn how to bake a cake if you have no talent?

100%.

It’s the same approach. It’s not about natural talent but learning a new skill.

Beginning painting is learning to embrace experiments and find inspiration in your mistakes.

‘Happy Accidents’ can be the beginnings of creative breakthroughs, so be open to when your painting ‘goes wrong’ and try to see what new lessons can be learnt.

Talent is overrated and can be an excuse you can rely on rather than putting in the time on the foundations. The path to success in learning any new skill is focusing more on improving the fundamentals.

“Skill is the ability to do something. Talent is the rate at which you can acquire the ability to do something.¹ If you have a talent for the guitar, that means you will learn to play the guitar faster than someone who doesn’t have a talent for the guitar. If you don’t have a talent for the guitar, that means it will take longer to learn to play the guitar than it would if you did have some talent. For most things* in life, talent doesn’t really matter. The rate at which you can acquire the ability to do something doesn’t really matter. What really matters is the length of time you can do something.” – Billy Oppenheimer 

This quote is so true, “what really matters is the length of time you can do something“.

If you set yourself a goal of creating one painting, you will face problems.

If it goes well, you’ll be worried that the next one won’t be as good, so you’ll procrastinate on continuing.

If it goes badly, you’ll convince yourself you have zero talent; painting isn’t for you, and all those teachers were right.

So what’s the answer?

Start an experiment.

Let’s say you’ll try to paint 100 paintings before you decide if it’s for you.

Does 100 sound too many? It’s estimated that Picasso created 13,500 paintings and around 100,000 prints and engravings.

And don’t get put off if you’re coming to painting later in life. Your unique experiences and perspectives can inform your practice and tell your journey. (Range: Why Generalists Triumph in A Specialized World By David Epstein is a great book on this)

I teach classical painting methods in oils and acrylics that focus on fundamental painting principles.

My philosophy is less is more. A distilled approach to classical painting. A solid foundation for anything you choose to paint, regardless of subject or medium.

I help other aspiring artists not make the same mistakes I did, so if you’ve ever dreamt of picking up a paintbrush and filling a canvas with colour but don’t know where to start, let’s go on a creative journey together to discover how to ‘see’ like an artist.

Students often ask me, ‘What essential materials do I need to begin painting?’

Winsor & Newton Cotman Travel Watercolour Kit

When you are learning anything new, you want to get the best results without investing too much too soon, so before we get into materials, I found it usually helps to begin with the end in mind.

You need to decide on your medium, and each medium has its own charm.

What are you trying to emulate, or what artists are you trying to recreate?

Make a note of paintings you like the style of, what they were painted with and the effect or technique you want to achieve.

You might have tried watercolours and got buckled paper or put off using oils due to the dangers and smell of turpentine (but not realise how far modern oil materials have come.)

You might be much happier with pencils and sketchbooks than painting on canvas.

You’ll get faster results if you can match the correct medium to your personality, aspirations and experience, but knowing which medium will suit you best is impossible until you try.

When you’re dealing with any paints, there are a few things to consider:

  • Handling properties
  • Drying times
  • Surface that you want to work on to
  • Implement you want to use to apply the paints
  • Environment or the space you’ve got available to you

Oil Paint

Oil paints can be amazing to work with, from quick Alla-prima oil canvas sketches to photo-realistic oil portraits.

They have a lovely buttery consistency and a slow drying time, enabling you to make changes over a longer period, adjust shapes, or work wet-into-wet with thick impasto marks.

Oil paints stay workable for much longer than acrylics; the paint on the palette stays pliable.

And oils are king when it comes to blending colours.

Because of their slow-drying nature, you can enjoy the luxury of tweaking and softening your work, creating wonderful, subtle paintings. This is especially true for portrait painting when the shading of the face can need constant revisiting.

If you’re a bit wary because of all the solvents associated with traditional oil painting, you could use water-mixable oils (WMO’s) that you can dilute with water. (Watermixable Oils vs Traditional Oils)

Pro Tip: Even though you can use water with water-mixable oils, you still need to introduce a water-mixable thinner and water-mixable oil to get the best result. This will give you better paint flow and handling. Try to think of them as  ‘water-cleanable’ oils.

Bear in mind that oil paint is a bit messy. I find it gets everywhere just because, well… it tends to get everywhere!

If you’ve got a house full of cats or small children running around, oil painting can make a mess; that goes for water-mixable oils, too.

With Oil Paint you can change your medium to alter paint handling qualities

Preparation is key. Due to the oil in oil paints (usually linseed oil), it’s best to work on a prepared canvas or board.

If you have plenty of time set aside for your painting, traditional oils can be fantastic, but if you want to work with thick paint, you need to consider drying times.

Each particular pigment needs a different amount of oil mixed with it, resulting in different drying times. e.g. Earth colours such as Burnt Umber are rapid drying, whereas Ivory Black takes much longer to dry.

Drying time guide for Winsor & Newton Artist Oils

Ensure a well-ventilated space; traditional turpentine and white spirits can be quite strong. I work with odourless mineral spirits or ‘Zest It‘ (a thinner made from citrus ) with very little odour compared to turpentine.

Many new solvent-free products, such as Gamblin’s Solvent-free Gel, are now coming to market, so there are plenty of alternatives. These offer a way of diluting the oil paint without using traditional solvents; you can also clean your brushes with walnut oil (Murphy’s soap in the US gets good reviews).

Acrylic Paint

burnt-sienna-winsor-newton

Professional Artist Acrylics have a higher pigment load than student-grade paints

One of the key things that make acrylics a great medium to start with is you can paint on anything: paper, card, canvas board, whatever you have to hand.

Set up is quick; they are water-soluble, fast-drying and water-resistant when dry. They clean up with water, and there’s no smell!

They can be used in thin layers like watercolours or in thicker, more opaque applications like oil paint.

You can mix clean, bright colours, and the crisp edges that can be achieved with acrylics can be perfect if you want to paint with a more graphic composition. You can quickly mask out areas, work over them, and easily cover a hard shape with thicker paint.

Blending with acrylics can be a bit frustrating due to the speed of the drying time; acrylics dry by evaporation and tend to dry quite quickly.

Artists refer to this as having a short ‘working time’; however, this can vary depending on several different factors; the main ones are:

  • How thick or thin is your application of the paint
  • The absorbency of the surface you’re working on
  • The size of the painting
  • What you dilute the paint with, either water or a specialist medium
  • The heat and humidity of the environment you’re painting in

If you are working on a large scale, it can be practically impossible to work the canvas as a whole to bring together the same finish. But apart from working quicker or on a small scale, you can add a medium to the paint to help keep the working time open for longer. Soft gel gloss, a retarder (slows down drying time) or my preferred choice, glazing liquid gloss, make achieving smooth blends with acrylics easier.

Pro tip: 7 Ways to Stop Acrylic Paint Drying too Fast

Watercolour Painting

Beautiful graded washes, translucent colours, seamless transitions, a quick drying time, and super reasonably priced to get started. You can buy a Cotman travel kit, a pad of watercolour paper, a couple of brushes and get going!

If you want to paint outdoors, watercolours are a great option because your kit is pretty compact. Quick, impromptu watercolour sketches of a little plant next to you or a study of your garden always look pretty good in my experience.

Watercolour is all about washes and contrasts over line work, so you must know your drawing skills.

You can, of course, paint abstractly to produce swirls, blocks and washes, but if you’re trying to create a scene, a landscape or a realistic still life, there will usually be a fair amount of a drawing element to it.

When you paint with acrylics or oils, although the initial sketch and drawing out are still important, you can build up the painting through the form using an opaque application, whereas, with watercolour, you’re traditionally washing over a line. (Here’s an Ink and Watercolour demo)

Beginning Watercolour Painting

So, what are the essential beginning painting materials I would need?

The Winsor & Newton Artists’ Choice Professional Watercolour Set of 18 half-pan colours would be a great start for new watercolourists. Great pigmentation and these little pans last a really long time.

Most of the time, you would be painting on paper. You can read more about How to Choose Watercolour Paper here.

You could get away with one good brush, but ideally three brushes, and you could probably do 80% of the paintings with these three brushes.

  • a small round
  • a medium round
  • a bigger mop brush

For watercolours or gouache, brushes are usually soft, have a spring and can hold water. Most traditional brushes are made from animal hair, and the quality of the brush’s bounce and feel depends on the quality of the hair used. But you can get really good quality synthetic brushes now, too. You can read about A Quick Way to Understand Brushes here.

Flat & Round Synthetic Acrylic Brushes (Isabey Isacryl, Rosemary & Co Golden Synthetic, Princeton Aspen)

I think a great starter set for acrylic painters would be the Winsor & Newton Professional Acrylic Colour Set of 12 20ml tubes.

Again, a handful of brushes would be a great start.

  • a small round for detail
  • a flat brush
  • a Filbert brush,
  • and a bigger brush 1 1/2 inches for laying down the tonal ground

And Glazing Liquid Gloss as your medium.

Beginning Painting Oil Painting

Michael Harding Introductory Oil Painting Set

And for oil painters, I’d start with the Michael Harding Introductory Kit. The set consists of six tubes of 40ml paint: Titanium White, Yellow Lake, Ultramarine Blue, Yellow Ochre Deep, Burnt Umber and Scarlet Lake.

When it comes to the brushes, it is definitely easier to have more and, ideally, be able to hold a few brushes in your hand at the same time.

For example, if you’ve got a white brush and want to go from white to black with oils, it is really tricky.

It takes loads of washing, impeccable cleaning or a huge load of paint to transfer or change oils from light to dark. It’s very easy to end up with muddy colours on your canvas and messy everything else, so ultra-clean practice of brush handling is key here.

You’ve got to spend more time colour mixing, then make a mark and leave it to keep a clean colour, gently blending out the edges.

The other difference with oils is you need less paint, so you only need to put out a tiny bit of pigment. It will last ages, and a small paint volume will have good coverage.

When it comes to the mediums, you can use an odourless mineral spirit, like Gamsol, to cut through the paint to thin it. An oil medium to add flow and oil. Or one of the many non-toxic mediums as an alternative to using a thinner.

How do I set up a basic painting workspace at home?

Firstly, consider light and ventilation.

Essentially, the easiest thing is to have a table and a slightly angled board or a tabletop easel because then you can sit behind and paint in the right light.

You can sit next to a window, but it will vary depending on what time of day it is or how dark it is.

An LED bulb or an LED panel behind and above you is the best thing to get. Clipped on, looking down onto the easel.

This, again, will depend on if you’re using oils, which are a bit trickier because they often get a glare onto your canvas. So you have to make sure you’ve got the hang just right, or you can adjust the angle.

Have a kitchen roll or rags for cleaning up and a bin, and make sure you have a metal bin for oils because of the fumes and good practice with the rags disposal.

What are some of the fundamental basic techniques I should focus on as a beginner painter?

Detail from: Venice, Light & The Landscape Course

It sounds boring, but working with black and white to work on your tones, value, and contrast is fundamental. Paying attention to the value (lightness and darkness) of colours and learning to create contrast in your paintings is essential for depth and visual interest.

And then, after that, I would work on colour mixing because if you’ve got your tones and colour mixing right, everything else falls into place.

And also not to forget, drawing.

I always say most painting mistakes come from your drawing mistakes.

Brush techniques

Practise blending, scumbling, dry brushing, layering, and impasto (thick paint application).

You need more brush techniques with watercolour. With this medium, mastering brush control is key for achieving textures and effects, such as variated wash, wet into wet, lifting and blooms.

You’ll be thankful for that larger brush that holds more water!

When you’re working in acrylics, my top tip would be use more paint than you think you would need.

And with oils, make sure that you don’t drag or you don’t reapply; it’s so easy to make colours dirty. Ideally, you’d lay a colour down, leave it, and then work over it to blend the edges.

How do I choose a subject to paint?

Begin with simple subjects and compositions, and you can tackle more complex scenes or ideas as you gain confidence.

If you are looking for simple projects, I’d recommend signing up for the email newsletter, if you haven’t already. There are 10 references to work from; just pick one of them and follow it.

I often find beginners want to put their own mark onto a canvas; even when they’re first beginning, they don’t want to copy something. But if you look at any of the Students Success Pages, everyone following the same image with the same colours has their own character and natural style. It’s almost like having your own handwriting but with painting!

So, when you are learning, I recommend copying the basics until you understand the language of paint.

Which of your courses would you recommend?

The Beginners Acrylic Painting Course gives a good overview of different paints, such as high-flow acrylics, heavy-body acrylics and different mediums.

There are three different projects: a still life, a seascape and a landscape.

Alternatively, if you did one of the Morning Painting sessions, like the Modern Still Life, you would just have one subject, five colours, and three brushes.

It’s super simple to get started. There’s a drawing guide that you can follow along and you get to a finished painting quicker because it’s more focused.

Remember, painting should be enjoyable!

Let your creativity flow, and don’t be overly critical of your work; it’s all part of developing your ‘talent.’

Continue Reading​How to Begin Painting (Without Wasting Your Time or Money)

Amsterdam, Vermeer & The Little Street

This week I’m lucky enough to be in Amsterdam to experience the largest ever Vermeer Exhibition!

28 of Johannes Vermeer’s known 37 works, have been brought together from museums and private collections across the world for this unique opportunity at the Rijksmuseum.

It’s currently a sell out show with over 450,000 tickets sold! but they are releasing new tickets so it’s worth checking the site. (Rijksmuseum Vermeer Tickets)

On display is one of my favourites, ‘The Little Street’ and we do a master copy of the painting in the Beginners Water Mixable Oil Course.

When I get back to the studio I’ll put together a exhibition review but for now I’m off to grab a coffee and a Stroopwafel.

The 5hr+ course is best suited if you’ve been working with acrylics and want to learn about the pros and cons of water-mixable oils. We go through lots of materials and options to give you an overview of what’s available with water-mixable oils.

Speak soon,

Cheers,
Will

Continue ReadingAmsterdam, Vermeer & The Little Street

How to Quickly make Sense of a Complicated Landscape Scene

I had an email from a student recently with a great question,

I’m wondering how to start painting this picture. There are so many colours, trees and bushes so I think it gets so messy. Do I start with the sky in the background and work my way forward and finally paint the trees? – Ulrikke

The photo that accompanied the email was a scene crowded with trees. Lots of layers all on top of each other, overlapping leaves and foliage coming towards the viewer with almost no visual sky.

Continue ReadingHow to Quickly make Sense of a Complicated Landscape Scene

How to Dilute Acrylics vs Water-mixable Oils

A Comparison Video

Morning class,

Over the past few months, I’ve been experimenting with various mediums, recording drying times and noting the handling of water-mixable oils – all in the process of creating a new course.

Amongst the copious footage, I wanted to share this introductory lesson where I compare the dilution of acrylics to water-mixable oils.

Simple but fundamental observations.

You may find there are times when acrylics dry off too quickly or are difficult to blend especially when you’re painting in thin layers. Using water-mixable oils can be fantastic because they give you that extra working time. Painting wet-into-wet is one of the significant advantages you’ll notice because you gain a lot more time for smoking together colours.

But how do they both compare when diluting with water?

Continue ReadingHow to Dilute Acrylics vs Water-mixable Oils

Edition // 001: Notes from the Artist’s Studio

Morning Class,

My name is Will and I am an obsessive notetaker.

I get sidetracked easily.

If I’m listening to something that has piqued my curiosity, it can send me down a rabbit hole of research….usually halfway through a painting.

And then the copious note-taking follows.

It got so bad at one stage, Vanessa had to prevent me from buying new notebooks because after furiously filling them with fascinating insights, I’d annoyingly lose where I’d put them or worse couldn’t decipher what my own scribbling all meant.

On a positive, my last birthday present was The Remarkable Tablet (an e-ink notebook that feels amazingly close to writing on paper) which has helped add order to the chaos and made the kitchen table decidedly neater.

Some of my research notes do come back to inspire my practice and if they bring me a new understanding or appreciation, I figured they are worth sharing.

So here are my top 5 art inspirations that I’ve read, experimented with or listened to this week, when I should have been at the easel, with the hope they might inspire your own work too…

Continue ReadingEdition // 001: Notes from the Artist’s Studio

Peonies in Water-Mixable Oils

Will Kemp, Peonies (Detail) Acrylic & Water-mixable Oils on Canvas, 60.96 cm x 60.96 cm (24 inch x 24 inch)

How do they compare to Acrylics?

Over the New Year, I’ve been in the studio working up a large scale floral still life painting, from a series of sketches I did over the summer. The original composition had been inspired by the dramatic oil paintings of the Dutch Golden Age (you can see the progress of my painting further down the article).

To achieve the soft blends between the petals, delicate smoked edges and the ability to work across subtle shifts in hues, oils would allow me a longer working time. Then I could build up the painting as a whole piece, adjusting tones, working wet-into-wet.

But being in the middle of a British winter and the studio doors firmly shut with little ventilation, the thought of having a pot of thinners or strong solvents in an enclosed space was discouraging me from getting started.

After a prolonged period of procrastination, it occurred to me, maybe it was time to break out the water-mixable oils.

Continue ReadingPeonies in Water-Mixable Oils

How to Choose a Colour for a Tonal Ground

My Top 5 Pigment Choices

Inspired by the dramatic, dark Flemish oil paintings I saw in Antwerp; I’ve just started working on a still life set up of some fab oversized pink peonies. I’m going to begin simply with acrylics then build up the piece using water-mixable oils.

Yesterday, I talked about the importance of a coloured ground and how this very simple step of preparing your canvas, can transform your working method. And I received lots of emails asking
‘How do you go about choosing a colour for your tonal ground?’

Well, the first thing I do is make a decision.

What is the most important thing or the most important problems that I can foresee within the painting I’m going to be working on?

For this still life, judging the values of the flowers and getting the drawing right are going to be the two trickiest areas –  but get them right….and they can pull the whole painting together. Choosing a sympathetic tone for the coloured ground will help me achieve this.

Continue ReadingHow to Choose a Colour for a Tonal Ground

Inside the Artist’s Studio

Peter Paul Rubens, Detail from The Assumption of the Virgin, Oil on Panel, 1626

Ruben’s House & the Art of Antwerp

The rhythmic sound of African drums echoed through the vast interior of the Cathedral.

It was an unexpected acoustic experience, and the historical tour we’d seen advertised was looking increasingly unlikely.

There was just Vanessa and me waiting patiently at the back of the Cathedral when the tour guide arrived; she was getting extremely agitated. She hadn’t known the performance was on, the volume was too loud, a new musical set had just started, and her tension was building.

She was miffed.

But then our saviour came, a gentleman from Romania. Our tour of two had become three. We were off to the races.

I was in Antwerp (just last month) exploring Ruben’s home and studio, but nothing had prepared me for the pure brilliance of his works that lay only a few steps from our hotel lobby, hidden behind the doors of the Cathedral of Our Lady. 

Continue ReadingInside the Artist’s Studio