
Will Kemp, Peonies (Detail) Acrylic & Water-mixable Oils on Canvas, 60.96 cm x 60.96 cm (24 inch x 24 inch)
How do they compare to Acrylics?
Over the New Year, I’ve been in the studio working up a large scale floral still life painting, from a series of sketches I did over the summer. The original composition had been inspired by the dramatic oil paintings of the Dutch Golden Age (you can see the progress of my painting further down the article).
To achieve the soft blends between the petals, delicate smoked edges and the ability to work across subtle shifts in hues, oils would allow me a longer working time. Then I could build up the painting as a whole piece, adjusting tones, working wet-into-wet.
But being in the middle of a British winter and the studio doors firmly shut with little ventilation, the thought of having a pot of thinners or strong solvents in an enclosed space was discouraging me from getting started.
After a prolonged period of procrastination, it occurred to me, maybe it was time to break out the water-mixable oils.
You could ask what took me so long because I have painted with water-mixable oils before and with pretty good results.
Nice handling and texture and an impressive drying time.
But even with all those positives, under normal circumstances, I would usually succumb to the oiler consistency of traditional oils. They seem to glide that little bit better, especially when applying them in thinner layers, a little bit oilier is the only way to describe the difference.
However, faced with the promise of working in an enclosed fume-free painting environment, water-mixable oils were sounding more and more appealing. They would allow me to paint with oils yet clean up with soap and have just a jar of water.
I made my way back to the studio, brew in hand!
How do you approach water-mixable oils as an acrylic painter?
Having worked in traditional oils for many years, the shift over to water-mixable oils was relatively straightforward. I have previously written an article about Water-Mixable Oils and how they compare to Traditional Oils, and you can read more here.
But many students contact me, having only ever worked in acrylics. They long to try oils but have similar confined studio space issues or experience sensitivity to thinners and don’t know where to start. So it did pose the question.
What if you have only ever worked in acrylics, how do you approach water-mixable oils as an acrylic painter?
What are the differences? And what should you be aware of before you begin experimenting with a new medium?
Water-mixable oil vs acrylics coverage
One of the first things you’ll notice in comparison to acrylics is that you need a lot more paint to cover over mistakes or block out colours.
The covering power of acrylics is pretty amazing. If you’ve been used to quickly changing large passages of your painting, it can come as a bit of a shock when trying the same technique with water-mixable oils. The Titanium White doesn’t have the same covering power in the same thickness of application.
You can, of course, grab a fully loaded palette knife and apply in one thick swoop. But doing it this way the pay off would be a very long drying time with a raised textural quality to the surface (unless an impasto textural Van Gogh finish is what you’re after, then go for it!)
But if you want to build up the coverage in a few thinner layers, you’ve got to take into account the longer drying time in between applications, very similar to traditional oil paint.

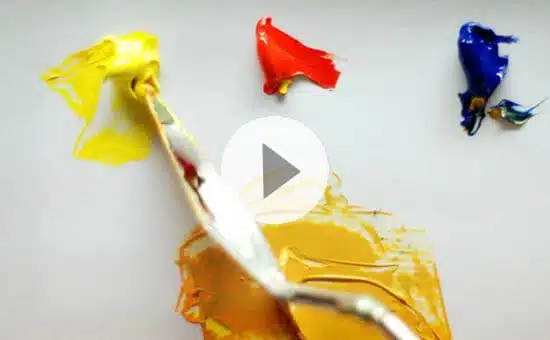
I thought I’d do a quick mix between Yellow Ochre and Titanium White. This illustrates the difference in tinting strength between Winsor & Newton Acrylic and Holbein Duo Aqua Watermixable Oil.

I’ve squeezed out roughly 1 part Titanium White to 1 part Yellow Ochre acrylic on the left & 5 parts Titanium White to 1 part Yellow Ochre water-mixable oils on the right

First Mix, with the Acrylics

Second mix, with the water-mixable oils.
To achieve the same tinting power as the acrylics, I needed roughly 5 times the volume of Titanium White water-mixable oils.
So are you going to need to use much more paint over the painting process?
Actually no, the opposite is true. Despite the more translucent quality of the paint, I tend to use far less volume of colours on my palette.
Because water-based oils dry much slower than acrylics, you can afford just to put out a small amount of paint, and it will stay workable for a good day or two in the studio without needing a stay-wet palette. Also, you get a nice spread with the colours during application.
Thinning with water vs a water-mixable thinner
When you dilute water-mixable oils with water, there is an immediate value change, much more than with acrylics. The water creates an emulsion with the paint, so it goes cloudy.
Wait; what? I thought these are water-mixable?
What gives.
Well, I think they should be called ‘water cleanable oils.’
I tend to use the Winsor & Newton Water-Mixable Thinner for dilution. I find this nice to work with, it adds a great flow, the colours stay true, and you only need a small amount to get it ‘moving’.
Water-Mixable Thinner is a non-toxic solvent and is low odour.
I haven’t noticed any irritation when using it. I’m trading having a very small amount of non-toxic solvent for much-improved handling properties but if you prefer you can just dilute the paints with water.
You can read the Safety Datasheet from Winsor and Newton here.
Working time with water-mixable oils vs acrylics
If you’ve been struggling with your acrylics drying too quickly to achieve those lovely smokey blends you’re after – you’re in for a treat!
It is so fantastic to have that extra working time. You can mix a colour string (a range of colours with different tonal values) and have them out on your palette, go for a cup of tea, go for lunch, go to the movies and come back and they’re still wet.
This also, of course, means if you’re working in one session, then you’ve just gained a lot more time for blending colours. So painting wet-into-wet is going to be one of the significant differences you’ll notice.
Size of canvas and style of painting
If you paint small and want to paint quite thickly and impasto, just using acrylics can get fantastic results due to the thickness of the paint. The smaller scale will enable you to blend the colours easily because the colour will stay wet due to the volume of paint used.
If you’ve got more of a tendency to build things up in layers, take your time and look for subtle transitions between forms, water-mixable oil paints could be the answer. They allow you to work in thin layers that remain workable for much longer.
Cleaning brushes in-between mixes
When I’m working with traditional oils in a space that hasn’t got great ventilation, I always have a tendency to just put out the minimum amount of turpentine (or Odourless Mineral Spirit, OMS) using a screw lid jar. Hence, the least possible VOC fumes in the space. The problem is, with such a small amount of liquid, it’s much harder when it comes to cleaning your brushes to get them thoroughly clean.
So being able to wash your brush between mixes using a big pot of water is fantastic, you can then use a paper towel to dry off the excess water from the bristles.
However, I have found in comparison to acrylics; it’s harder to get the bristles thoroughly clean just using water. I found using Masters Brush Cleaner, and/or washing up liquid will help to clean your bristles at the end of a painting session.
And while we’re on the subject of bristles, synthetic bristles will be more tolerant to continued water exposure than hog hair natural bristles.
Stage 1 – Starting the painting with Acrylics
So on to the painting, which is a mix of mediums. I started with an acrylic underpainting and then built up the piece using water-mixable oils on top.
I used a watery application of the acrylics and painted onto cotton canvas. This helps the upper layers of the water-mixable oils to adhere well to the surface.
Why not water-mixable oils for the whole piece?
Well, I could have done, but the acrylics cover more effectively than the water-mixable oils and allow for fast progress at the beginning stages due to their quick drying time.
Coloured Ground

The first stages of the painting are to establish a base ground tone.
Throughout this still life, judging the values of the flowers is going to be one of the biggest challenges so choosing a sympathetic ground colour that compliments the colours of the flower heads and is similar in value to them, will help me achieve this.
Even though the finished painting will have a more solid black background, I’ve chosen a pre-mixed Pale Umber acrylic by Winsor & Newton. The Pale Umber which is a warmish light grey/brown is very close in value to the general shadow tone of the petals.
It’s not too dark, which means I can quickly draw out on top of it and it’s not so light that when I get to the brightest lights blocking in stage and white goes on, it will still allow my shapes to emerge.

Early block-in stage, using Burnt Sienna and Burnt Umber mix, over the Pale Umber ground
So if the mid-tone value of the ground helps with the drawing and judging the rest of the values more easily, the colour, the actual pigment choice, will help with the mood of the painting.
I want the warm elements in this piece to shine, so the flowers heads, the wood of the table and the cream jug in the front.
On top of the ground, I draw out using a round brush with a slightly diluted mix of Burnt Umber and Burnt Sienna acrylic. It enables me to have a richer, warm base.
At this stage, I’m just broadly observing which areas are warm and which are cool.
Blocking in the background

When the darker background is introduced, a mix of Ultramarine Blue & Burnt Umber, you can start to judge the warmth that had been previously established more easily against the cool black.
By painting the negative space around the flower heads, the positive forms start to emerge and come forward to the viewer.
I’ve also dry brushed in the form shadows on the peony flower heads, almost like a thin scumble thickness.
Looking for the shapes

At this stage, I’m focusing on the shape of the leaves, as if they were split into two. One mass of light and one mass of shadow.
I haven’t gone dark enough within the shadow side yet, so the background is fighting for the attention of the flowers.
Sometimes you question yourself, ‘It can’t be that dark‘ or ‘How will anyone know it’s leaves if I go that dark‘. These are questions that regularly come up as an internal dialogue, even though you know your answer. That’s why I will often start with just a couple of colours; it limits the choices and limits the inner critic – you are only judging whether to go lighter or darker at this stage.

Detail of the Block-in with the watered-down acrylics
Adding the mass shape of the leaves

Thought I’d bite the bullet and get some green in!
This is a mix of Cadmium Yellow Light, a touch of Yellow Ochre and ‘black’ I’d mixed from Ultramarine Blue and Burnt Umber. Using a black to create the greens helps to keep the colours muted. You can see an earlier video on mixing greens here.
Because I know I’m going to be working with oils on top, I’m applying the acrylics thinly using a filbert brush, so that I get soft edges, I’m almost staining it. It’s just really to get a colour note down so I can judge my oil colours against it.
I use the same Ultramarine Blue and Burnt Umber mix lightened with Titanium White for the neutral hues in the background.
The tabletop has been blocked in with Burnt Sienna, Burnt Umber, Yellow Ochre and Titanium White using a bigger flat brush and a thicker, more opaque application.
Blocking in the peonies

Here I’ve begun to blush in the more intense colours to the flower heads. I was using a Permanent Alizarin Crimson and introduced a Quinacridone Red (Permanent Rose is the same colour) This will allow me to achieve the more magenta hues that are within the central flower.

I’ve added some darker greens to the shadow area of the leaves still with the acrylics, diluted with water, and have now got an excellent base to judge the hues of the flower heads from.

Detail: You can see the semi-transparent layers underneath, with thicker paint build up on top.
I continue to build up the slight changes in light and dark on the flowerheads, so they start to have more of a sense of a three-dimensional shape.
Stage 2: Introducing water-mixable oils

Once I had all the base colours blocked in with the acrylics, I started to work over the top with the water-mixable oils.
Traditional oils need to be thinned with a solvent such as White Spirit or Turpentine but water-mixable oils (also known as water-soluble or water-miscible) are oil paints that can be diluted and cleaned just with water.
But when you only add water to dilute them there will be a noticeable colour shift, they will lighten and then darken back down and dry matte once the water has evaporated.
This is ok if you’re roughly blocking in a colour, but for accurately matching colours it can be a little disconcerting!
So for my first oil layer, I’m choosing to dilute the paint with a water-mixable thinner – in place of water.
I’m only using a touch of the thinner, just to moisten the brush and increase the flow of the paint so I can push around more easily (your brushes can still be cleaned just with water.)
Fat over lean

Winsor & Newton Artisan Water Mixable Thinner, non-toxic & low odour.
You may have heard the term ‘Fat over lean’ mentioned concerning oil painting, and it applies to water-mixable oils too.
It’s a simple rule but one you need to be aware of, if you are painting in an indirect method, i.e: working in layers. If you prefer to paint all in one go – Alla Prima and the paint all stays wet together, you don’t need to worry.
Fat over lean means that each succeeding layer of paint should have slightly more ‘fat’ or ‘oil’ than the preceding layer.
There are three main reasons that a paint layer could be oiler or fatter.
- The natural oil content in paints. For example, Burnt Umber has a ‘low fat’ oil content, so it is fast-drying oil paint because there is less oil in the paint mixture to oxidise and dry. This is why earth colours have been historically used for oil underpainting because they are lean. In comparison, Ivory Black has a ‘high fat’ oil content and takes longer to dry. This would not be the ideal pigment choice for an underpainting and is the reason I blocked in the dark black background using acrylics first, so it would dry quickly and I could work on top.
- You add a medium in with your paint. For example, Linseed oil. You would tend to do this in the latter stages of the painting. This improves the flow of the paint, increases the working time and retains the ‘fat over lean’ rule, so the upper layers of the painting dry more slowly than the layers underneath.
- You apply the paint more thickly, so naturally, the oil content is higher in the volume of paint, again you can do this in the later stages of the painting.
So for the first oil layer of this painting, the leanest, I’ve thinned or diluted with Water-Mixable Thinner, but as the painting progresses, I’ll use a combination of less thinner, thicker paint and then lastly, thick paint straight out the tube with a little bit of Artisan Water-Mixable Linseed Oil added in.


I’m using Holbein Duo Aqua and a Daniel Smith Water-mixable oil.
- Titanium White – Holbein Duo Aqua
- Cadmium Yellow Light – Holbein Duo Aqua
- Burnt Sienna – Holbein Duo Aqua
- Cadmium Red Deep Hue – Holbein Duo Aqua
- Rose Dore – Holbein Duo Aqua
- Ultramarine Blue Light – Holbein Duo Aqua
- Ivory Black – Holbein Duo Aqua
- Burnt Umber – Daniel Smith

I’ve started to introduce a more intense warm yellow into the leaves and work on the balance between the cool and warm greens. (In the floral painting still life course you can see how effective observing the differences between the warm and cools can be)

I’m trying to keep the brushmarks loose and give the impression of a flower head just by using abstract shapes.
By stepping back (about 7-10ft) from the painting, you can see how the picture is ‘reading’ as a whole from a distance. I really like how this particular flower head appears abstract when you’re right up close to the canvas, but as you step further away, an impression of the flower appears.
Adding highlights

If you’re just coming to water-mixable oils from acrylics, this is where you’ll notice one of the significant differences – the lack of coverage.
I’ve found the Holbein water-mixable Titanium White to be one of the thickest and most opaque but even using this; you need to use a much thicker application than you may be used to.
I think a misconception about water-mixable oils is that they are quick-drying oils.
They can be quick dry if only diluted with water, but there are tradeoffs in the paint handling and colour shift. Other mediums can be added in to speed up the drying time depending on the techniques you’re trying to achieve. But on the whole, when I added the thinner in a typical application, the water-mixable oils dried only a little bit quicker than traditional oils.
To give you an idea, a small study I completed using the water-mixable oil paints straight from the tube, was still wet to touch three days later when I moved the canvas. I guess it would have retained workability within the first 48 hrs.

As I build up the thickness of the paint, I introduce some water-mixable Linseed Oil. This will improve the flow of the paint, increase the working time and retain the ‘fat over lean’ rule, so the upper layers of the painting dry more slowly than the layers underneath to prevent cracking.

Winsor & Newton Artisan Water Mixable Thinner & Linseed Oil
I create my own medium, a mix of 1 part Artisan Water Mixable Thinner to 1 part Artisan Water Mixable Linseed Oil. As I’m working with the paint in quite a thick application, the body of the colour straight from the tube is pretty nice, so I’m only using a tiny amount of my medium mix.
Pro-tip: You can vary the ratio of thinner to oil, depending on the number of layers you work with and the consistency you prefer to work in.

You can see on the flower heads as the light changes across the surface I adjust the hue and the value of the mix, this helps to give the illusion of light hitting the surface.

Once I’m at this stage, I then mix a range of colours strings for each of the flower heads. I stick to the Cadmium Red, Rose Dore, Yellow Ochre, Cadmium Yellow Light and Titanium White for most of the lighter values and then darken down with the Burnt Sienna, Burnt Umber and Ultramarine Blue Light. The palette is a tear-off paper palette New Wave Grey Pad

As the painting progresses, I refine the colours on the jug and mute down the greens. I found they were fighting too much with the flowers. I kept the flowers on the outer edges of the arrangement more impressionistic and focused on adding more details to the central flowers for the finishing touches.

Detail of final piece: Notice how dark the foliage is, this helps to bring the flowers to life. Also, keeping the colour range in the leaves limited, allows for more variety of the shaded areas within the flower heads.
Really hope you find it helpful and I’m planning a new Absolute Beginners Water-Mixable Oils Course ready for release early Summer 2020!


Just perfect for the stage I’m at now. You are a terrific teacher,Will. Kind regards.
That’s very kind of you to say so Syl, pleased you found it helpful.
Will
Will
Thank you for your Peonies painting “ lesson”.
I work in traditional oils but found the way you developed the colours and values your Peonies painting very useful as I work on a large “floral” painting of an echeveria….an Afterglow with a wonderful colour palette.
Oh, that’s great to hear, hope it helps with your Echeveria painting Jane.
Will
Thanks Will you must have read my mind , have just finished an acrylic painting and was going to finish it with water Mixable oils , wasn’t quite sure of the fat over lean and you have just explained it perfectly, many thanks. Gail Medcalf.
Fantastic stuff Gail, so pleased the lesson was timely for you.
Will
I read your message on Water/oils and acrylics layering…. do you think a smaller canvas ie. 12×12 might be a wise choice to practice these new techniques? I have so much”stuff” paints etc…and tend to go overboard when I am learning… I loved the peonies, one of my most fav flowers.Thanks for your teaching. I hope I can improve…
Sure Betty, or even smaller, you can learn a lot from a postcard-sized 6 x 4-inch board.
Will
Hi Will
I absolutely love this painting and your step by step information.
I’ve had a very long lay-off from sketching and painting so feeling really lacking in any confidence. Your email came through when I was looking at the view from my house and thinking I should just have a go!
Which of your courses would you recommend?
Chris Rose
Hi Christine, lovely to hear from you. The Absolute Beginners Acrylic Course would be a great start. It introduces the range of methods and techniques that you will see in other lessons. And one of the first paintings is of a Scottish croft cottage so might give you a good starting point for the view from your house.
Hope this helps,
Cheers,
Will
Very informative and in particular the various kinds of thinners to use, thank you Will.
My pleasure Keith.
Will
Absolutely beautiful! Thanks for sharing
Cheers Nikki!
This news letter is very helpful!
I have just started using water mixable oils and am happy to hear that you will be providing a full course soon. I have enjoyed your other courses. You are a great teacher!
Thanks!!
That’s great to hear Robin, pleased you’re looking forward to it.
Will
Hi Will,
I haven’t tried water mixable oils over acrylic so I’m keen to have a go at these peonies but I didn’t see a reference photograph, Will you be adding one to this article?
Thanks Graham
Hi Graham,
Glad it’s inspired you! The painting was developed from sketches I’d made of a big jug of Peonies we had in the house in July, so there isn’t a photograph of the full set up, just individual flower heads.
You can see a photo reference here of one of the flower heads How to Choose a Colour for a Tonal Ground (My Top 5 Pigment Choices)
Cheers,
Will
Dear Will,,,, how I envy you having a “studio”,,,I’m curious,, when your first painting was done,,, where was it done ? In a school,,, home,,, other building?, Several years ago,I had a space set for me to use in family’s garage out by the big door,,,, east sun early in the day,,,good light for about 2 or 3 hours,, then much like north,,, but not,, for all of one summer I painted and sold all I did,,, I love large,,, 2′ by 4′ and 4′ by 4′,, homemade,, 1/4″ plywood,, with 1″ by 2″ border,, I so enjoyed not worrying about paint getting on something it should not,,,, sorry ,,I will stop whinning ,,, I always learn from your share an just wanted to let you know,,, norak
Hi Nora, glad you enjoyed the article, I think my first ‘studio’ was at the kitchen table at home!
Will
This was very helpful. I have used both WM oils and regular oils and you gave good info on the WM oils, especially in regard to the White. I took a local workshop where the teacher used Walnut Oil Alkyd as a medium so that the paintings would be dry enough the next day to add another layer. It is non-toxic as well and works great if you need to speed up the drying process.
Hi Elizabeth, glad you found it helpful, yes, the Walnut Oil Alykd can be a great medium choice if you don’t want to use any solvents. In this article, I demo using the walnut oil it with the water-mixable oils :Water-Mixable Oils vs Traditional Oils for Solvent-Free Oil Painting (Video)
Will
Beautiful painting. Thanks for posting this. I think (as you mentioned) that the big advantage of the water soluble paints is not needing a solvent for cleaning brushes. But since you can easily clean regular oil paint off brushes using a rag, cooking oil and soap and water I’m no longer sure if there is much of a reason to use the water solubles.
Thanks Jeff, pleased you liked the piece. If you’ve got a good working method without using solvents that’s great.
Will
This is a great tutorial. I did not know that you could use an acrylic underpainting and also mixing a 50:50 medium with the Artisan thinner and oil. I like the Cobra WMO much better than the Artisan. The Duo are tempting but just too pricey for my wallet. Keep up the good work Will.
Thanks Charmain, yes the Cobra paints have a nice feel and flow to them.
Will
Thanks so much for this article. I’ve been working with Holbein water based oils for a few years now having tried other brands & come away dissatisfied. Because of the thinner pigment coverage I’ve found that I must make my grisaille layer much lighter than I otherwise would have to with other types of paint, ie. acrylics or conventional oils. This is a small price to pay for a healthier working environment.
Hey Mary, pleased you enjoyed the article and thanks for the note on your working methods with the Holbein paints.
Will
I can’t thank you enough for this. You explained the steps so clearly – something the books I’ve bought on the subject have not done. I finally understand fat over lean and how to use it. I am curious about why you use Holbein Duo rather than Winsor Newton Artisan as I’m trying to build up my supply of colors.
You’re most welcome Mickey. I’ve found the Holbein Duo to have a nice consistency and flow and a wider colour range compared to the Artisan. However, there is quite a price difference though, as a quick comparison:
200ml Winsor Newton Artisan Titanium White – £15.70 (0.08p per ml)
150ml Royal Talens Cobra Titanium White – £10.80 (0.07p per ml)
110ml Holbein Duo Aqua Titanium White – £24.00 (0.22p per ml)
37ml Winsor Newton French Ultramarine – £4.30 (0.12p per ml)
40ml Royal Talens Cobra Ultramarine Blue – £4.90 (0.12p per ml)
40ml Holbein Duo Aqua Ultramarine Blue Light – £9.10 (0.22p per ml)
And just as a comparison here’s some prices for traditional artist quality oil titanium white:
Traditional Oil
Old Holland – 40ml – Titanium White – £6.90 (0.17p ml)
Michael Harding 40ml – Titanium White – £5.90 (0.14p ml)
Winsor Newton – 37ml – Titanium White – £5.80 (0.16p ml)
Will
Thanks Will, very helpful. I look forward to your new course.
Best,
Mike
Thanks Mike, glad you’re looking forward to the course.
Will
Thanks Will. In Bhutan at the moment, fascinating country but freezing cold. Painting Peonies in the warm when I get home is a very good idea. Thank you.
Jill. X
Ha, ha, keep warm Jill!
Will, what a wonderful news letter. I tried water mixable oils once but have concentrated on your acrylic paintings. Now I want to try this again. Very beautiful painting! Thanks for all the advice!
Sharon
Pleased you found it helpful Sharon.
Will
Hi Will,
Thank for the very detailed and excellent explanation of how to use Water mixable oils. I have some water mixable oils. I think I’ll give them a try. You are a wonderful teacher!
You’re very kind Linda, hope you enjoy experimenting with them.
Will
Thank you Will. You’re very generous with your time and a very good teacher. I haven’t tried the water mixable oils yet and, in fact am happy with using acrylics. (at 72 it gets harder to teach old dogs new tricks :)) I’ve actually received a few small commissions (enough to keep me in paints and canvases) painting dog pets and I owe very much to you and what you have taught. Always learning. Bob
Hey Bob, nice to hear from you. Glad you’ve been enjoying the acrylics and congrats on the commissions, great job!
Will
i can’t remember if i asked you about using lavender oil instead of solvents for oils. it does smell strong (which can give you a headache) but it is not toxic. it would not work probably for the water mixable oils but might be an option for close quarters. would love to hear your take on it. i also use clove oil on a q-tip in my closed oil paint palette box, which keeps them soft it seems like forever. thank you for this post, as i just got some water mixable oils and i am sure that i would have been disappointed if i just worked with water and had to deal with the value change.
Hi Karen, yes, spike lavender oil can have a very strong smell when working in a small space, it really cuts through paint and can sometimes even go through an upper layer of paint to the one below. If using it you only need a really tiny amount on your brush.
Cheers,
Will
My favourite flowers and the painting so well explained.. I’m inspired and now can’t wait to put it all to use. Thanks so much Will.
That’s great to hear Kathleen, so pleased you’re feeling inspired!
Will
Wow! Beautiful flowers. The flowers pop with so much details. Love how the table looks worn. The jug has so much detail, too. It all looks so real. Thanks for sharing!
Glad you liked the painting Laundrea, thanks for your kind words.
Will
Great tutorial and I appreciate your clear explanation of “fat over lean” with pictures of the W&N products. I got some water mixable oils for Christmas and have done one painting with them & am looking forward to doing more.
Hey Ed, hope you’re doing well. Glad the fat over lean explanation helped clarify it.
Will
Hey Will! Thank you for this info. I’m definitely going to try out the thinner you mentioned (and the cleaner, water & dish soap doesn’t seem to cut it). So far, I have just been using the modified linseed oil to help with the flow and consistency of the paint but it would be helpful to be able to thin the paint in earlier stages as you described. My first attempt with the water-mixable oils was with your brilliant floral still life tutorial. After painting it with acrylics, I painted another version with the water-mixable oils and I was pleased with the result and enjoyed working with the paint. Such a different experience than with the acrylics! I can’t say if I have a preference of one over the other, they are just different and awesome in their own ways! :) I have also heard of artists working with traditional oils in a less toxic way which I am also curious to try at some point (reference: https://gamblincolors.com/studio-safety/solvent-free-painting/).
Instagram: @n8mccall
Hey Nathan, nice to hear from you and so pleased you enjoyed the floral still life course. Yes, the Gamblin solvent-free gel is a mix of safflower oil and an alkyd resin that you can use to increase the flow with the paint whilst keeping a thicker consistency.
Cheers,
Will
Thanks Will your info has been very helpful – your tutorials are very useful and clear.
My pleasure Moe, glad you found it helpful.
Will
Lovely tutorial! I’ve been avoiding the Artisan water-mixable oils I bought on a whim as I didn’t like the texture of the paint, but having tried your mix of thinner/medium, I’m going to give it a go again. I am so happy you are going to release a new tutorial (finally!). You are the best instructor, starting with that little brown jug you posted long ago. My family thinks I have “real talent” just from that first painting. Yeah, another class :)
Thanks Vicky, hope you enjoy experimenting with the different mediums.
Cheers,
Will
Hi Will, I been working for past two years in Acrylics using your lessons for inspiration. Today I purchased a set of water mixable oils.. It is only a cheapish set but I thought it would be a good practice set and up popped your email..Great timing..and I have already learnt that water perhaps is not the best thinner.. So looking forward to getting started.. Thanks Julie
Perfect timing indeed Julie! really hope you find it helpful.
Will
Great tutorial and beautiful painting. Thanks a lot!
Thanks Tamara, pleased you liked it.
Will
Really brill, Will! Great tutorial. Q: Daniel Smith no longer manufactures anything but their watercolor line (no oils/mixables; no acrylics.) Do you have a recommended substitute for that tube of DS mixable you used and referenced? Thanks
Hi Jack, thanks for the note about the Daniel Smith production of oils/acrylics. Holbein make a Burnt Umber that would work well.
Cheers,
Will
I noticed while watching your Beginners’ Acrylic Lessons that you are right-handed. Yet you reach across your canvas to your colour palate which is on the left side. I am a newbie and am just setting up my workspace. Is there an advantage to crossing over? (I am left-handed.) I was a traditional rug hooker who is switching over because my hands have worn out. You have a delightful, engaging manner and I am pleased to have found you. Thank you.
Hi Colleen, this is often set that way for filming purposes, so you can see the palette colours I’m mixing and painting more clearly at the same time as my hand not blocking the view from the camera. I’ll change the position of the palette depending on the subject I’m painting. If I’m holding a hand palette this will be in my left hand, and if I’m mixing lots of colours working on a tabletop that will be on my right side. Hope this helps,
Will
Thank you, Will. I really appreciate your demonstrations. Also, when I clean my brushes after using oil paint, I use Masters Brush Cleaner too.
Blessings always, C-Marie
Great stuff C-Marie, its a really handy paint cleaner.
Will
Thank you, Will, for yet another great tutorial
My pleasure Norbert.
Will
Thank you so much for this wonderful article. Learned a lot and look forward to your upcoming course. Wonder if you have worked with M Graham oils. They are not water mixable but use walnut oil and one can use them without solvents (and with closed windows). Would love to know what you think of them and how they compare to other brands. (I am not in any way affiliated with M Graham. :)
Hi Linda, so pleased you enjoyed the article. Yes, the M Graham oils are great, with a lovely pigment load, the walnut oil is slower drying than linseed oil but they can work really well for longer oil paintings when you want a longer open time with the paints. You can also use their Walnut/Alkyd Medium for underlying layers if you want to speed the drying time. You can see a demo using the Walnut/Alkyd Medium with water-mixable oils here.
Cheers,
Will
Thanks Will for a wonderful tutorial. You are so generous to take the time to break down the various steps in your painting with detailed notes and photos. Peonies are a favorite so I can’t wait to try something similar. After reading your article on water-mixable oils vs traditional oils, I recently bought a starter set of Cobra water mixable because I didn’t want to use solvents. I liked working with the water mixable as much as with acrylic so I shall look forward to seeing your new tutorial on painting with water mixable oils.
Thanks again and Happy New Year.
Good one Karen, pleased you’ve been enjoying working with the Cobra oils, glad you found the article helpful.
Cheers,
Will
That was fantastic. So clear, so well thought of and easy to follow. not to be done in a hurry but worth putting in the time. Hope to find time soon and but the thinners.
Thank you very much.
My pleasure Marie-Claude, pleased you enjoyed it.
Will
Really interesting article Will. I’ve been wondering about these water mixable oils as I paint in both oils and acrylics and have invested in some of your courses. Lately I’ve been using oils because I wanted to be able to blend fabric in a still life, but I’ve worried about the fat over lean principle. Something to think about!
Many thanks,
Julie
Glad you enjoyed the article Julie, hope it helped to answer some questions about the water-mixable oils.
Will
Thank you, for this new tutorial.
My pleasure Alessia
Hi Will,
I thoroughly enjoyed your demo and explanation of water-mix able oils. I have used Artisan but prefer the consistency of Cobra. I am largely self-taught in this medium and can hardly wait for your new course to learn how to use it properly.
Eddie
That’s great news Eddie, pleased you’ve been getting good results with the Cobra watermixable oils.
Will
Beautiful painting! I really enjoyed your precise instructions, but I have a question concerning the “watery application of the acrylics”. I have read that adding too much water to acrylics compromises the bonding of the paint to the canvas. How do you overcome this?
Hi Laura, the absorbency of the canvas enables watery washes with good adhesion. Here’s some more info from the Technical Services Supervisor for Golden paints:
Hope this helps,
Will
What a great explanation and demonstration of water mixable oils! Not sure about brushes, I have a set that’s used for oils and another for acrylic. Would one need to get brushes exclusively for water mixable oils?
Currently working on the Venice Sunset and adore the colors!
Thanks
Hey Linda, pleased you found it helpful. Ideally, yes, but you could use either brushes aslong as they are well cleaned afterwards. So pleased you’ve been enjoying the Venice course.
Cheers,
Will
Thankyou so much Will. This lesson on using Water soluble Oils was, as are all your lessons I’ve followed,having been alerted to them by my sister Kate Mitchell, so interesting, easy to follow, thorough and then exciting to try. You’re an inspirational teacher and thankyou for your generosity in sharing all these ideas
Thanks for sharing Jo, very much appreciated. Glad you found it helpful.
Will
Love Peonies!!
Excellent in depth information and of course presented in your marvellously inspiring way.
I am ready to invest in water soluble paints and wondered if you had an opinion regarding the difference between the Holbein Duo Aqua regular line and their Duo Aqua Elite with heavy metal pigments. Are the colours richer with the Elite?
Thank you for all your help.
Hi Elaina, the elite paints use single source pigments so traditionally will have a more intense colour and coverage power, for example, a cadmium yellow, rather than a cadmium yellow hue.
Will
Thank you, that was a well laid out lesson. My question is, if you follow this process and are interested in exhibiting how do you list it? Mixed Media or oil , or oil/acrylic ?
Hey Vicki, pleased you found it helpful. Either would work, ‘Mixed media on Canvas’ or ‘Acrylic & Oil on Canvas.’
Cheers,
Will
Thanks for this very interesting and helpful article, Will. I’ve been using water mixable oils for some time now and I love it. I use Holbein duo Aqua and Jackson’s own brand which is also excellent.
Glad you found it helpful Carol and pleased you’ve been enjoying working with them.
Cheers,
Will
Thank you so much Will.
I have read several times with a great pleasure. When i succeed to say goodbye to these amazing photos i’ll start to paint :)
That’s fab to hear Nilay.
Cheers,
Will
Hi Will,
I’m thrilled for this well organized and articulated introduction to oils via water-mixable oils, and heading to the art store to pick up materials. I’ve been mulling over doing a floral image like this and tackling oils, and love the idea of not rushing before my acrylic paint drys. Here it is. So intuitive of you during these winter months. Love it!
Laura
Thanks so much Laura, great that you’re feeling inspired!
Cheers,
Will
This was both timely and brilliant teaching Will. I can only use water as I have severe asthma. Which is why I have only been able to use acrylics. So armed with the info I tried a small amount of water mixable oils on last layering of a beach scene. Omg yes…beautiful to work with. I’m going to try your peonies this weekend. Thank you and love your teaching and art.
So pleased it helped Bernadette, really great to hear its helped to add an extra medium to your paintings.
Will
Hi Will. Your videos are very helpful, and inspired me to return to painting after many years. I am hard at work learning to use acrylics but would like to try the water soluable oils. Have you heard of the COBRA brand which my local art store stocks in Canada. Might it be better to go online for a better known brand?
Hi Deirdre, yes Cobra is a good brand of water-mixable oils to work with. They have two ranges, a ‘study’ brand and the Cobra Artist Water Mixable Oil Colour, the artist quality will tend to have better opacity and coverage.
Will
Great instruction. Thank you. I can’t wait for the new course.
Cheers Laurel
Will
HI WLL
so, i have explored online and found that cobra is from windsor and newton – which answers my own question in previous email.
Hey Deirdre, Cobra water-mixable oil is from Royal Talens, and Artisan water-mixable oil is from Winsor & Newton.
Cheers,
Will
Thanks so much for this article! I’ve been wondering about this product. I learned a lot and, as always, I really appreciate your clear, step- by-step approach.
My pleasure Honey Lea, glad you found it helpful.
Will
Hey Will!
I just want to thank you! I think you are an excellent teacher, you describe well, have an enormous knowledge, and on top I like your style. I have done quite a few of your classes and read well your explanations. Any time I wonder something I usually find an answer when looking through your website or classes.
I must stop before I sound too cheesy.. So Thank You & Have a good day!
Well thanks so much Petra, very kind of you to say so. So pleased you’ve been enjoying the courses and finding the website helpful.
Will
Hi Will,
I’m back to report that I completed Happy Peonies. I have kind of an old computer monitor, but I could make out the expression of your work at the various stages and the closeups you provided definitely helped with the detail. Besides the brushstrokes, there’s the overall composition that you created conceptually, and that’s something that perhaps you’ll delve into at some point in the future? As you’ve shown us your approach to painting by defining the background and negative space first, I’d love to learn how to approach it.
Thanks.
Hi Laura, so pleased it went well and you enjoyed the process.
Will
Hi Will, thank you so much, this post comes just in time for me, too. I’m a beginner/amateur in painting and was so so glad to find your website while I was searching about acrylic painting last year. Having tried and had fun with acrylics, I’ve always wanted to try some oil, too, to see the difference between them, and to explore the different paths/choices I may be able to take. (But more healthy ones). Every of your tutorials has been so helpful. I like how your thinking is so clear and thorough!
I’ve got this question. I’m learning, like many people, I guess, by copying photos. Some are mine but most of the good ones are found on the internet, taken by other people. I’m thinking this would be a trouble regarding copyright… Would it be wise just to avoid them and only copy from real life or my own photos? Or if I do copy them, I guess I should avoid displaying my paintings in public places like local fairs etc.?
Another aspect I’d really like to learn from you: I know I love to paint, but there are times when I find it so hard to start, both in terms of not being in the right mood, or at the thought of the preparation, among other things in life. Would you have some advice, or write an article on this aspects, on what have kept you going, or what would help people overcome procrastination and be productive?
Thank you very much, I’m looking forward to your new course on water-mixable oil!
Thanks Jean for your article suggestions, procrastination can be a tricky one to get to the easel! you might enjoy this article on having a ‘growth mindset’ the myth of talent and my own procrastination problems!
You can find some websites like: https://www.photos4artists.co.uk/ that have some great reference photos that are available for artists to use for free, this is from the site:
Hope this helps,
Cheers,
Will
Will, I liked your tutorial, I tend to do something unorthodox..Paint acrylic over water mixing oils. and get the best of both mediums. ; EXTENDED PAINTING TIME AND THEN ACRYLIC GLAZING AND WASHES AND OPAQUES AND ACRYLIC GLOSS VARNISH. strange , but have been doing it since 1985. John Killmaster.
Pleased the technique has been working for you John, my only concern would be the difference in drying time as the oil underneath would need exposure to the air to fully cure and the cracking that may occur as the underlying oil paint cures and shrinks in comparison to the quick-drying acrylic.
Will
Hi Will, great issue and thanks for that many informations about using WMO. Have you ever considered using an harmless thinner like Green for oil Sennelier to whas your brushes during painting and OMS just for adding tiny bits into your medium?
Thanks and cheers
Stef
Hi Stefan, it varies depending on the technique I’m using and the space I’m working in, but yes the green for oils or zest it can work well.
Will