
Modern Acrylic Still Life Course
(Scroll down ↓ to Add to Cart)
Morning class, I’m Will Kemp, and welcome to the first course in my new series ‘The Morning Paintings’.
I’m super excited about these because they are easy-to-follow single-project courses you can complete in just a few 1-hour painting sessions.
Each one will follow the same approach:
- A single painting from start to finish.
- A limited colour palette.
- A handful of brushes.
- A small canvas.
- A simple subject.
- Taught over 3 x 45-minute lessons.
Advice for perfectionists and procrastinators
The reason I’ve started this series is that sometimes you can find yourself overthinking the end result of a painting, feeling that it’s got to be complicated or a masterpiece. The pressure to make it perfect can result in many unfinished paintings or keep you from even starting!
I’ve found the best way to get around being overwhelmed is to set aside a 1-hour painting slot every morning. Embracing the process of practice helps to build momentum and self-confidence.
This course has been designed with small, bite-sized lessons; you’ll be building your knowledge and your painting without the task becoming too much. With just a handful of materials, I’m keeping it very simple, but we’ll still get a good range of mixes, even using a minimal palette.
The actual starting is the hardest part – well, the thought of starting. Once you begin, it’s much easier to keep going.
In this first course, I’ve taken all the principles from a traditional still-life composition but kept it simple and contemporary. You’ll learn classical principles that are the building blocks of all great old master paintings.
We’ll cover the preparation of your surface & drawing out, mixing colour strings and blocking-in and how to create the illusion of a three-dimensional shape by observing the cast and form shadows. We’ll understand the importance of harmonious colour and adding texture to the surface to control the viewer’s gaze.
It’s been kept to be really, really simple, like when we paint the pears, we only use two colours for most of it, and then add a few extra magic bits of glazing to give you a little zing at the end.
So find a comfy seat, a strong cup of coffee or a pot of tea, and see what can be achieved in a 1-hour painting slot, thoroughly engage in the process.
You could make a big step forward in the painting every day, and after three days or even over a weekend, I think you will be absolutely amazed at how far your painting has progressed!
What’s in the Course?
- 1 x Modern Still Life subject from start to finish, based in the studio, working from a reference image.
- 3 x downloadable video lessons, split into separate chapters that follow sequentially. Step-by-step instructional videos so that you can follow along at your own pace.
- Each stage is a detailed yet easy-to-follow process.
- Lifetime access, downloadable on separate devices.
- One-time payment
- Downloadable JPEG reference images and reference line drawings.
- Printable Class materials list
- 2 hrs of detailed video instruction.
(You will need a printer or print shop for the reference image)
£35.00
Description
Modern Acrylic Still Life – Single Project Course
This course will help you create a realistic three-dimensional form, giving your objects a sense of depth and an impression that you could grab them off the canvas.
You won’t have to think about arranging a subject and what’s going to work well for a composition. We’ll cover simple colour mixing and brush techniques whilst loosening up your brushwork, and the step-by-step instruction will keep you on track.
We get to paint a fab patterned ceramic jug (created by our friends at Studio Bu) alongside a pair of pears!
Who is the course for?
I’ve designed this acrylic still life painting course with the absolute beginner in mind; you’ll be guided through the basics of working with acrylics, learn the power of a limited palette, and then move on to an extended palette and glazes.
Imagine going to your paint box, opening up the lid and picking out just three brushes. That’s all you need to complete the painting.
Everything has been set out, so you only need to focus on the next step.
“You don’t need to predict how everything will play out. Just master the next step and continue moving in the right direction.” – James Clear
You’ll be using simple brush techniques and materials, so even if you’re completely new to painting, you’ll get great results!
What materials will I need?
We’ll only use six colours, and that includes white, and if you’ve been following some of my other courses, you will have most, if not all, of the colours already.
What are the colours?
- Titanium White – (Golden Heavy Body Acrylics)
- Cadmium Yellow Light – (Golden Heavy Body Acrylics)
- Burnt Umber – (Golden Heavy Body Acrylics)
- Ultramarine Blue – (Golden Heavy Body Acrylics)
- Permanent Alizarin Crimson – (Winsor & Newton Acrylics)
- Green Gold – (Golden Heavy Body Acrylics) I use a super tiny amount of this; it isn’t essential
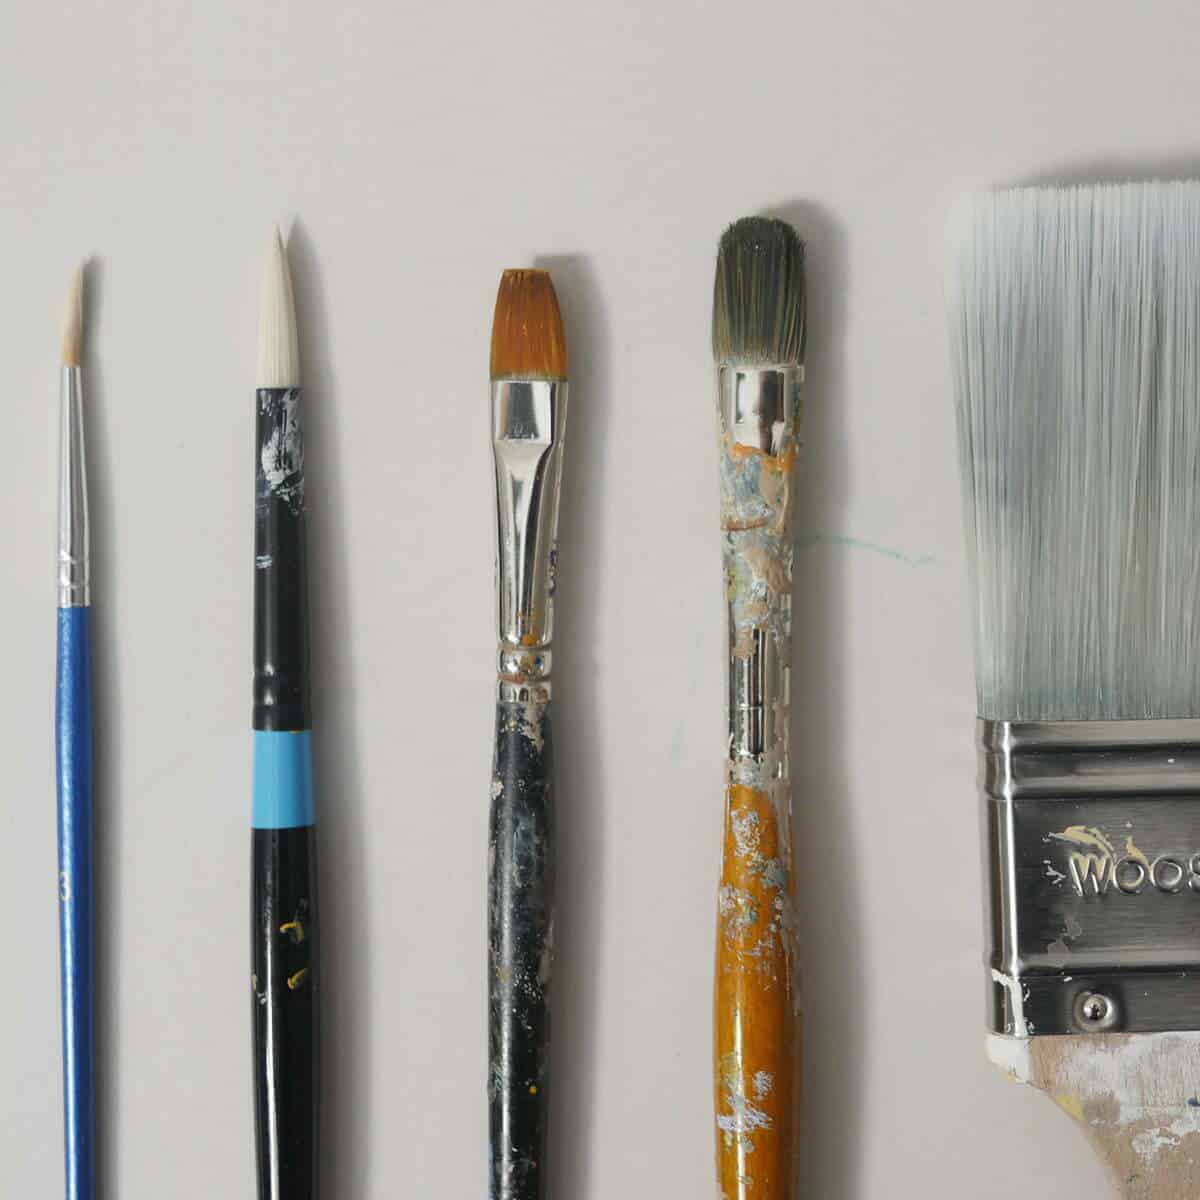
And Brushes?
- Small Nylon Synthetic Round
- Isabey Isacryl – Size 6 Filbert
- Princeton Aspen – Size 4 Round
- 2-inch Decorators Brush
Will I be able to download the video lessons?
Yes, the course is delivered by a series of downloadable video lessons that are yours to keep forever.
What will I achieve at the end of the course?
You’ll have created a fab little contemporary still-life painting, gained confidence, lost the pressure of perfection, and embraced the process of practice!
You can see some student success from the course here
Lesson Breakdown

Lesson One
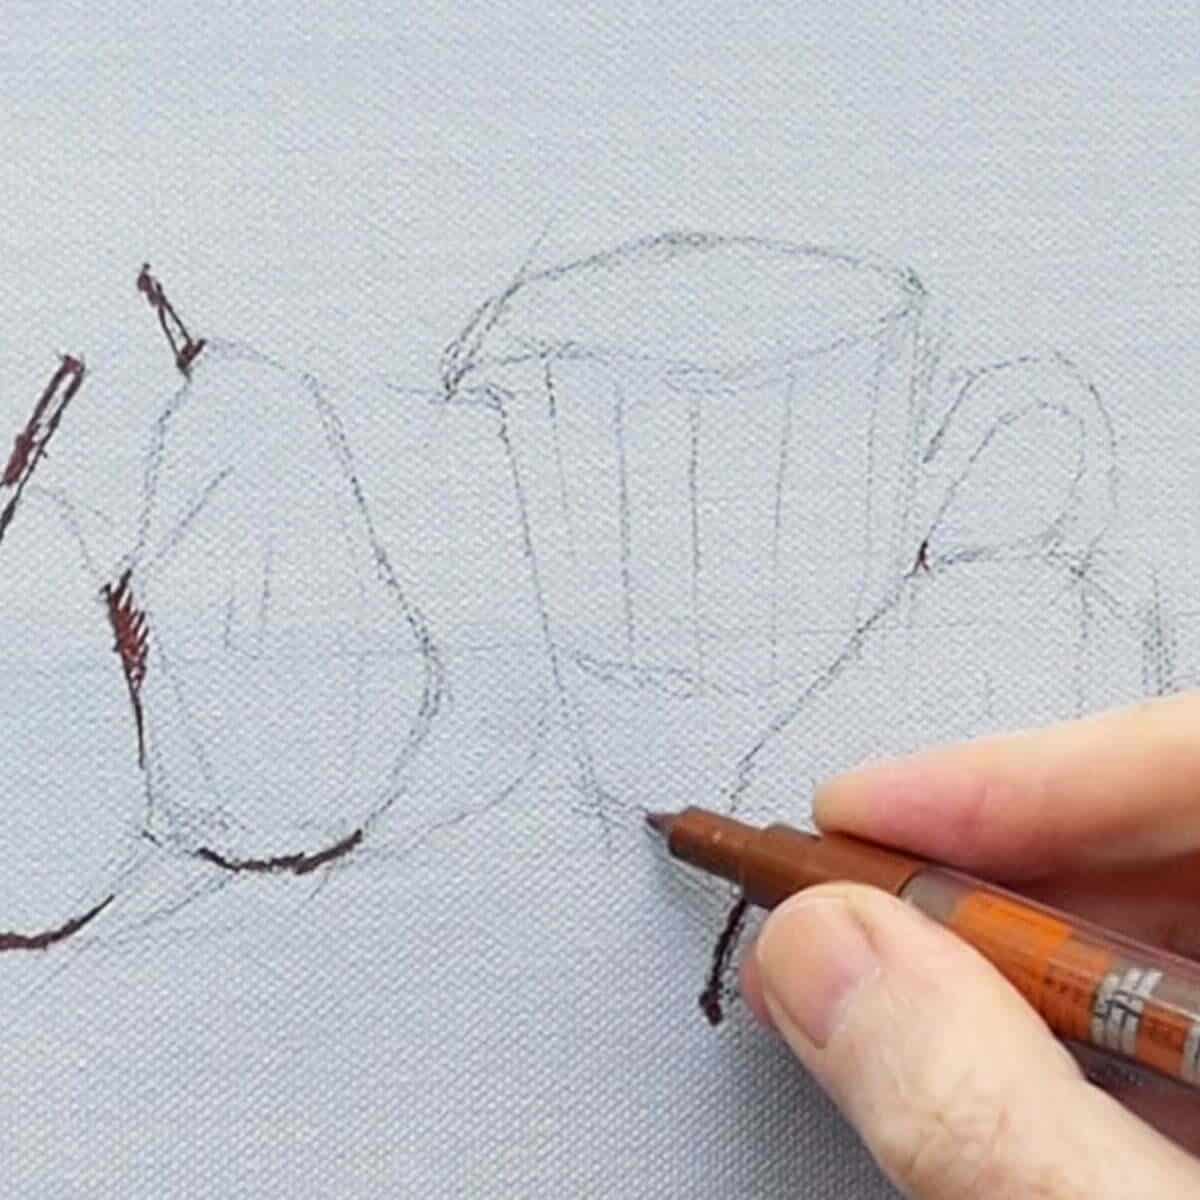
Preparation & Drawing Out
Learn how to choose a sympathetic tone for the coloured ground, we’ll then work within the confines of an envelope shape and discover the magic of straight lines when drawing round objects.

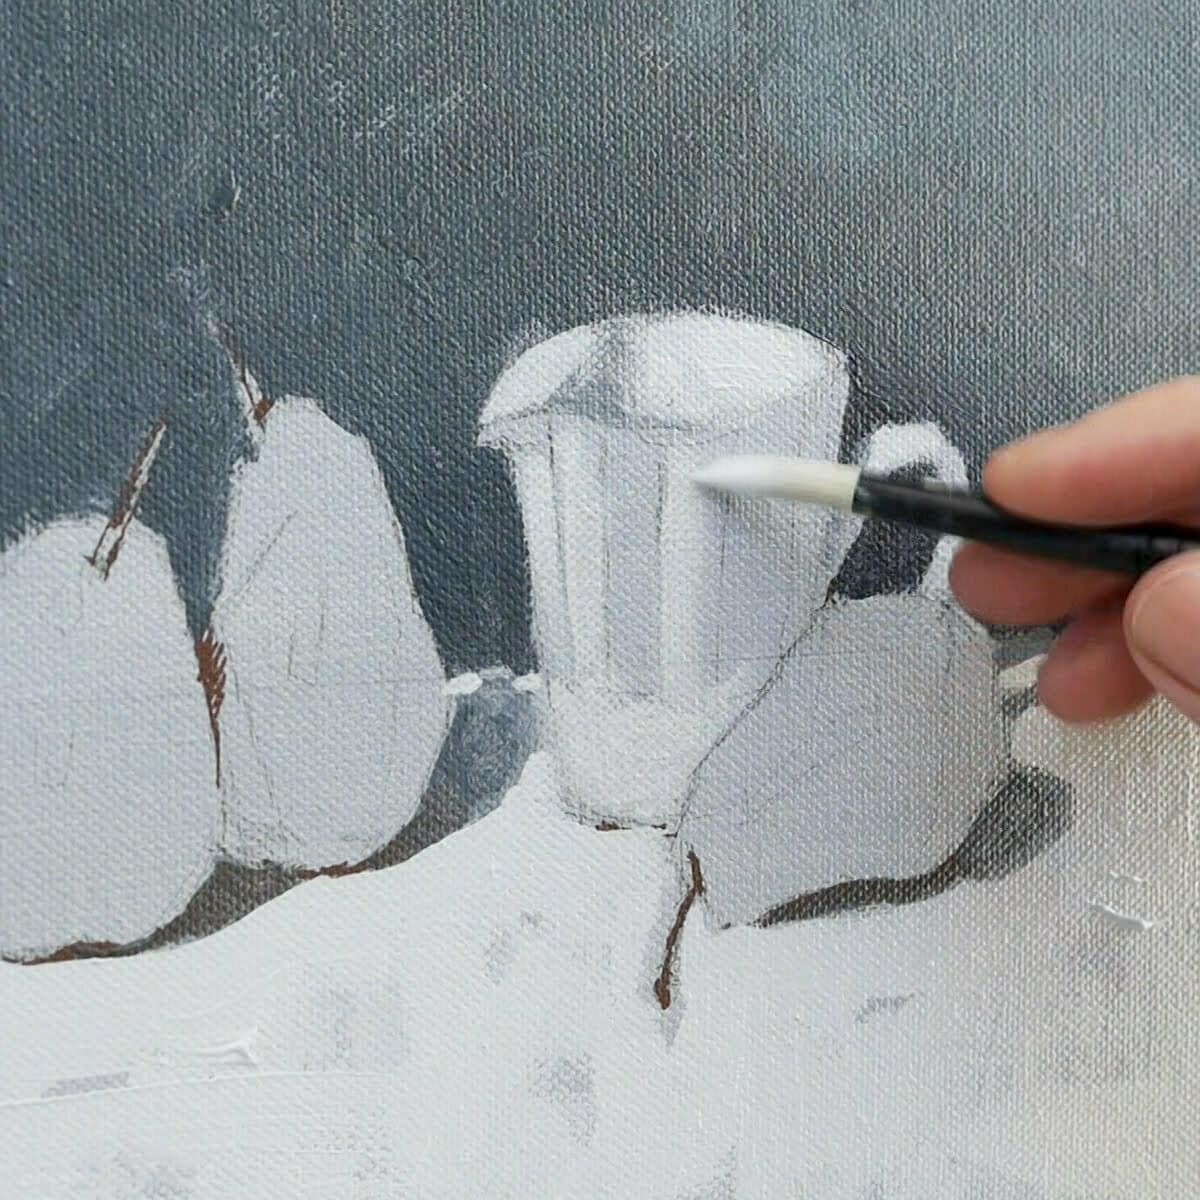
Lesson Two
Blocking-In
Isolating colours really helps to see them more clearly, so we’ll pre-mix colours in advance, block-in to see the power of a shared edge, also use all the negative spaces to help us to paint the objects more realistically. Using a limited palette we’ll also change the texture within the piece to control the viewers gaze.

Lesson Three
Full Palette
Creating three-dimensional form gives your objects a real sense of depth, and in this lesson, we’ll encounter the two things to help create form, expand our palette and look at the power of glazing, where a little goes a long way.
Course Delivery
Course Delivery
I’ve taken care to film everything from my perspective so you can see exactly what I’m doing as we go through the entire painting process in real-time.
- Downloadable Full-colour reference photograph
- Downloadable Line Drawing
- Downloadable Value Scale
This course has been developed with a beginner in mind, carefully going through the steps at a pace that introduces new colours and techniques slowly.
How is the course delivered?
When you purchase the course, you will receive an email with all the downloadable video links to the course. You then have to download and save the Video Lessons onto your home computer/iPad.
3 Downloadable Step-by-Step Video Lessons.
Over 2 hours of detailed video instruction that once downloaded – you have any time, anywhere access.
A ‘Getting Started & Materials List PDF‘ – which includes your materials list.
JPEG reference image, including the photo reference I demo with, a copy of my pencil sketch for the line drawing.
The video files are large (3GB) so you need a broadband internet connection and enough space on your computer hard drive.
Please note: You will not receive a DVD.
Cut by the Artist
I filmed, edited, and coloured the course myself (with a little help from Vanessa!) rather than working with a production company. Artists have different needs than editors so I wanted to cut the course like an artist, showing you exactly what I wanted to see when I was learning. I show all the real-time brushstrokes for the paintings so you don’t miss a step.
There are 3 main camera views I cover:
An over-the-shoulder view of the work – so you can see how I build up the painting as if you were standing behind me in the studio.
A close-up of the brush contacting the canvas – with extreme close-ups, so you can see the grain of the canvas and the bristles in the brush.
Stable shot of the palette for when I pick up paint – see exactly how I mix colours. There is nothing worse than when the brush disappears from view, only to reappear with some fantastic new colour. Where did that colour come from?! How did it get mixed?
The palette view is very important, and not just at the beginning of the video. I want to show you every single mix I make, so I film with the palette directly next to the painting, then you can see shots of the palette throughout the course and gain a sense of my approach to colour mixing.
Colour Corrected Footage
Filmed under constant colour balanced conditions, so the paint colours are as accurate as can be. (Computer monitor screens and print-outs can vary)
Real-time filming – No long jumps in progress
I don’t like long jumps in progress when the paintbrush goes off-camera, the shot changes and suddenly the picture has seemed to drastically improve.
I include all the stages so you can clearly see the progress of a work.
Course Requirements
Course Requirements
Requirements for the Course
A broadband internet connection – the files sizes for the video lessons are quite large (3GB in total) so can take a while to initially download (depending on your internet speed.) Once downloaded, they are yours to keep forever, watch without buffering or take to the garden and watch away from an internet connection!
Enough free space on your Computer or iPad – You can download the files to a separate USB stick if you need extra storage.
A Colour Printer – to print out the reference images or access to a Print Shop.
Photo Printer Paper – I use Epson Archival Matte or Epson Photo Glossy.
1 hr per painting session – You’ll need to be able to dedicate 1hr for 3 painting sessions.
FAQs
Modern Acrylic Still Life Course
Yes, you can download to an iPad using Files App, or the free app called ‘Documents’. Without either of these apps, you will not be able to download directly to an iPad.
You can also download the video lessons to multiple devices (home PC, laptop etc) and if your storage space is running low on your laptop, you can download to a separate USB stick.
No, not at the moment.
The courses are available as a download only, there is not a streamable option.
If you only have an iPad you need to use either the Files App or the free Documents App to download and have enough space on your device
But there is one exception.
If you open the download links in the Safari browser on an iPad, Safari will give you an option to View or Download, if you click View, you can watch the videos without downloading.
Yes, there are reference images in jpegs and line drawings to work alongside from.
Yes, there is a line drawing you can work from and I go through the drawing process in the course.
We accept all major credit and debit cards such as Visa, Mastercard. We also accept Paypal.
Yes, you could follow along with the course with Oils or Water-Mixable Oils. There are a couple of tweaks you’d have to be aware of. The coloured ground will take longer to dry, and you’d have to spray fixative on the drawing before painting, but after that, the colour mixing and approach would be very similar.
Send me an email, my direct email is: [email protected] and I’ll do my best to help.
The shopping cart will convert to your local currency. You can use a currency converter to get an idea of the current exchange rate: https://www.xe.com/currencyconverter/
Yes, you can from another screen, such as an iPad or a desktop. That will let you keep the reference image visible while you follow the lesson.
However, in some of the lessons, I physically test colours directly on the printouts. This can be very helpful when you are first learning, because it makes colour matching clearer and easier to judge.