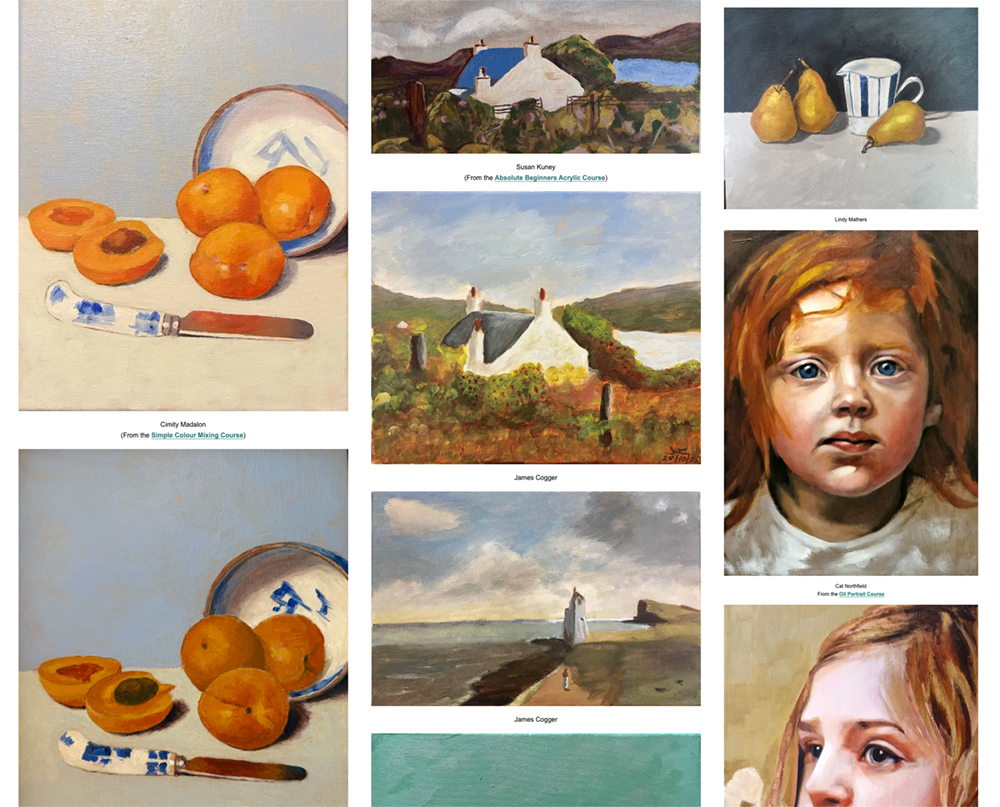
It has been a brilliant couple of months across October and November. I’ve loved seeing all the paintings, sketches and studies that have been shared recently.
Thank you to everyone who has taken the time to post their pieces. The creativity and progress on show over these weeks has been a real highlight.
What an incredible start to the Autumn it’s been! So proud to showcase a roundup of recent work from the students and artists following the courses and free lessons!
Thank you so much to everyone who has shared their beautiful work over the last couple of months.
“The pictures they created convinced me that anyone and everyone could use a few clear principles to build powerful visual statements: emotionally charged arrangements of shapes on a page.” – Molly Bang, Picture This: How Pictures Work
When you’re surrounded by hundreds of reference photos or standing in a beautiful location, it’s easy to feel overwhelmed.
Every scene seems to have potential for a painting, but nothing quite clicks. You find yourself thinking, “Would this work?Will that look good?” without ever feeling confident in your choices.
This is where ‘compositional categories’ can really help organise your imagery and give you a starting point to check your compositions against.
Not by limiting your creativity, but by giving you a clear lens through which to view your options.
Your pencil flows across the paper, and suddenly, it all makes sense. The proportions look right, the shading actually resembles the model, and you feel like you’re ‘getting it!’
You pack up your supplies with quiet confidence, already daydreaming about the drawings you’ll make at home next week.
Then life gets busy. A week later, you finally sit down to draw again, excited to pick up where you left off. You sharpen your pencil, study your subject, and… nothing.
The connection is gone. The techniques that seemed so natural have vanished. You’re not just rusty, you feel like you’re starting entirely from scratch.
It’s as if everything you learned has slipped away.
You’re not alone.
You’ve just run into one of the most common experiences in learning: the forgetting curve.
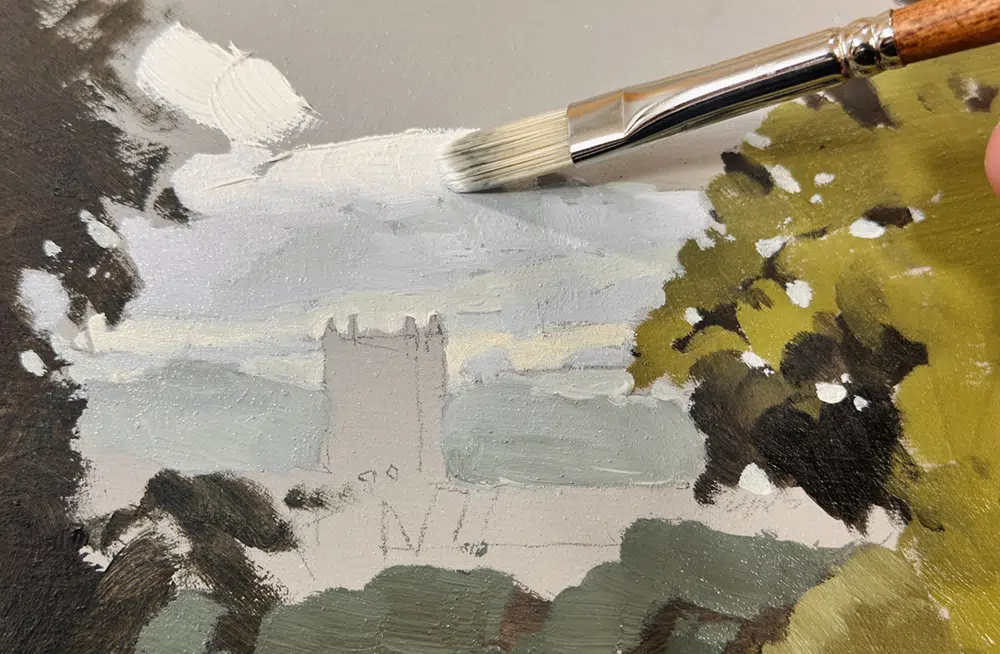
For this step-by-step tutorial, we’re focusing entirely on staying within the yellow family of colours.
We’ll move from a bright, saturated Cadmium Yellow Light through to a darker, earthy Raw Umber, and see how much of a painting we can create just within that colour family.
The perceived limitation of the palette actually becomes a strength. It forces you to examine form, composition, light, and the interaction between objects.
But the main thing it helps with is colour mixing.
Once you have the colour scale, you can adjust the colours by moving up or down it without veering too far off course.
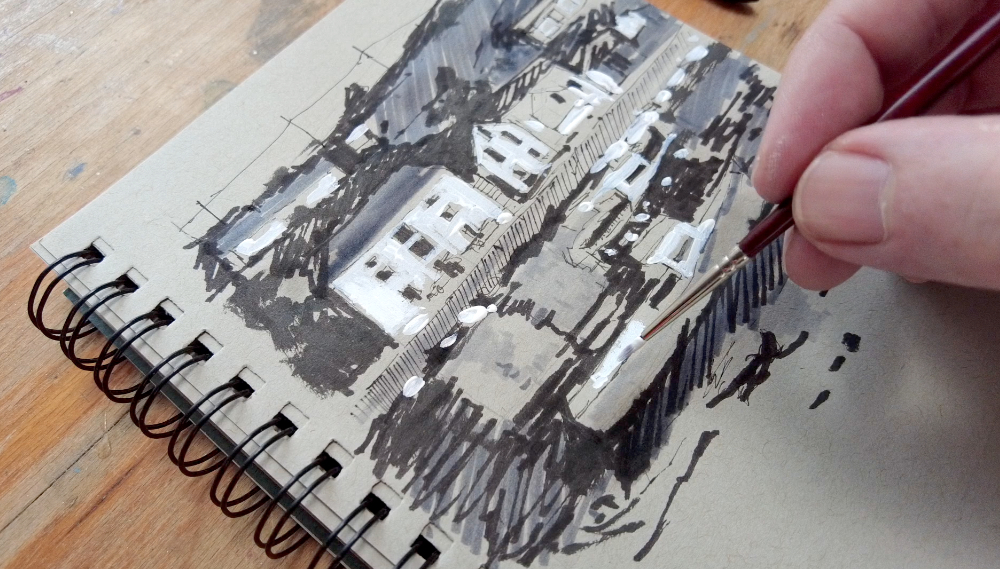
After a recent day out to Porthleven, I put together a video of a harbour scene sketch I did back in the studio.
I used Strathmore toned paper, started with a Sailor Fude Pen and then added layers of tone using Tombow Markers. The final highlights are white dashed Gouache.
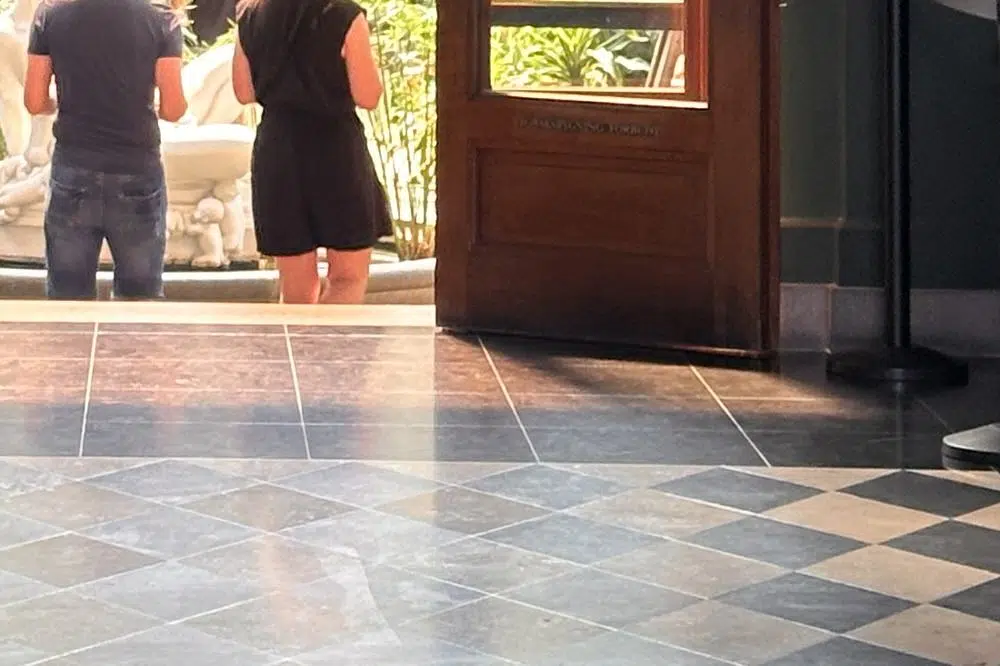
Set in the heart of Copenhagen, the Ny Carlsberg Glyptotek building is a masterpiece.
The highly decorative red-brick façade leads you into the entrance hall (the oldest part of the museum, designed by Dahlerup), which initially has that familiar grandeur of other classically inspired museums.
Subdued light, intricate tiled floors, decorative ceilings and sweeping staircases stretching out to all sides.
Only after walking a few feet do you spot an archway and double doors that seem to lure you forward.
It keeps opening up, opening up, until you find yourself standing in a super-bright, glass-domed oasis.
The colours bounce off the water like a painting. I kept thinking how many artists must have stood here, brush in hand, trying to catch that perfect line where ochre meets cobalt.
It was a fresh, clear morning, and I was exploring one of Copenhagen’s most picturesque 17th-century districts.
I’m back in the studio, knee deep in a series of oil paintings.
And I’m really enjoying working with the fantastic malleability of oil paint. You can push it around, layer it thickly, and enjoy a long working time and soft, smoky blends.
But.
Even as a seasoned oil painter, when I’m sorting out my brushes, choosing paints and deciding on mediums, the sharp reality hits. Lack of preparation, a few poor habits, and rose-tinted expectations could easily counteract your efforts and enthusiasm.
Here are 7 Oil Painting Truths, so if you encounter any of them, you can smile and dust yourself down instead of letting them derail you.
1. You will get messy, drop paint, and get oil paint in areas you never realised you could.
I’ve found that no matter how careful you are, you will undoubtedly get oil paint on your hands, your brush handle and then get it on your top!
Wearing rubber gloves can improve your clean-up process, and I’d advise wearing an apron or an old shirt. Knowing that you will get it somewhere and being prepared for that.
Also, make sure not to eat or drink in that area, just because the oil paint will turn up where you least expect it. So the more dedicated space you have, the better.
2. You will get overwhelmed by the range of oil colours and different brushes for different techniques.
A small selection of my brushes! why do I still order more?
Every time I open an art magazine, there seems to be another new paint from a manufacturer.
“Is this the colour I’ve been missing?”
But honestly, the simpler you keep your colour mixing, the better. Just start with a few key colours and maybe a couple of dark earth tones. Those darker colours are great for underpainting or dropping the chromatic intensity. If you choose them well, you can do a huge number of paintings with just two or three colours.
I recently had a bit of a shock when it comes to brushes. I looked through mine and realised I had hundreds. But when I actually paid attention, I noticed I’d been buying the same two or three types over and over again. It turns out those are the ones I keep reaching for.
With oil paint, the biggest difference compared to acrylics is how many brushes you need. With acrylics, you can often get away with using one brush, rinsing it in water, and moving on. But with oils, especially if you want to avoid using lots of solvents, it’s much easier to just have extra brushes ready to go.
You should set aside a few for your darks, a few for your mids, and a few for your lights.
That way, you’re not constantly cleaning, and you reduce the risk of muddy colours from brush contamination. It’s one of the easiest ways to keep your painting clean and your process flowing.
3. You will try to put out too little paint to save money – this is a false economy
With oils, you can squeeze out a blob of paint, and it will last for days, sometimes even weeks. So don’t be afraid to put out more than you think you’ll need and mix more generously. It won’t go to waste like acrylics, where once it dries, it’s gone.
When you’re just starting out, using a student grade white can be a really smart move. Something like Winsor & Newton Winton Titanium White is great value. ( There is an offer on at Cass Arts for £14.50 for two 200 ml tubes)
In this case, unlike acrylics, artist-quality white isn’t as important.
That’s because with oils, to get a clean colour application on top of your existing wet colours, you usually need to paint thicker and then leave the brushstroke alone.
With acrylics, the opposite is true. You can use thinner layers and still get solid coverage, as long as the paint is high quality and opaque. So with acrylics, I’d always recommend getting the best artist-grade white you can (I like Golden Brand Titanium white). But with oils, a good student white will do the job and actually encourages you to be more generous with your paint, which really helps when you’re learning.
4. You will compare yourself to an artist in a museum. Even one of the best over the last 400 years, against their best work, trained since 11 and drawn every day
Give yourself a break.
I was reading something today about the idea of making a hundred bad paintings. I think it originally came from a film director who said you should make a hundred bad movies. The idea is that if you approach painting with that mindset, you won’t get so precious, and it takes the pressure off.
When you’re starting out, it’s easy to think you’re going to make one incredible painting and that will be it. But usually, that’s not how it works. It might be pretty good, but the real progress comes when you stop comparing your work to other people’s and start comparing it to your own.
Take inspiration from others, of course, but ideally, you want to be able to look back at a painting you did three months ago and think, “I can’t believe I thought that was good at the time.” That’s how you know you’re improving.
You’re becoming your own reference point.
It’s also worth remembering that when you go to a gallery or an exhibition, the work you see is surrounded by so much extra context.
There’s the grandeur of the museum space, the history of the artist, and even the fact that you may have seen the image before, all of which add to its impact. In his 1935 Essay, “The Work of Art in the Age of Mechanical Reproduction,” Walter Benjamin introduced the concept of “aura,” the unique presence and authenticity of an original artwork that stems from its particular history, location, and singular existence.
Benjamin argued that an artwork’s aura is tied to its “here and now”. Imagine your painting being shown on television or displayed in a gallery. It would feel different, too, simply because of the way it’s presented.
5. You will learn more at the easel in 30 minutes than you will from 30 hrs of YouTube videos
It’s so easy, especially with all the content available these days, to fall into the trap of thinking that if you just watch one more video or learn one more thing, then you’ll finally be ready to start painting. But often, that just becomes another form of procrastination.
The truth is, if you pick the simplest subject, one brush, and one tube of oil paint, you will learn so much more by actually painting for an hour than by watching videos for days. Everything that goes wrong and everything that goes right in that session will teach you far more than you expect.
Oils are great for this because the paint stays wet the whole time. You can keep adjusting, softening edges, layering colours, and really exploring how it moves. You’ll learn what kind of brush feels right, how much medium you enjoy using, what colours you naturally reach for, and even what frustrates you.
All of that only comes from doing. The act of painting is the best teacher.
You’ll be surprised at how much you can accomplish in just one hour, even if it doesn’t feel perfect. That hands-on time builds your skills and confidence far more than waiting to feel “ready.”
6. You will feel exhilarated, then deeply depressed, all within the same painting
Painting can really feel like a rollercoaster. When you first start blocking in or sketching out the composition, there’s a rush of excitement. You feel like this could be the one. This painting might turn out amazingly well! And that initial energy is such a great boost.
But as the painting starts to develop, doubts often creep in.
You might start to wonder if you chose the right subject, if your colours are working, or why the paint isn’t handling the way you expected. You start questioning yourself. That’s when the energy can drop, and it’s easy to hit a low point where you think, “This is rubbish, why am I even doing this?”
Then, often out of nowhere, you’ll paint one little section that surprises you. It turns out better than you thought it would. That small win can give you just enough encouragement to keep going.
That’s why taking regular breaks is so helpful.
Step back from the easel.
Squint down at the painting.
Look at it with fresh eyes.
That reset in perspective can really shift how you feel and help you make decisions more clearly. And often, it’s in those final moments that the magic happens. The last highlight, a sharper edge, or a touch of contrast, those small finishing touches can transform the whole piece.
So, the key is to stay with it, ride the ups and downs, and trust that each stage is part of the process. Keep going.
7. You will judge, question, challenge and rebel against the process
When you’re following a tutorial or trying out a new technique, especially if someone has already laid out a process that works, it’s really tempting to think you know better. I found that when I was first starting to paint, even if I was following someone to get specific results, I would still start questioning the steps. I’d think, “This can’t work,” or “Why am I doing it this way?”
For example, if you’re painting on a coloured ground for the first time, it might feel pointless. You might wonder why you’re not just starting on white. Or if you’re asked to work from the negative space first to reveal the positive forms, that can feel really counterintuitive. (this tutorial of drawing the negative of a bike is a good example)
But these techniques often make a lot more sense once you’ve seen them through.
It’s a bit like following a recipe. I think people tend to fall into two camps.
One group follows the instructions closely, measuring everything precisely. The other group wings it, adding a bit of this or that and hoping it all comes together. Both can end up with a cake, but the results can vary.
When you’re first learning, it really helps to be in that first group. Just follow the steps. Try the full process as it’s laid out, even if it doesn’t make perfect sense yet. That way, you get to experience how these techniques work in practice, and you’ll start to build a foundation you can later adapt to suit your own style.
For students wanting to make the leap from acrylics to Oils, many of the techniques throughout the teaching on the site stem from my training in classical oil painting. So if you’ve been working through the tutorials, you’ve been developing oil painting skills by stealth!
Disclaimer: I’m an artist, not a copyright attorney; everything here is shared for general educational purposes only.
Morning class, I get lots of emails from students who want to pick up a paintbrush but find the first stumbling block is what to paint! It’s easy to find yourself at a loss when looking for a good reference image for the simple reason of copyright.
Most published photos in books, magazines, and online are copyrighted. That means you typically need permission from the photographer or rights holder to use them as a reference for your paintings, especially if you intend to sell or publicly display the artwork.
However, if you’re simply using them for practice at home and not sharing the work commercially, or if they are being used for educational purposes, it’s usually okay. You can also look for images that are under Creative Commons. This is where an image can be used, and if displayed or sold, the original creator must be credited.
The best free reference images for artists are your own.
You can tweak, light, and design them to be unique. But when you’re starting out and want to practice different subjects, high-quality, royalty-free images can be super helpful.
When it comes to finding the perfect reference image for your artwork, not all sources are created equal. Knowing where to look and understanding the rules around usage can save you from the gut-wrenching moment of realising your beautifully finished piece is based on an image you didn’t have the right to use.
So I’ve put this article together to give you confidence in finding great resources, knowing your work is legally protected and ethically sourced.
There are three main categories of reference images that artists commonly use:
Museum and Library Archives
Museums and libraries hold vast collections of historical artworks, drawings, etchings, artefacts, and patterns. Many of these works are old enough to be in the public domain, meaning you can use them, even commercially, without restriction. This makes them super helpful for finding inspiration and creating master copies of artworks.
Free Photography Sites (Unsplash, Pexels, etc.)
These platforms offer high-quality images taken by living photographers. You’re free to reference these photos for your artwork and sell your painting or drawing based on them. However, you can’t just sell the original photo as is. Some of these sites have usage requirements like Creative Commons licensing or simple attribution to the photographer, so it’s important to double-check the terms before using them.
Artist-Curated Collections
These are specially curated for painters and illustrators. Unlike typical photography, these images often focus on strong light, simple shapes, and clear values making them perfect for translating into paint. Some of these collections come with zero copyright restrictions, while others may require simple attribution. They are designed with artists in mind, making it easier to spot key elements like shadows, contrasts, and composition that work well in a painting.
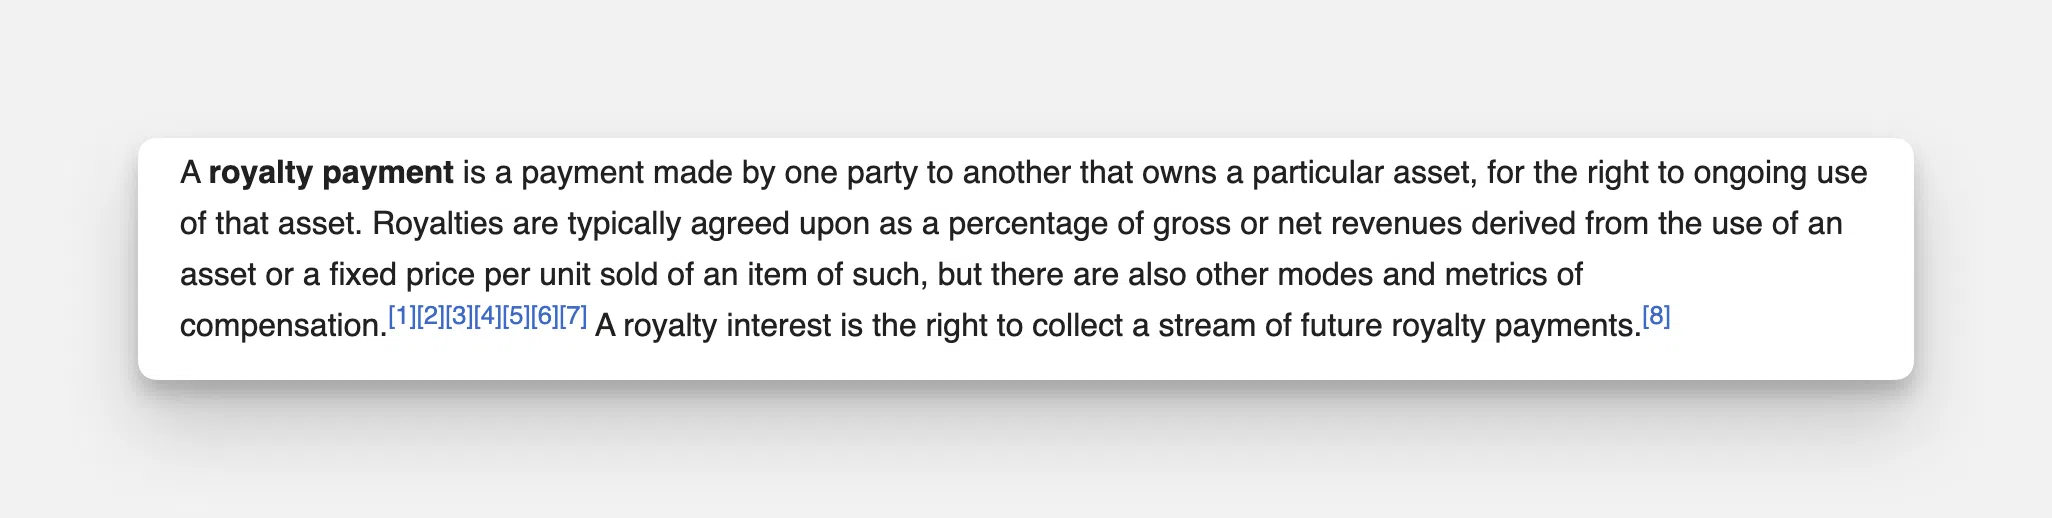
What Are Royalty-Free Reference Images?
A royalty is a recurring payment made for the use of someone else’s asset, like a song, book, or artwork.
For example, if a radio station plays your song, you receive a royalty each time it’s played. If a publisher sells your book, you earn a percentage of each sale.
“A royalty payment is a payment made by one party to another that owns a particular asset, for the right to ongoing use of that asset.” https://en.wikipedia.org/wiki/Royalty_payment – Wikepidia
‘Royalty-free’ works differently. It isn’t always free, you pay once to use the image or asset, with no additional fees each time you use it.
For free reference images, we don’t necessarily want a ‘royalty-free image, we want a ‘free-free’ image!
Thank you to all the students who shared their beautiful paintings from the last couple of months. So delighted to showcase a recent roundup of work from the students and artists following the blog.
If you’re accustomed to painting with music or in silence, you’re not alone. Many artists find comfort in familiar sounds—or the absence of them as they create. But have you ever considered inviting a new kind of companion into your studio?
Why Listen to Art Podcasts as a Beginner (or Experienced Artist)?
As a beginner, it’s easy to assume you need to spend every moment learning a technique. But the truth is, the biggest hurdle for most new artists isn’t a lack of skill. It’s feeling motivated and confident that you’re on the right path.
That’s where podcasts shine.
They offer you the chance to hear from working artists, tutors, and creatives who have all been where you are now.
Listening to their stories, challenges, and painting methods can shift your mindset from “Am I doing this right?” to “I’m not alone, and I can keep going.”