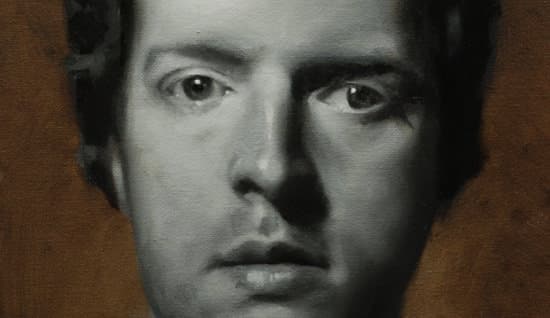
How to paint a portrait series. This is part 4 of a 5 part series of tutorials for beginners making the transition from drawing to oil painting.
We look at how important value and tone are in creating a realistic black and white portrait using classical oil painting techniques.
Here is a quick review of what we have covered so far if you’d like to join in…
Part 1 – Establishing the drawing, including the shadow line.
Part 2 – Developing the tones, adding lights.
Part 3 – Modelling the big forms.
Part 4 – Second Painting
Mixing a new medium
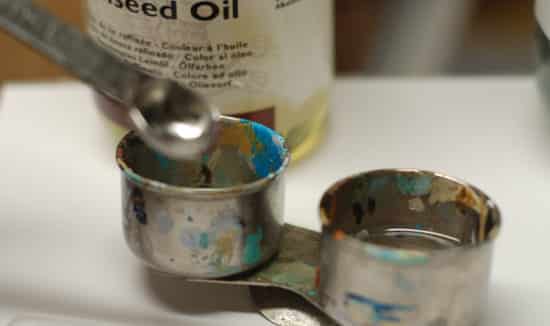
We now create a new medium for the next layer of the painting. Different artists vary the richness of the medium depending on their own personal preference but the next mix is still just using Linseed oil and Odourless Mineral spirits.
- 2 Part linseed oil to 1 Part Odourless mineral spirit (OMS)
You can use the pipette to measure out amounts, or if I’m mixing a larger amount I’ll use kitchen measurement spoons.
Choosing your background
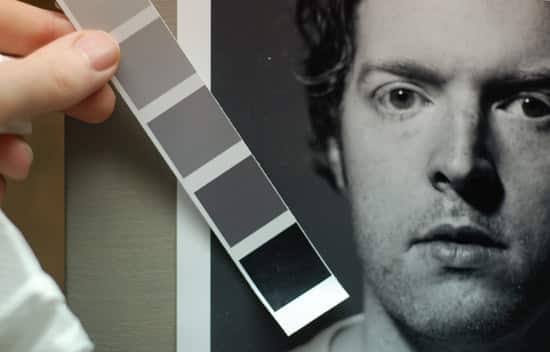
You can now assess your background tone to see if you want to match a grey, rather than use the raw umber underpainting.
In this example, I’ve decided to leave the background as the Raw umber, because it is a slightly lighter in tone than the reference photograph I’m making my job a little bit more difficult.
If this is your first portrait then I would definitely mix a grey tone that matches your reference photograph for the background as it will help in judging the tones more accurately and enable you to change the drawing if it has gone ‘out’ at all. I am using leaving the raw umber as I like the aesthetic of the warm glow against the cooler black tones of the face.
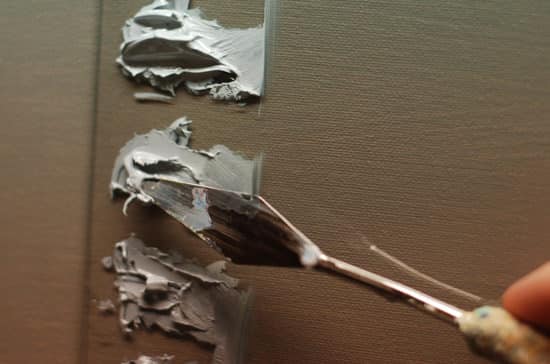
How to keep your oil paint workable between sessions?
If you have spent all your time mixing your colour strings but have limited available time to paint how do you keep the paint workable? There are a few options to minimise paint and mixing time waste without the paint drying onto your palette.
- Freeze the paint. (in a resealable tub in the freezer)
- Submerge the paint underwater. (you can use a shallow tray like a stay-wet palette, this only works if the palette or glass or perspex)
- Cover the paint with Plastic wrap/ cling film.
- Add a slow drying oil such as oil of cloves. (Some painters warn this can lead to a darkening of the paint colour over time)
- Mix a large blob of paint, let it skin over and remove the skin and use the fresh paint underneath.
So what’s the best method? It’s hard to give a straight answer as each has pros and cons.
My personal preference is to let the paint skin over, remove the skin, and use the fresh paint from underneath and realistically you have about a 5 day working time until you need to mix it up from scratch again.
The paint underneath the skin will be slightly stickier and thicker and as I progress the painting this extra thickness can be nice to add more impasto passages.
Before we begin
I now start to assess the tones with fresh eyes. Having a break to refresh your eyes can be very important with portraits. Often you’ll find yourself painting an area over and over again without really looking at it.
For this next part of the painting, we are going to start to try and refine some of our shapes and develop the drawing.
This is the stage where things can go wrong and you can feel like there is no way back in your painting, all your hard work was for nothing and a feeling of frustration can set it.
This is normal, don’t get disheartened.
Paintings often go through a stage where they look really bad and this is usually the stage where most beginners stop. It can be all manner of things that throw you off track, the drawing can go ‘out’, the edges can appear too hard, you become over confident and don’t observe tones as well as you first started or you can become obsessed with just painting one part of the portrait – usually the eyes.
To make sure this happens as little as possible, have regular breaks from the portrait, make sure you step back to view your portrait from a distance and try and bring the whole painting together at the same time rather than focusing on the features- easy to say but harder in practice and I still have to check myself when painting.
Assessing the tones
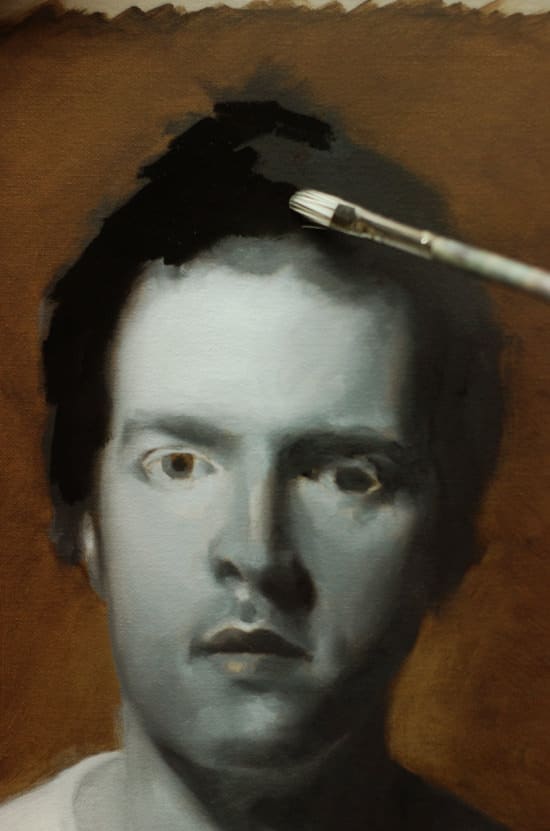
I now add a flat tone of the black to the hair, it’s quite thin yet opaque as I’m going to be working wet into wet. This just establishes a layer of paint for me to work into.
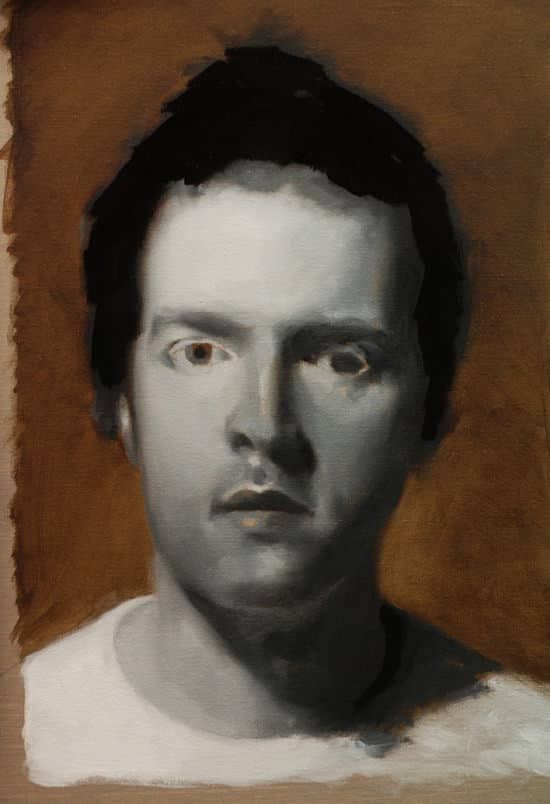
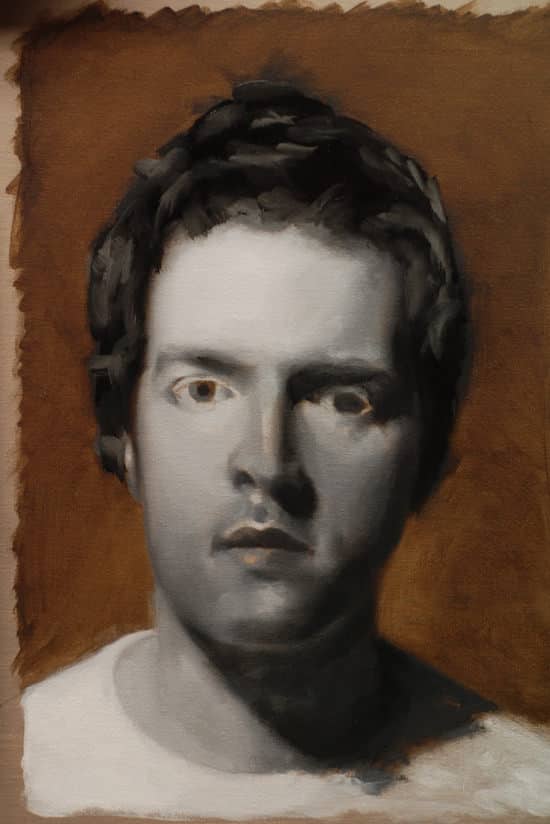
I’ve now added some gestural marks using the size 4 Ivory Filbert. I want it to be soft and quite loose – I’m not trying to paint each individual hair I just want to create a general impression.
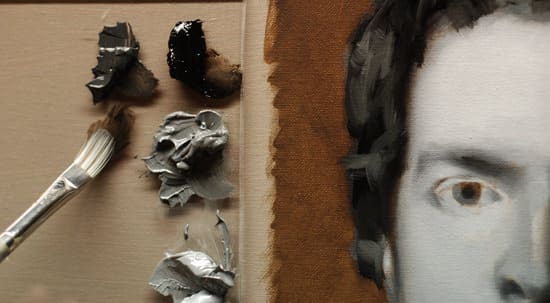
Reinforcing the Lights
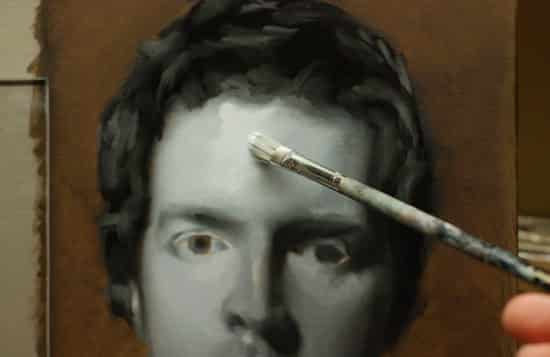
I now add some thicker lights using a value 2 and 3, flicking my eyes between the portrait and the photograph.
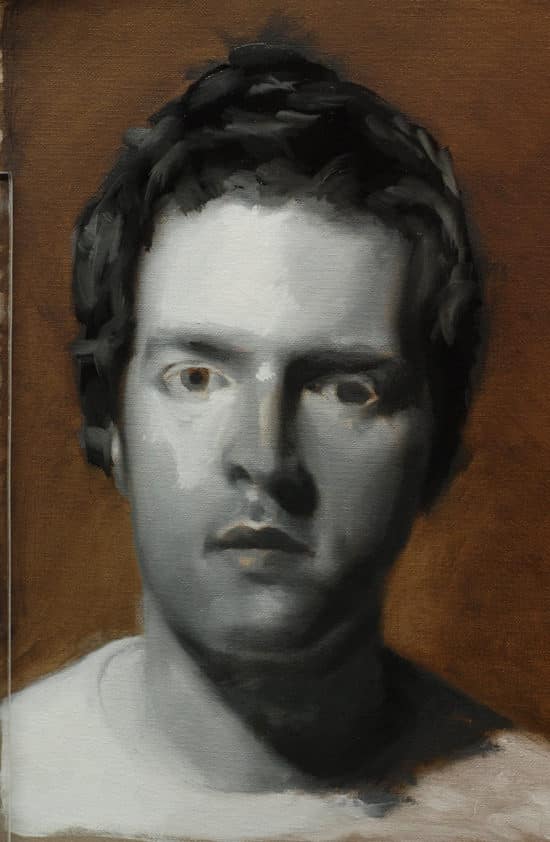
I continue to adjust the tones, working my way down the portrait as before. You’ll notice how the paint has a harder edge because there isn’t any of the wet paint underneath for it to blend into.
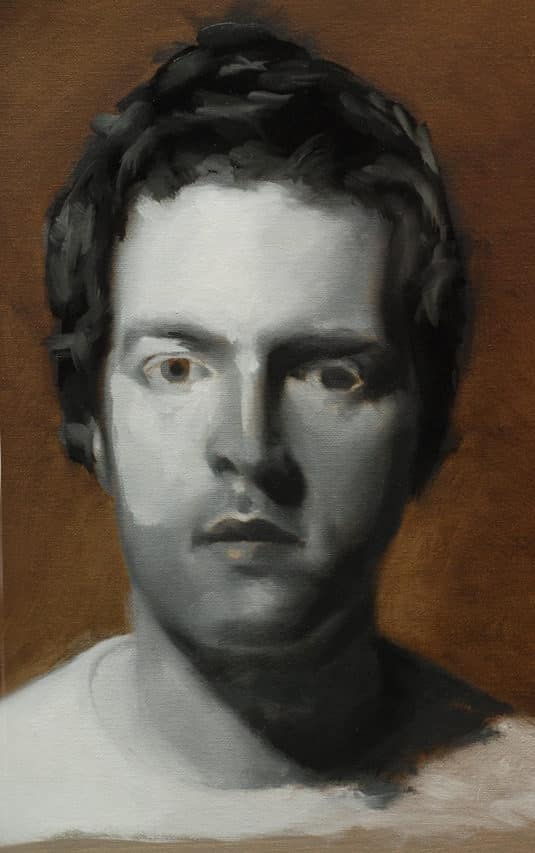
This is where you might start to get a bit scared, as suddenly we seem to be loosing the lovely soft finish of the first painting, so I switch to the softer sable to blend the paint in more. I use a scrubbing motion with a dry brush to soften the transitions between the forms.
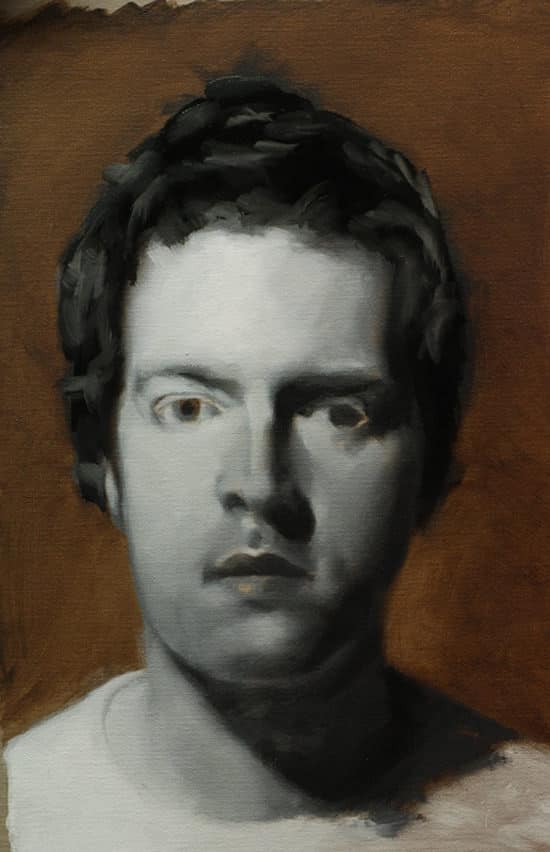
The fused edge now feels better, the temptation to go in and add some details to the eyes will be strong. But we are still trying to check the drawing and alter any shapes. We are going from the general to the specific. the smaller forms fitting into the bigger forms.
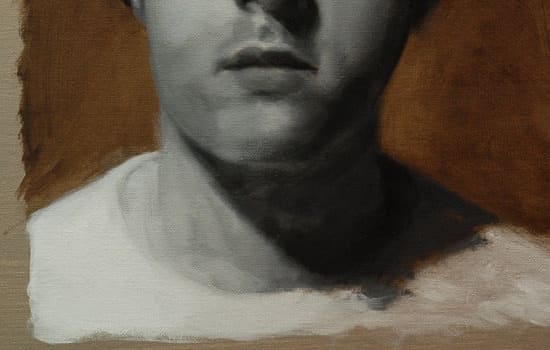
I add a few thicker brushstrokes onto the light side of the neck, it’s a good tip to try to keep the lights thicker and the shadows thinner. Notice how the brushstrokes haven’t been blended at this stage, just flat tones.

Now we can start to add some more detail to the eyes, I use the smaller round sable brush. When the line first goes in it can look quite hard and ‘cartoon like.’ I then use a soft dry sable to soften the edges.
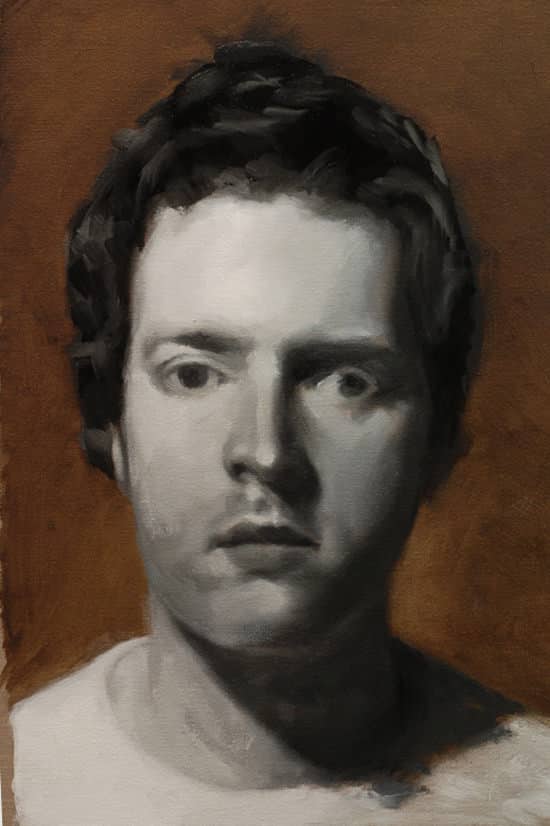
Notice how the eyes have a softer finish than the previous photo.
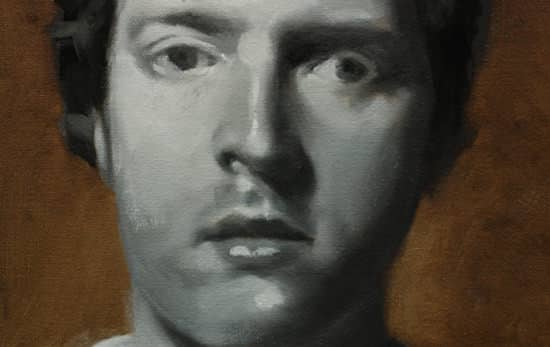
I then begin to add further lights onto the portrait. These again can feel ‘stuck on’ as there isn’t the wet paint underneath for the new light pigment to blend into.
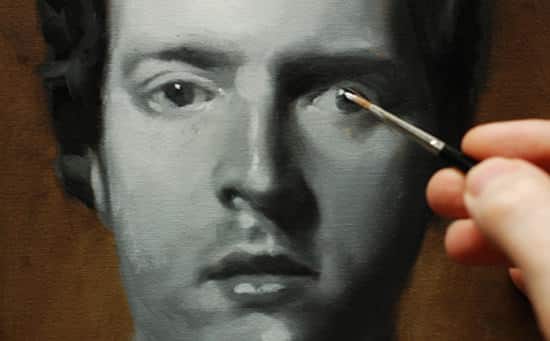
To help judge the tones I now add a pure titanium white highlight to the eyes, these are simply two dots of white. It’s amazing how much life these can bring into a portrait.
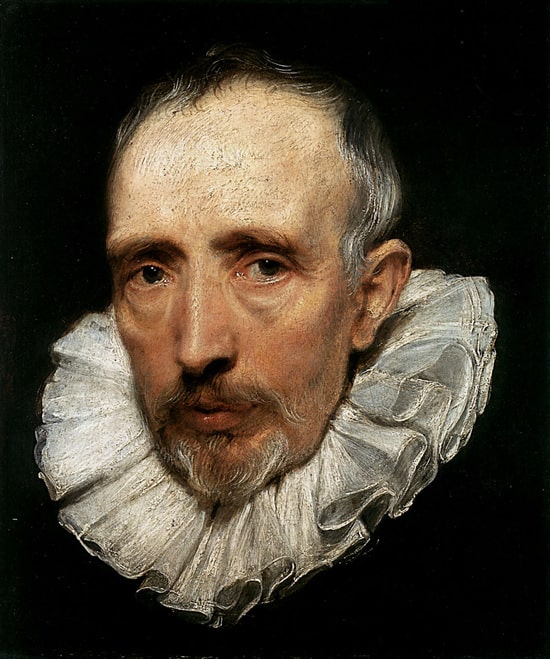
Anthony van Dyck, Portrait of Cornelis van der Geest, 1620
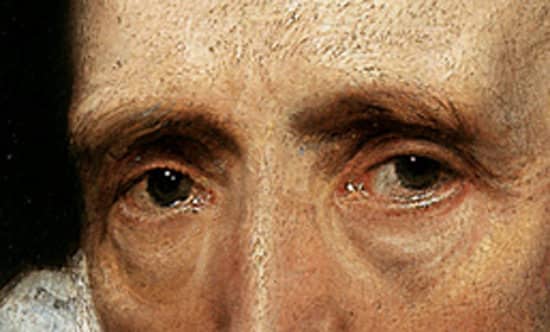
If we look at the number of highlights in the eyes of van Dyck’s portrait you can see how effective they can be in creating the illusion of realism in your portraits.
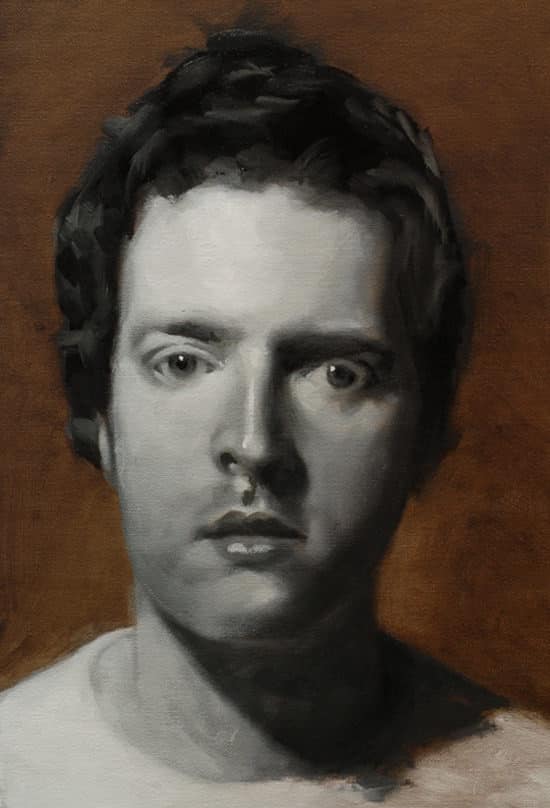
I now model the shape more using the smaller brushes, I might work between a size 2 & size 4 of the Ivory filbert and the sable.
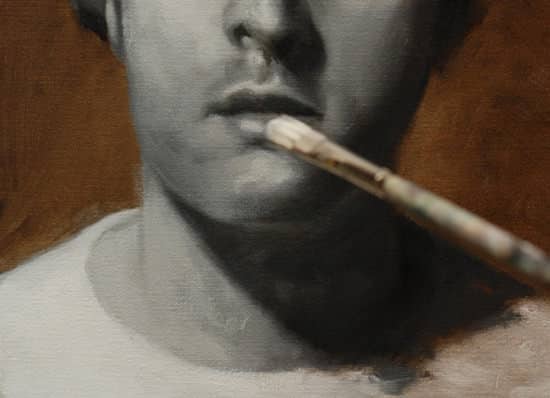
I then begin the soften the edges again and make any adjustments in the drawing. At this stage, just a few millimetres of a line out can make a big difference. Often you are so close to cracking the sitters character, then a brushstroke goes a little the wrong way and it takes to an hour to get back to where you were before.
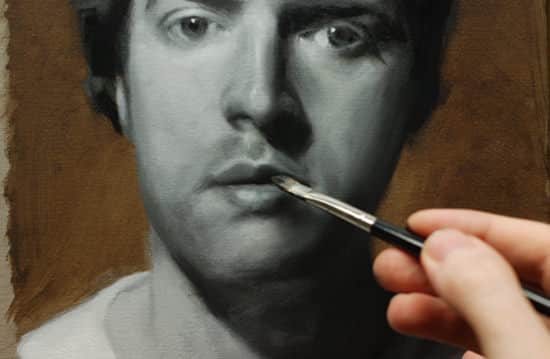
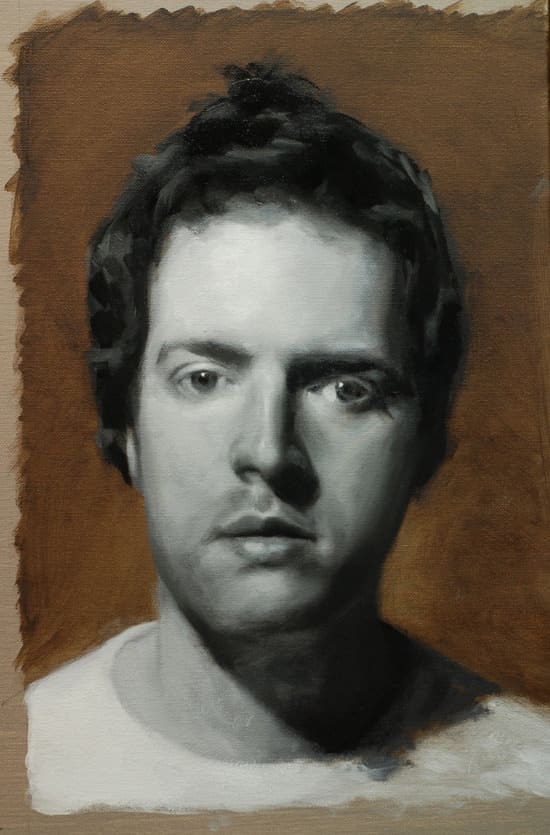
On this stage I’ve reworked the cheek that was in the shadow as it was making my face look too round, I’ve adjusted the drawing and it seems to be working better.
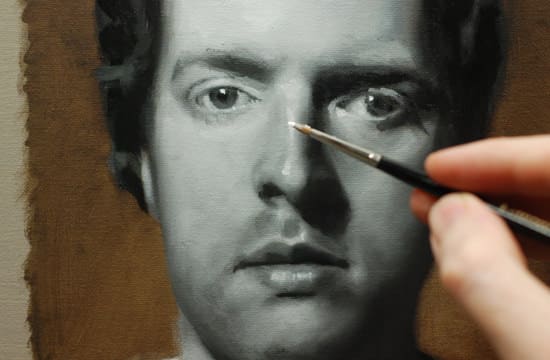
I now add some more highlights to the nose and the eyes.
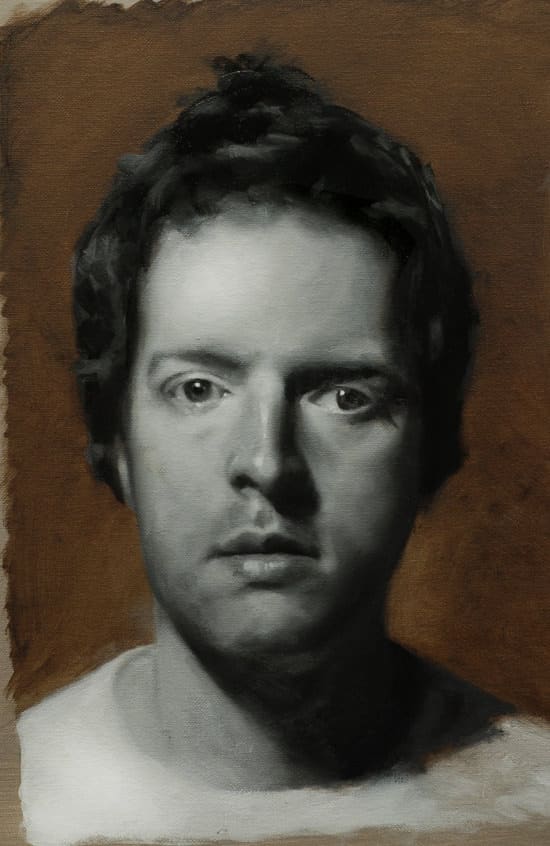
So now we have the painting looking more like the sitter and the features with more detail and form.
Tune in next week for stage 5 when we add the final glazing and finishing touches to the painting.
Happy painting!
You might also like:
1. How to Paint a Portrait in Oil – Part 1
2. How to Paint a Portrait in Oil – Part 2
3. How to Paint a Portrait in Oil – Part 3
4. How to Paint a Portrait in Oil – Part 5




Hello Will,
I have a question about my painting before I mess up. Can oil paints be mixed with kitchen oils? Such as the ones that my mum puts on the cookie sheet to make tarts.
Also I would like to know why is it that green or light blue with a skin tone messes up my paintings. Am I adding too much or to little.
Thanks,
David A.
Hi David,
Oil used with Oil Paintings is different to kitchen or cooking oils.
There are two kinds of oils: drying oils and non-drying oils.
The kind of oils used in an oil painting are drying oils; non-drying oils are oils such as olive oil and corn oil (cooking oils, basically). Drying oils are things like linseed oil, poppy oil and walnut oil—these are the three that are most common in painting.
Of these, the most common is linseed oil. and you’ll be able to get from dick blick or your local art store.
Linseed Oil
The most thorough-drying and the most durable (the thorough drying reduces the likelihood of later cracking)
“Touch dry” in 3 to 5 days
Yellows and darkens slightly as it dries Yellows and darkens more with age.
When you say the blue or green mess up your skin tones, how are you using it, mixing it into a mix or using direct onto the canvas?
Speak soon,
Will
Hi Will,
When I mean green and blue mess up my skin tones I mean like, I see those colors on peoples skin that I paint but when I mix it in to the colors I use for skin tones (Burnt Umber, Burnt Siena, Titanium White, Primary Red, Cad Yellow Light, Cad Orange Light Hue Permanent) it comes out in a different color than on my palette.
Is there a special shade of green or blue I should use?
Thanks,
David A.
Hey David,
Often a muted green or blue is best. Terre Verte is a very subtle green and will tone down a red without pushing the colour out too much.
I don’t personally use a blue, I would rather mix black, which has a blue base, in with the colours.
The other technique is to use green as the underpainting. This was used in renaissance painting, especially on portraits because you could then add subtle glazes of warmer red flesh tints over the top and the figures would ‘pop’ in contrast to cool green background.
Using a green/gray underpainting is known as the ‘Verdaccio technique’. Traditionally it was created from a mixture of Mars Black and Yellow Ochre. Again, it was used to establish tonal values in the underpainting. Due to the green colour of the flesh at this stage of the painting it is sometimes called the ‘dead colouring’ stage of a painting.
Hope this helps,
Will
Thank You Will.
David A.
You mentioned above that on the face it becomes difficult to blend because you have no base paint to work into. Do you ever apply a medium to the entire canvas before you start this phase of painting so you have something to work into? Thanks!
Hi Michelle,
Yes, sometimes I do work into a medium (this is called a Couch) but when you’re first starting I find students get a lot better results with as fewer options as possible and working into a medium brings it’s own problems.
More often than not I would do it section by section rather than the whole piece,
Thanks,
Will
Hello, I have a few newbie questions I hope you wouldn’t mind answering.
I’m just now starting out on oil painting, and I bought some cheap Reeves Water Miscible Oil Paints. Is this a good way to start out? Are there any significant differences between using water miscible and traditional oil paints?
Do I have to gesso my canvas board every new session?
And what kind of brushes do you recommend? I have some brushes, but they’re more like water color brushes and I noticed that they’re pretty flimsy.
I appreciate any help you could give me. I’ve been drawing for years, but I’m just now getting into painting and it’s really intimidating.
The brushes are made using a unique blend of high quality synthetic fibres which are designed specifically to Hi Spy,
Water mixable oil paints can be a good place to start if you don’t want to use solvents when painting but want a longer working time (drying time) than acrylics. You don’t have to gesso your canvas between sessions, just once before you start your painting. As for brushes, with water mixable oils you want a brush that is a bit stiffer than the watercolour brushes but not quite as thick as a hog hair brush, due to longer exposure to water a brush with a mix of synthetic and natural bristles would work well. Winsor and newton have developed some brushes specifically with water mixable oil paints in mind that you might find useful, they are called ‘Artisan range of brushes’
Hope this helps,
Will
Hi,
Saw the close up van dijck portrait of Cornelis van der Geest ( middle of this article) . How do one becomes a result in the paint of the face as in this case where the skincolor looks like fingerprinted/I mean the surface isn’i flat but looks like fingerprints putted in the wet layer of paint. Is this due to lead white as underground? Or any link or tip how to reacht this effect. I would like to polychrome a small portrait bust in terracotta and this is the skin color I would like te obtain.
Hi Deckers,
It is a result of thicker impasto paint and a base of lead white being used to achieve a more textured finish.
You will be interested in this more in depth article on how this particular portrait was painted.
Cheers,
Will
Superb article. Thank you very much.
Best regards
andres
You’re welcome Andres, pleased you liked it.
Will
Hi Will,
Have reached this stage with the portrait. I have found it requires a lot of intense concentration – probably more than I’ve done up to now. A lot of it is to do with the feel of the brush as you work with the paint. Everything is very subtle. I’ll no doubt invest in some sable brushes in the future but altogether I think I’ve made a reasonable attempt so far.
Working on card has meant that I couldn’t quite get the degree of softness that you achieved with canvas and its greater texture but I didn’t stress myself out over this. I could see the limitations of the tools and materials.
And anyway its my first go!
I’m waiting for the paint to dry a bit more before I tackle the last stage.
I tried the method of storing paint in the freezer to stop it going off. It works quite well. How long can oils be stored for in the freezer in your experience?
David
Hi David,
Yes, this stage does need a more concentrated focus, as even the slightest shift in tone or shape can change the look of the subject.
Regarding freezing of oils paints In my personal experience I haven’t left paints in the freezr for longer than a few days.
Anne Marie Helmenstine PhD said:
You might find the full article by Marion Boddy-Evans interesting.
Cheers,
Will
Cheers Will,
Interesting article.
Regarding acrylics – by using a large flat food storage boxes as a pallette I’ve managed to keeps paint fresh for months.
I use the box upside down i.e. the lid is the pallette, I spray the paint with a mister when I’m painting and the box itself goes over as a cover.
David
Hi Will
The tutorial is excellent and easily the most detailed and complete step by step online guide I have found…and believe me I have read many before I managed pluck up the courage to have a go. Thankyou for your help.
I have completed the acrylic stage of my son’s portrait and am ready to move on to mixing my value range with oils. I have kept the hard edges and looking at it from a distance it appears to blend in nicely and I’m impressed with what I’ve managed so far…for a first attempt at this style of painting anyway.
What is your view on the Artisan water mixable oil paints and thinners? Are the same results achievable?
What types of varnish do you suggest?
Once again…thanks for the site and please keep adding to it.
Billy
Hi Billy,
Thanks for your kind words on the portrait tutorial, really pleased you’re finding it helpful.
Similar results can be achieved with the Artisan water mixable oils, but if you just use water as a medium they don’t flow as much as with traditional oils.
Varnish wise I prefer a gloss finish, so either Winsor & Newton Gloss varnish, or Gamblin Gamvar is nice.
Cheers,
Will
Hi Will,
I “stumbled” onto your site a couple days ago and boy am I glad I did! I have read your tutorials over and over again and decided to start on a portrait Monday following your directions. I am working on Part 3 at the moment and am amazed at the progress I am making thanks to your detailed information and explanations. I can’t thank you enough for so generously sharing your knowledge. Hats off to you!!!
With regards,
Diane
Hi Diane,
Nice to hear from you, so pleased you’re having good progress on the portrait course. Looking forward to hearing how your portrait turns out on the final part!
Cheers,
Will
I painted a portrait that became dull and dark after it dried. It wasn’t this way before it dried. I used your step by step as close as I could. I used a little bit of linseed oil but that is all. What can I do to brighten it up a bit? A glaze?
Michelle
I can send images
Hi Michelle, the oil has just ‘sunk in’ to the canvas. The sheen is usually brought back by using a varnish or ‘oiling out’ the surface. You can read more about it here
Cheers,
Will
Thank you so much! I will varnish the painting as soon as it is a few weeks older!
Again, Thanks! I love your site!
Michelle McKnight Davis
Hi Will,
I would like to ask about the time we should wait between the layers of black and white paint. You wrote that raw umbra needs only a day to dry, but when can we come back to the finished Stage 3? Finished Stage 4? Do these layers need to dry completely or can we continue on a still wet layer?
Veeery nice tutorial.
Cheers,
Marcin
Hi Marcin, for this demo I return when the stages are dry, but you’ll find with different portraits you’re working on sometimes you don’t need an entire day, you’ll be able to continue on when the layers are wet.
Hope this helps,
Cheers,
Will
Hey will! I’ve been learning a lot from your tutorials and you have explained it in ways that can easily be understood. This portrait tutorial is awesome!
But Im having a problem with doing a portrait in monochrome (im using ultramarine).
My art teacher said not to use black oil paint and I’m having problems on how to darken it by layering. And im doing a chiaraschuro type of technique to my portrait (just like what you do did) And its very hard to get the darks without using black. Any suggestion on how to achieve darker tones with ULTRAMARINE without using black??
Daniell
Hi Daniel, nice to hear from you, and so pleased you’ve been enjoying the portrait lessons. To darken the ultramarine blue you can add some burnt umber, this will give you a nice dark black colour.
Hope this helps,
Cheers,
Will
Hi Will!
I have some problems with transferring an image into a canvass.
I’ve always wanted to do freehand drawing but my problem is always proportion. Any tips on how I can get a better copy of a photo, even if my reference is not the same size as the canvass ??
-Dennis
Hi Dennis, one of the most simple methods is to grid both your canvas and reference image. The more grids, the more detailed your image will be. Here’s a nice tutorial that goes through the process.
Hope this helps,
Cheers,
Will
Thanks a lot Will!
Will why do you do an underpainting when you just cover it up with opaque paint??
What is the effect you are after? I dont seem to get it. I thought it should be done transparently so as to reveal the color beneath? I mean what does this type of style exactly do to your painting?
Sorry for all the questions :D Im just really confused.
Hi Terry, with this method you are learning how to paint a ‘colour’ portrait – by stealth! Getting used to establishing the underpainting with earth colours is a great practice if you are interested in developing your classical painting skills. By having the dark quickly established it helps you to judge the relative darkness or lightness of the colour strings that will be applied to the next layers.
Hope this helps,
Cheers,
Will
hey will, what do you mean by doing an underpainting juxtaposes nicely with highlights? I just don’t grasp the concept yet.
Hi Dennis, having a thin, dark, under painting that establishes the form, then when thicker white highlights go ontop they balance and contrasted together. Thin, dark shadows with thick, white highlights.
Hope this helps,
Will
Sir, I want that my painting will glow after it’s finish . What I will add only spraying the varnish? Thanks.
Just apply a gloss varnish to bring the glow back to all of the colours.
Cheers,
Will
hi, and thank you so much for the incredible site.
I have a question about the layer with Dammar varnish. Why do you want to mix in the Dammar varnish, what does it do that is not achieved when you varnish the whole painting?
Thanks in advance and venlig hilsen marianne
Hi Marianne, the dammar gives the medium a different flow to the paint and is especially useful for subtle glazes.
Cheers,
Will
Hello Will,
I am working with oil for the last 6 years. I worked my whole life with acryl as an illustrator mostly art impressions. I am 79 years old and stopped my profession and that gave me the possibility to change to oil because of the more beautiful colors. And now comes my question. If I want to paint black I always used dark brown mixed with blue and I avoid to use black. Black is to me a death color and with brown and blue the whole painting remains in a warmer tone. What is your idea about this.
With greetings, Jan
Hi Jan, personally I quite like black and use it for muting down skin tones for portraits, but you can still make a really lovely chromatic black using a dark brown and blue. You might find this article of interest: Are these 3 black paint myths holding you back?
Cheers,
Will
Dear Will,
First of all thanks for posting all this very interesting info. Don’t know if you are still looking into these comments but here’s a question about the mediums in this tutorial. 1st medium is 1 to 4, linseed to OMS. 2nd is 1 to 3, linseed to OMS, then the 3rd jumps from skinny to obese as in 2 to 1 linseed to OMS. That’s not a typo is it, is that correct? I’m a painter from India and I’ve always wanted to investigate the methods of the ‘old masters’. Thanks again for your time and expertise.
R.
Hi Rupak, yes, that’s right, those are the ratios I use. You often want the first couple of layers to dry relatively quickly and then have more working time as the painting progresses.
Cheers,
Will
By far the best site about oil painting I found on the internet. I’m 65 and I’m trying to find a hobby since I am now retiring from a really stressful work. I worked in a bank all my life. As my English is not good at all I would like someone who knows English and Portuguese could help me in some translations. For example: 1) what is the name color RAW UMBER in Portuguese? (understood to be a kind of brown, but which one?). 2) What is specifically a sable brush? 3) I did not understand that way how to keep your oil paint workable between sessions: “Mix the large blob of paint, let it over skin and remove the skin and use the fresh paint underneath”.
Who can help me?
Greetings from Brazil
Hi Ademir, I think ‘Terra Sombra Queimada’ is Burnt Umber, but I’m not sure what Raw umber is. Raw umber is cooler that Burnt umber. A sable brush is a soft-haired brush.
“Mix the large blob of paint, let it over skin and remove the skin and use the fresh paint underneath”.
When oil paint dries it will form a skin on the outside first, but still have wet oil paint underneath the skin. You can peel off the skin of dry paint to reveal workable paint underneath.
Hope this helps,
Cheers,
Will
Thanks a lot Will!
You’re welcome Ademir.
Hi Will
I’ve hugely enjoyed working through this black and white portrait (thanks for the advice re letting the layers dry). As I wait to do the final session I’m fired up to beginning to look at a colour palette. I’ve taken your basic limited portrait palette but can’t get the English red – is there a good alternative? I’m also wondering whether to just go for it and get the whole extended portrait palette – is that crazy?
Thanks again and all the best.
Andrew
Hi Andrew, really pleased you’ve been enjoying the portrait lessons. The English Red is a synthetic iron oxide, the pigment code is PR101, so if you have a look on the back of the paint tube (mostly displayed on artist quality paints) you can see the pigments used. So look for an iron oxide red, on the Old Holland colour chart you can see the English Red, it’s quite muted colour. Alternatively, you can increase the colour intensity of the red and go for a cadmium red, just need a little.
Hope this helps,
Cheers,
Will
Dear Will,
You said “this is usually the stage where most beginners stop”, I have to admit that that I’m one of them. Here you can see my 1st trial (https://photos.app.goo.gl/i8S4xokwvMQCOMEp1), sorry that I didn’t do a good job on your portrait. Until last stage, I could still manage to remember those “simple shapes, flat tones”; here suddenly, they seem to have fallen apart and look quite alien to my mind, so I find it impossible to go on. However, it is not a surprise as my last training on drawing was the light-shadow apple course. Nevertheless, I want to thank you for this great tutorial and I will do it again, starting with a drawing.
Hey Ping, pleased you’ve been enjoying the process. You’ve got a good sense of the light fall and the shadow side of the face has been handled well in the transition between the tones. All that has happened is the features are in proportion, and the face is in proportion, they just aren’t quite in proportion together. This is a common issue when drawing/painting portraits so I wouldn’t be too hard on yourself, really excellent start!
Will
Thanks for your comments and encouragement.
My pleasure Ping
Hi Will,
Great course! First time trying a portrait. I’ve just finished stage 4 of the portrait but I’m having a little difficulty with the background. As my hair is blonde, it doesn’t blend as well with the dark background and the portrait has a bit of a “stuck on” appearance. What can I do to fix this? I’m fairly pleased with it so far but I’m worried that painting over it again will spoil it. Not sure if I should be painting the whole thing again ( stage 5) or just glazing the darker areas. You advice would be most welcome.
Regards, Judith
Hi Judith, glad you enjoyed it. Yes, just glazing the darker areas down at this stage. You can try just working on the edges of your portrait to soften the line, this will help to make it feel part of the background without having to repaint the whole area.
Will
Hi will, I think I made an error at the very beginning, did you do a raw umber wash over the whole canvas as a mid tone before you drew the portrait? As I got to the highlight stage and realised it was the same tone as the canvas….. really enjoing the process though, thank you :)
Hi Jo, yes, I applied a grey tonal ground to the whole of the canvas first. Pleased you’ve been enjoying the process.
Will
Hi Will,
I’m so excited about this tutorial. Thank you for sharing. What is the next step to move from monochrome to a full color palette? Do you have a tutorial on this?
Hi Cindy, pleased you enjoyed it. The next step for a colour piece would be to apply coloured glazes. I have a full portrait course on it here : How to Glaze an Oil Portrait for Beginners.
Cheers,
Will
The linseed oil you use, is it boiled linseed oil?
Hi Rob, usually cold-pressed linseed oil.