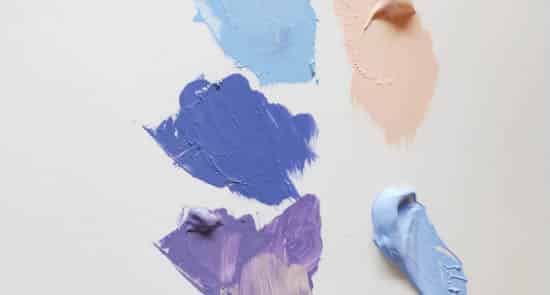
“With a limited palette, the older painters could do just as well as today… what they did was sounder.”
Pierre-Auguste Renoir
Lessons for an Absolute Beginner
Part 3 of this 4 part video series for beginners to acrylic painting
The first thing I do is block-in the bottom half of the sky with the pinky tone; I’m not worried about too much detail, just getting a general tone blocked in.
This helps you judge relative tones and assess the next layer of colours that need to be added.
The ‘block in’ is still using the same premixed colours that we used for the sky and the clouds.
By using a limited palette, it makes it easier to create a visual balance and harmony.
You will tend to try and paint the sand ‘more sand coloured’ as it has such a strong emotional bond with our memories of what colour sand ‘should be’ rather than what the colour actually is.
Try using the purple and see how you get on.
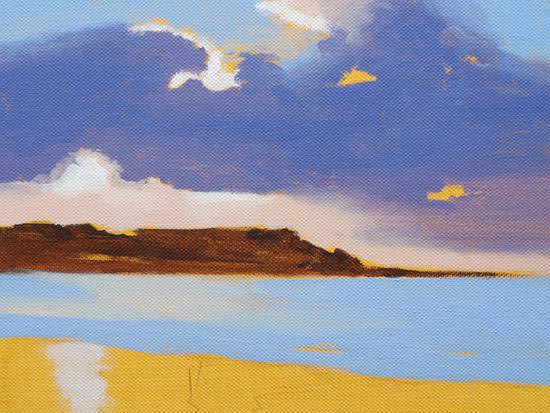
The water and the sand are blocked in next on the painting. The colour mixture for the water is ultramarine blue & titanium white.
Because we haven’t muted the blue down with a complementary colour, it will have slightly more vibrancy than the sky.
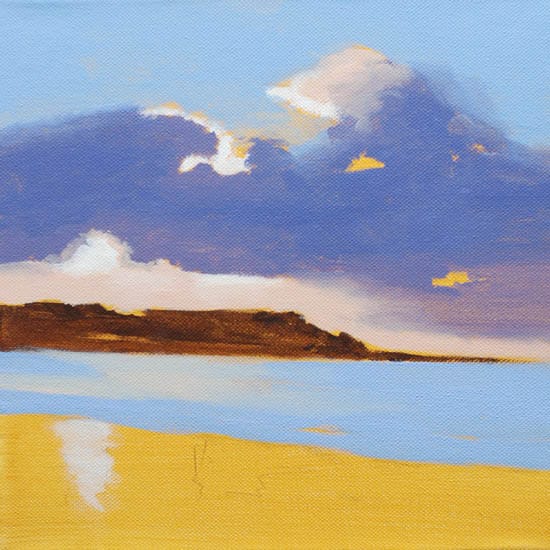
Notice how the yellow of the underpainting appears much brighter now we have the blue placed next to it in the painting. This is the effects of simultaneous contrast that will happen with colours whilst painting.
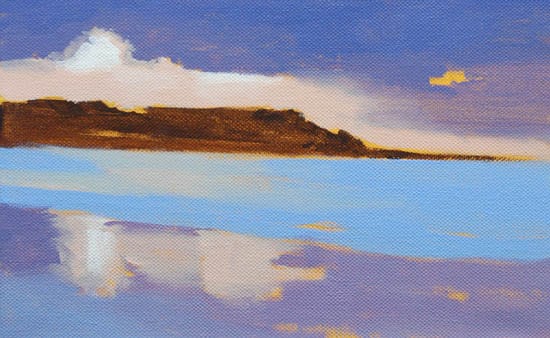
Notice how the blue doesn’t appear as vibrant now the purples have been painted onto the foreground. By working quite painterly and leaving parts of the underpainting showing, we can create a harmonious landscape that still has a freshness.
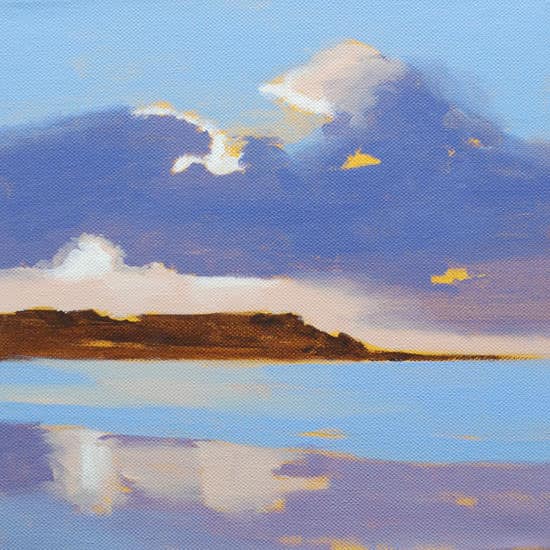
Now we have the full painting blocked in.
Using the technique of a limited palette is very effective and efficient. It means we can create an image that has both unity and colour harmony.
The final stage will be to enhance some of the colours in the picture and introduce some pure Alizarin crimson. This will help to create a focal point in the centre of the sky.
Acrylic landscape painting- Free video Course |Part 3
The video below shows the third video in the acrylic landscape painting. The final steps will follow next week. Make sure to subscribe to my YouTube Art school Channel to keep updated, you don’t need an account, and you’ll get weekly email updates when a new video is posted.
You might also like:
1. Acrylic landscape painting techniques – Lesson 1
2. Acrylic landscape painting techniques – Lesson 2
3. Acrylic landscape painting techniques – Lesson 4



Fantastic. Thanks. Very easy to follow, and made all the more entertaining with Vanessa strumming the mandolin in the background :)
Thanks Ali, Vanessa’s flexing her fingers for next weeks lesson, I think she might be going for a world record!
Will
I enjoyed learning your techniques
Thanks Ann Marie,
Will
Hi, I am very happy to inform Mr. Will Kemp. This acrylic landscape painting is very useful to beginners. Please send this type of paintings to my mail…waiting for your reply…Yours Bikshapathi, MA,MPhil,PMIR,BEd.
Hi Bikshapathi, thanks for your kind words.
For updates on new painting tutorials just add your email to the “sign up’ box at the top-right of the website. This way you won’t miss any new articles.
Thanks again,
Will
Aloha Will.
I live in Hawaii and have just viewed your tutorial on the absolute beginner seascape. I tend to be intimidated by the vibrant colors, fearing that it will look too unrealistic, even when the colors I am mixing and using are the actual colors in the picture. Thank you for plodding ahead and just focusing on the colors and shapes, not getting too caught up on the actual subject you are painting. Your fearlessness helps me ‘get out of my head’ and just paint what I see. Thank you so much, Will. Please keep these tutorials coming!
Meg
Hi Meg, thanks for your kind comments.
Try taking the painting step-by-step and I think you’ll surprise yourself with the results, let’s ‘feel the fear’ and paint it anyway!
Cheers,
Will
I searched for “beginner paintings” to try and came across your site. I’ve gotten through part 3. I’ve never painted this way before. My painting is a bit different than your is but so far I think it’s okay. I’m not so sure it’s going to come out well. Perhaps it’s because I am doing this in several sittings. However, I am really enjoying this site. Thank you Will, for taking so much time to put all of this information together. I’ve been a self-taught beginner painter for about 15 years now and feel stuck. I usually paint abstracts but have been challenging myself more lately with landscapes. Thank you.
Great to hear it Jeanine, so pleased you’ve been finding the lessons helpful in your painting.
Cheers,
Will
Where is the part 4?
Hi Jeanine, there is a link to part 4 at the bottom of the article,
Cheers,
Will
Being REALLY REALLY new at painting and any type of art work, I enjoy your classes as you make it so easy and helps me to continue even more and my desire for learning with you has increased…. I don’t get a lot of time to paint but it is wonderful that I can just go back to your website and pick up where I left off. Thank you so much for sharing your talents………I look forward to more and more…..
Great to hear it Sandy, so pleased you’ve been enjoying the lessons.
Cheers,
Will
Hi Will, firstly I want to say how much I enjoy your teaching. I had a few lessons a couple of years ago and my teacher was very similar to you which has given me more confidence.I have bought some of your courses and I hope to finish the over our New Zealand winters as I took a break over summer. I’m doing a landscape, I’ve gessoed the canvas and done the tonal ground and lightly done the lines with a 3b. My canvas is 22” x 24” and my question is , do you do the first stages on that sized canvas on a flat surface or an easel. Also my scene is rural so for the colour blocking of the darks should I colour match the actual colours of the darks?
Regards,
Ann
Hi Ann, nice to hear from you and so pleased you’ve been enjoying the lessons. I tend to work at the easel for the blocking-in, but you can also work on the flat, depending on which you prefer. For the blocking-in, you can either work with a general base for the darks and then get more refined for the next layers (for example Burnt Umber for the entire piece) or tweak the colours to better match the subjects, muted greens/blues etc.
Cheers,
Will