
Acrylics are a great medium. Pick up a few well-chosen materials, and after a simple set up, you can paint on almost any surface.
But.
They dry quickly. And sometimes really quickly.
If you’re new to painting, the seriousness of this small window of free-flowing acrylics begins to dawn on you, little by little.
The paints don’t seem to blend quite as well as they did when you first put them out on your palette. In fact, that expensive paint you took so long deciding on has now gone completely hard, and there’s a distinctive shift in colour.
This is not just frustrating but feels like an undisclosed complication.
You thought it was going to be getting the painting techniques right that would be difficult, not battling with the paint drying out too quickly.
So how do you stop it from happening?
Paint faster? Invest in specialist paint mediums? Use a broom rather than a brush?
Humidity
Everything revolves around evaporation.
Controlling water evaporation is the key principle to manipulating the drying time of your acrylics.
Acrylics dry by evaporation. So, the wetter the air around the acrylics, the longer they stay wet. You might be painting in a dry climate and not realise how much that affects the paints’ workability.
The drier the air, the faster the acrylics will dry.
- Wet air (around acrylics) – paints stay wetter.
- Dry air (around acrylics) – paints dry out quicker.

In my studio, I’ve got a humidity and temperature monitor. This helps to keep an eye on the water content of the space, so I can adapt my techniques if needed.
I’ve noticed when I’m painting near the coast, and there’s a higher amount of water in the atmosphere, the paints will keep working for a lot longer. If you are based in an extremely dry climate, you could introduce a humidifier into your space that will emit steam or water vapour to increase the air’s moisture levels.
Heavy Body Acrylics under ambient conditions of 70ºF/21ºC and 30% Relative Humidity in a 0.15mm brush stroke.
wet: under 5 minutes
workable: 10 minutes
touch dry: 30 minutes
locked down: 3+ days
Temperature & Air Flow
If it’s a hot summer day, you might have placed an air conditioning unit or fan next to your painting space; this will shorten the working time of the paints as airflow aids water evaporation, definitely something to consider.
Pro tip: It’s also handy to check the ambient temperature of your studio. If you drop below 9° C, it can cause issues when creating a strong paint film.
Acrylics are ideally used at room temperature, above 60° F / 16° C, and avoiding any applications below 49° F / 9° C, which is the so-called “minimum film formation” temperature (MFFT). Below that temperature acrylic paint cannot form a strong, coherent film and will be prone to failure and various drying defects, such as cracks, poor adhesion, and cloudiness – Golden Paints
On top of your studio environment, there are a few successful ways to manipulate the drying times of acrylics by controlling evaporation. However, I don’t use them all in one painting but pick and choose whatever would work best for the style or stage of the piece I’m working on at the time.
How would you speed up the drying time?
Here’s an inversion thought experiment.
What would you do if you had to dry acrylic paint as fast as possible?
Paint in a thin layer? Warm room? Wind turbine? Sunshine? …Blow torch?
If I had to get a painting to dry as quickly as possible, I’d use a hairdryer on thin paint. High airflow, high heat, about 1 cm from the paint surface! This expels water the quickest from the paint.
And this knowledge is the secret to your success.
All we have to do is work on the opposites.
#1. Paint volume
Paint thicker.
The first thing to consider is the actual paint volume. And that’s how big a volume of paint you put out onto your palette.
When you first start, you’re worried that you’re going to waste paint, so the tendency is just to put out a small blob. You’ll find that goes dry, very, very quickly.
When I lay out a palette, I put out a larger amount of paint than I think I’ll need. I know I might end up throwing some of it away, but it enables me to mix plenty of colours, get more accurate mixes, and have the paint stay wet on the palette for longer.
So next time you squeeze out your paint, try squeezing out double. It will feel awkward to start with but will really help.
Pro tip: This is in comparison to oil painting, where you can get away with putting a relatively small amount of paint out, and it will stay wet and usable for days.
#2.Water Mist


Water-mister
To try and balance the water leaving the paint surface, you can mist your acrylics on the palette as a way to re-introduce lost water from evaporation.
You can either use water or a specialist acrylic medium designed to keep the palette wet.
I tend just to use water and would usually mist a larger palette when working flat on a table. If I’ve got the palette upright on an easel, I find over-misting the paints can lead to them dripping down the palette.
You can also mist the canvas surface throughout your painting to add extra moisture to the paint layer.
Liquitex makes a specific palette wetting spray.
Liquitex Palette Wetting Spray Fluid Painting Medium is an innovative fluid acrylic resin designed to slow the drying of acrylic colours. Allows you to keep your palette colours fresh longer, preventing the paint from ‘skinning over’. Improves colour blending. Can be used to thin colour while maintaining film integrity. Formulated with an anti-microbial agent to prevent mold. – Liquitex Paints
#3. Slow-drying Mediums

The most common dilutant with acrylics is water, but you can add something in with the paint that will either evaporate slower than water or slow down (or retard) the polymerisation process of the acrylics drying.
These products are known as additives or mediums.
They each have different benefits, depending on how you paint.
i. Additives (Retarders)
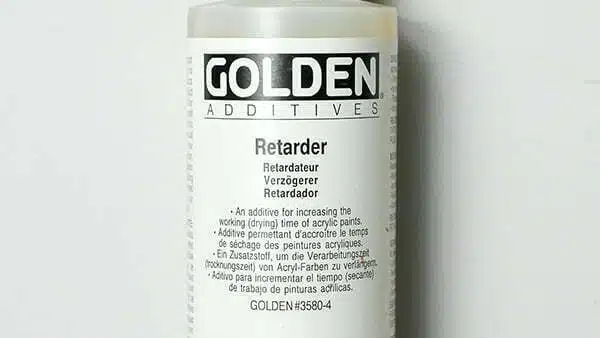
Acrylic Additive, Retarder, Golden Paints
Acrylics are pigments suspended in an acrylic polymer binder.
When you dilute with water, you dilute the binder’s ratio, which can affect the paint film integrity.
Additives do not provide any binding qualities, so they often have limitations to how much is recommended mixing in with your paints. If you add too much, the paint stays gummy and doesn’t fully cure or fully dry.
Acrylic retarder can add about 10-15 minutes to the working time of the paint, and with Golden Paints Acrylic Retarder, you can only mix in about 10 – 15% in with your paint mixes.
I find using it can be okay, but only when I’ve first put out my paints and have squeezed a little bit of the retarder on top because at this point I can judge quantities.
The issue comes when you’re halfway through a painting and want to use it again. It’s very hard to gauge with your brush whether you’ve got 15%, or if you got 10%, or did you go 20%?
So I find using an acrylic retarder is definitely best suited as a pre-painting option.
ii. Slow Drying Acrylic Mediums

Slow Drying Medium, Winsor & Newton
This is a slow drying medium from Winsor & Newton; and what’s nice about this product is because it’s clear, you get very little colour shift when the paint dries.
Most acrylic mediums are white when wet but clear when dry. This changing from white to clear is a colour shift consideration in most acrylic mediums and paints.
Pro tip: Winsor & Newton professional range of acrylics also use a clear binder.
The other great thing about this medium in comparison to retarder is you can use it up to a 1:1 volume with the paint.
So one part medium to one part paint.
This is really handy because its a much more fluid consistency than with the 15% dilution of the retarder, and with a 1:1 mix, it’s much easier to judge the ratio throughout your painting,
However, be aware.
If you add that much medium, you are diluting the paint’s opacity by half. If you are using a student or hobby grade paint, diluting by half will have quite an impact and difference in the paint coverage and handling.
iii. Acrylic Glazing Liquid

Acrylic Glazing Liquid Gloss, Golden Paints
Acrylic Glazing Liquid Gloss (now called Gloss Glazing Liquid) can be used in any ratio with acrylics.
I find this excellent for applying thin layers of paint, with more working time and it ‘holds’ a paint film. You can see me using it in this acrylic glazing tutorial.
#4. Palette choice – i) Tear off Palette
I tend to work on paper palettes. These are thin disposable sheets with a non-absorbent sheen to the surface that repels the paints so they don’t soak into the palette.
If you’re using a paper plate or a styrofoam paper plate, they will absorb and soak up the moisture from the paint from underneath and dry out your paints.
ii) Palette – Stay-wet palettes
If you want your acrylics to last even longer or keep your acrylic paint from drying out overnight, there are two main options.
You either keep the colours in an airtight container or keep the paints in a stay-wet palette that ‘feeds’ the paint more water.
The stay-wet palette consists of two layers :
- An absorbent paper layer that is soaked with water – acting as a water reservoir.
- A sheet of grease-proof paper – this acts as a membrane to stop all the water going into the paint immediately.
You lay your acrylic paints out on top of the grease-proof sheet and as the acrylics dry, the water in the paint is replaced by the water that is held in the absorbent paper layer.
This will keep it workable for much, much longer, but there are a couple of caveats.
- Paint going too liquid
- Palette going mouldy
- Surface ripping if using a palette knife
- Space of surface
Because you’re adding water to the paint through the palette, there is a danger of adding too much water. If you’re using a soft body acrylic or a student grade acrylic, sometimes you can come back in the morning, and all your paints have run into each other.
If you’re using heavy body paint to start with and a moist but not soaking stay-wet palette, it can help to give you a really nice consistency for a few days. This is what I tend to do if I’m working on a larger scale painting.
iii) Airtight Palette


The clasp creates an airtight closure onto the paints.
An alternative to a stay-wet palette or a flat palette is to use an airtight palette.
These can be very handy to save leftover paint or use as a palette. The acrylics in the box above, have kept workable without any retarder, medium or extra moisture for over 2 months.
There is a little scraper that you can decant some of the paint with and even a thumb holder on the back!
#5. Painting surface
If you paint on a traditional absorbent gesso, it will suck in the water to create a good bond to the surface, but you can also mist the back of your canvas with water prior to painting. This acts like a stay-wet palette.
As the water evaporates from the front of the canvas, the paint draws water from the pre-wetted surface. This only really works at the first stage of a painting, you can also wet the front of the canvas before you begin.
#6. Choose your brand
Some student brands can dry quicker than artist quality brands, and different paint manufactures have different drying times, for example, Winsor & Newton claim an extra 20% working time in comparison to other brands.
#7. Mixing with OPEN slow-drying acrylics

You can also get more specialist acrylics that are designed to be a lot more slow drying. Golden make a range called OPEN acrylics, which have a lot longer working time.
You might be interested in this comparison article I wrote on Heavy-Body Acrylics vs OPEN Acrylics.
I found OPEN paint is a bit of a different beast than standard acrylic, the paint thickens as it dries, rather than forming an outer skin like traditional acrylics. The main issue for me was that they’re really designed for painting in thin layers,
OPEN Acrylic Colors are best used in thin layers. Applications of more than 1/16 inch / 1.5 mm (wet film thickness) will result in:
– Excessively long drying periods
– Persistently soft, higher tack feel
– Translucent layers that remain cloudyGOLDEN ACRYLICS
1.5mm is very thin if you prefer thicker impasto marks.
However, what is quite good is you can intermix the OPEN paints with standard acrylics. This tweaks and extends the drying time to create your own perfect mix of slower drying paint. (This is a technique that I use in the Acrylic Portrait Course to create a slow drying white to give me more working time when working with portraits.)
OPEN acrylic mediums
Ok, here’s one final tip, and it’s a good one.
You don’t have to use the OPEN paints to get some of that long working time goodness. You can use the OPEN mediums with your standard existing Heavy Body Acrylics and mediums.
To start with try a 2:1 Glazing Liquid to OPEN Thinner mix. (2 parts Glazing Liquid: 1 part OPEN Thinner)
This will give you a little extra time. You can then start to increase the amount of OPEN medium.
Mix a 3: 1 mix of open medium in with the glazing medium.
When more than half of the medium 60% open medium to 40% glazing medium, the working time is now 45 minute to an hour. – Golden Paints
Less is more with this thinner, Golden doesn’t recommend exceeding a 3:1 ratio if using just the OPEN thinner. (3 parts paint to 1 part Thinner), but diluting it with the Glazing liquid gloss as I’ve mentioned above will give you more dilution.
Add sparingly to acrylic paints, starting at approximately 10 parts paint to 1 part OPEN Thinner. Maximum addition is 3 parts paint to 1 part Thinner. – Golden Paints OPEN thinner
Once you get to grips with which of these methods work best for you within your own painting environment, you can confidently control your palette and concentrate on enjoying painting!


Thank you so much for this article! Like so many of your posts, it provides extremely helpful information. I began painting about two years ago, during which time I have completed several of your courses as well as a number of in-person and Zoom painting courses with other instructors. I keep coming back to you because I learn so much and I love your warm, supportive approach to teaching. Thank you again! I look forward to seeing what happens next with my painting as I apply what I learn from you.
That’s great to hear Kathleen, really pleased you found it helpful. Hope it helps in your next painting session.
Will
So appreciate your tutorial, wonderful advice for something I failed to consider and that is the humidity in my studio .. so wonderful that you share your wisdom and help others be better at painting. You are blessing , thank you so much for the tutorial. Sincerely
My pleasure Elaine, yes, it can really make a surprising difference to the working time, glad you found it helpful.
Will
Thanks for the tips will. Nice to hear from you
Cheers Nalini,
Will
Thanks for the tips. Really helpful. I’m going to have a mess around with some of those ideas and see which work best for me. I hadn’t realised about the ambient temperature needing to be above 9 degrees. In the Winter I’m sure my space is colder than that .
Thanks again
Angie
Pleased it was helpful Angie, yes ambient temperature can really make a difference to the drying and flow of the paints.
Will
Thanks, Will. As always your tips are super helpful. I generally use a stay wet palette, but have experienced all of the problems you mention. Please say more about the Airtight Palette. Is it a certain brand? Must it be purchased in an art supple store?
Stay well and keep posting articles and tutorials.
Linda Burton
Hi Linda, pleased they were helpful. The airtight palette was from eBay, It doesn’t have a brand on it. If you search for a ’24-well airtight palette’ you will find something very similar, it also has a thumb grip on the back.
Will
Thank you Will! I live in a semi to arid environment and have tried many of these approaches with frustrating results. Your specifics will definitely help. And yes, even I used a hairdryer occasionally.
Hope they help Beck, just having an idea of the relative humidity can really help gauge how quickly the paints will dry.
Will
Great Share will, thank you. Personally I love that my paints dry fast on the canvas because it means I can get a lot of work done in one sitting. Sometimes they don’t dry fast enough (Possibly because I pile it on with a palette knife)! These are really useful tips though for those paintings that I want the paint to stay workable for longer.
Thanks Izzy, yes, fantastic for building up impasto.
Very helpful. I noticed your portrait tutorials are for oil painting. Do you have one for acrylics?
Hi Andy, yes it’s here: acrylic portrait course.
Cheers,
Will
Thank you so much for this amazingly informative article.
So pleased you enjoyed it Mickey.
Will
Lately I am having problems with watercolor paper. The seems to be damaged. When using watercolors, the paint seems sink into the paper and leaves uneven blotches of paint. When selecting the paper, the paper seems prefect until one puts on the first wash.
I enjoy your newsletter and all the tips.
Evelyne
Hi Evelyne, have you tried turning the paper over? there is sometimes a slightly different texture which may help.
Will
I’ve been using acrylic for many years and have used many of the methods you mentioned here, including painting faster. The most useful thing, by far, is the stay wet palette. Yes, it has its draw-backs like everything else. I have found that if you place a solid copper penny or two under the sponge of the stay wet palette it prevents mold from forming. Also, letting it dry between projects is a good idea.
Cheers for the copper penny tip Alyce!
Will
Hi Will,
I love watching your videos and reading your articles. Your teaching style is very clear and pleasant to watch. You keep to the subject and don’t waste words. They are a valuable resource of time. I find something useful in every one of them and am able to apply my new knowledge immediately.
One thing I have found frustrating, however, is that when I try to print out the transcripts of the video lessons for later reference as I work on the sample project, it prints out the pages and pages of comments, even when I select a specific page range to print. Oddly, when I select a page range, it will often print everything except the pages that I selected.
This forces me to keep the lessons open on my computer for days as I often have trouble finding the specific lesson I am working on again if I close the window. There is no easy way that I have found to do a search on your website. I have to go back to the menu, then to free videos and hope the one I was watching shows up the the selections.
So, two questions: 1) is there a way that one can print out the lesson transcripts without the comments; and 2) is there way to do a search on your website for a particular lesson?
There may be obvious answers to my questions but, not being the most tech-savvy painter in the universe, they are beyond on reach. Any guidance you can provide will be much appreciated.
I look forward to subscribing to an advanced tutorial in the near future.
Regards,
Kathryn
Hi Kathryn, pleased you’ve been enjoying the site.
So, two questions: 1) is there a way that one can print out the lesson transcripts without the comments;
You could copy and paste the transcript, but they aren’t currently available as separate pdfs/documents.
and 2) is there way to do a search on your website for a particular lesson?
Yes, there is a magnifying glass on the top right of the homepage which is a search bar.
Hope this heslp,
Will
Good to receive this info refresher. Looking forward to more light and longer painting days. Be well everyone.
Cheers Les.
Will
Great tutorial! I mostly work with oils but sometimes the drying time between covering layers takes forever. So when I switch to acrylics like your recommendation I store the acrylics in a plastic covered container. By placing a moist paper towel on the bottom, it keeps the acrylics from drying out. If I leave the acrylics for a long period of time, I will mist the top of the acrylics and they seem to stay moist forever. How moist do you make the paper towel will depend on trial and error. To much water and the colours will blend together.
Hi Jack, I find less is more with the absorbent paper towel as you don;y need much to keep the paints workable.
Will
Cheers Will – this is incredibly useful – I’m trying to be as sustainable as possible and always try to use up paint leftovers – but now I can make custom pre-mixes and cut down on waste at the same time – thank you!
Great stuff Elaine.
Will
Very much appreciate your emails.
Where does one find airtight palette as illustrated?
Kind regards
Hi Alan, this was from ebay, it didn’t have a brand, but was under ’24-well airtight palette.’
Cheers,
Will
As always, you have given us helpful information ! I’ve been painting with acrylics for about 8 years, but learn something new like spraying the canvas, or degree of humidity. I use a wet palette box, which works for me. I do find that the amount of water in the palette does make a difference. Too much definitely will affect the paint. Thanks for your positive and encouraging outlook!
Glad you enjoyed it Donna.
Will
thank you so much
very helpful
Cheers Rayah.
Will
hi will what about a stay wet pallete
Yes, a great choice Stephen, I cover stay-wet palettes in number 4 – Palette Choice.
Will
What a great article, thank you so much. The advice and tips given are invaluable. I turned my radiator off where I paint to try and help with this problem which causes so much frustration. Like Kathleen above I have tried so many tutorials but always come back to your website because what you say and how you teach….works.
That’s lovely to hear Margaret, thanks for the support.
Will
Your course and tips are inspirational. In Australia, drying is a problem but using a wet palette….white ceramic tile on top of 2 layers of wet paper towel in a flat Tupperware box and a fine mist seems to do the trick. I love your traditional painting/colour theory approach and am learning so much. Thank you Will.
Thanks so much Heather, so pleased you’ve been enjoying the courses.
Will
I think I understand most of it except for the open acrylic mediums. Once you mix the open/glazing mediums, how much of it do you add to the heavy body acrylics? I read the section several times, but I may have missed something.
Thank you for this article. Short drying times for me is the most daunting aspect of using acrylics.
Hi Jim, If just using the OPEN thinner, Golden recommend a maximum of 3 parts paint to 1 part Thinner.
“Add sparingly to acrylic paints, starting at approximately 10 parts paint to 1 part OPEN Thinner. Maximum addition is 3 parts paint to 1 part Thinner.” – Golden Paints OPEN thinner
Cheers,
Will
Hi Will, thanks for your post. Very informative. For underpainting I am using gesso or GAC 100 mixed with acrylics using Munsells scale. Less water or just airbrush medium during the paining. I stored my paints in air tight container. Overnight I cover the acrylic paints on my pallet with jars leads or any plastic container that I spay with misty spray bottle and no skin or drying. Recently I bought Open Golden acrylics and I would consider your suggestions. By the way, If you add a few drops of White vinegar to your stay-wet palette it would prevent mildew. Fishing department at any store carry very good airtight containers, different sizes, that are very good for storing paints. Thank you Will for your lessons and keep in touch.
Thanks for the suggestion for the stay-wet palette Maria, much appreciated.
Will
Great article, Will! So interesting and helpful. Good to see it’s possible to get an airtight palette from eBay, and they aren’t even expensive :)
I have made my own, inexpensive, stay wet palettes, by buying dumpling storage boxes from China, which I found on eBay. They are large, shallow and airtight. I put wet kitchen paper in the bottom then a sheet of tear off palette paper on top and paint keeps for weeks! And because I have several I can keep different colour strings in them and there’s room to mix.
Great tip to spray the back of the canvas! I already rely on misting – and use gloss glazing liquid.
It’s so useful that you addressed this issue that I’ve spent a long time pondering.
So pleased it was helpful Catherine, and thanks for your palette tips, much appreciated.
Will
Hello Will,
I have had success keeping paint colour mixes viable for over 3-6 months using plastic containers usually used for beadwork. Exceptionally handy when you do not get back to a plein air painting for some time.
They are a lightweight bank of 6 or 13, with tight fit lift off cap, over an “inkwell” container.
Regards,
From now sunny, flooded, covid-ed, burned Oz
Hey Caz, wow 6 months. Thanks for letting me know.
Will
What a (comprehensive) treat, so much appreciated..! May the Spring be with you, Will!
And all of you, it feels like a real community.
And yes, since I moved my easel from (directly) underneath the vents, life is easier for me (and more difficult for the evaporation).
Hey Cecilia, my pleasure, you were the inspiration for the article! so pleased you enjoyed it.
Will
More great info, thanks! I pre-mix a little Golden Open Titanium White into my standard paint colors before painting plein air and then I paint pretty thick…buys me a little extra working time:)
Good one Leslie, glad the mix between the two has been working well for you.
Will
Very informative and I respect your honesty. Thanks for all the advice!
Really hope it helps Carl.
Will
I have experimented with so many of these slow dry products. In the end I came to the conclusion that ‘Open Medium’ is too viscous and ‘Retarder ‘ is too watery . So I have a special container and use a mixture of these two which I dip my brush in before picking up the paint.
Another hint which seems to work is to paint a layer of the retarder on your canvas before you start to paint and let it dry before working on the canvas.
Cheers Marlene.
I’ve been working with water mixable oils for a few months now (following your course) and I really enjoy the natural blending quality they have, but I find the colours I can achieve less vibrant than with acrylics. The whites and tinting strengths seem to behave totally differently. Other than the drying times, I’d say this is the other big difference between oils and acrylics. I’m also not super keen on the variation of consistency – some are really stiff and some a bit sticky. Your post has inspired me to try the OPEN range again. (Immediately after reading it I mixed acrylics with retarder, as an experiment – ah, a titanium white that works, I had missed you!) I’ll try using OPEN titanium white with normal heavy body and see what happens…
Good one Jamie, hope the experimenting goes well.
Will
I always enjoy your articles, tutorials and courses! I have been painting for about 5 years and have found a cheap and simple method to keep my paints wet over the course of a painting. When I am finished a session I mist the palette and pop it into an extra large zip lock plastic bag and the paints stay workable for up to two weeks! I re-mist after each session and it works a treat. It is kind of like a poor man’s air tight palette box!
Cheers
Kim
Glad you enjoyed it Kim, thanks for sharing.
Will
Mr. Kemp, “#1 Paint Volume” was a real eye-opener for me. I’d heard most of what’s in your lesson before, and always wondered why I had so many problems with drying, but the amount of paint I squeeze onto the palette never occurred to me. I tried it this morning, and it really helps. I’m rationalizing that acrylic is cheaper than oil, so if I waste it I should be less concerned. What do you think? I hope it’s true in the long run. My dream is still a Masterson palette surface that can handle a palette knife, but not sure I’ll see it in my lifetime.
That’s fantastic to hear Charlie, so pleased it helped.
Will
Thank you Will for these great tips, mainly the proper use of slow drying acrylic mediums. I do have all the 3 you mentioned on the article but did not know the diference among them. You are very thoughtful when and how to advise your students. Thanks for your much appreciated advise.
Perfect timing Marivone, hope it helps when deciding which medium to use.
Will
Great info! Do you ever do online live paint classes. ? Or are they always prerecorded? I have done a few of your tutorials and I find I need to know more on techniques for how to achieve certain looks or textures.
Pleased you enjoyed it Bianca, I don’t currently run any live paint classes, but good to know it would be of interest.
Will
Will, I recognize many of my mistakes in some of the situations you depicted, some comic… I am sure I was an inspiration ;))
I keep telling myself, ‘put mooore paint!’
Very true Cecilia, putting more paint out can often be the simplest solution.
Will
Hello Will,
In the past you posted an article top overcome procastination. Please could you help me to find your article?
I hope my english ist understandable. I wish you health and a sunny springtime.
Alexandra Christoph
Hi Alexandra, was it this one : On Painting, Procrastination and What Might Have Been
Will
Thanks for the great info Will. I especially appreciate how thorough and well-researched your articles are. I’ve really enjoyed these and your courses. You’re an exceptional educator and artist :)
Thanks very much Judie, pleased you found it helpful.
Will
Just getting back to painting. Love the way that you explana than. 89yers old. Thank you
Thanks so much Rena.
Will
Hi will, thank you for your enlightening article . I am a total beginner with Acrylics, I got to learn a lot and look forward to more information / knowledge from you.
I was presented with Golden fluid matt medium by my daughter . However I had wanted magic white . Can you please explain me the difference between the two ?
Thanks will !
Regards Rohinton.
So pleased you enjoyed it Rohinton. Magic white is usually associated with Oil Paint, applying a layer to the surface first, the medium will help to keep the paints wetter for longer but it wouldn’t have the same working time you have with oil paint.
Cheers,
Will
HI Will
I reread the last paragraph and am I but confused.
Ok, here’s one final tip, and it’s a good one.
You don’t have to use the OPEN paints to get some of that long working time goodness. You can use the OPEN mediums with your standard existing Heavy Body Acrylics and mediums.
To start with try a 2:1 Glazing Liquid to OPEN Thinner mix. (2 parts Glazing Liquid: 1 part OPEN Thinner)
What is open thinner mix ? Do you mean 2 parts paint to 1 part glazing liquid ?
This will give you a little extra time. You can then start to increase the amount of OPEN medium.
Which mediums are you talking about ,,, gloss etc. the word medium is confusing
Mix a 3: 1 mix of open medium in with the glazing medium.
When more than half of the medium 60% open medium to 40% glazing medium, the working time is now 45 minute to an hour. – Golden Paints
Less is more with this thinner, Golden doesn’t recommend exceeding a 3:1 ratio if using just the OPEN thinner. (3 parts paint to 1 part Thinner), but diluting it with the Glazing liquid gloss as I’ve mentioned above will give you more dilution.
Add sparingly to acrylic paints, starting at approximately 10 parts paint to 1 part OPEN Thinner. Maximum addition is 3 parts paint to 1 part Thinner. – Golden Paints OPEN thinner
Hi Marisa,
‘To start with try a 2:1 Glazing Liquid to OPEN Thinner mix. (2 parts Glazing Liquid: 1 part OPEN Thinner)’
2 parts Acrylic Glazing Liquid Gloss (from Golden paints)
1 part OPEN thinner (from Golden Paints)
Cheers,
Will
Hi Will. Thank you so much for this article – such a lot of useful information both from you and others who have commented on it. Regarding mediums – I try as far as possible to avoid mixing in ‘complex’ ratios as it would be easy to lose paint integrity and you can’t always judge mixes. I was very interested to learn about the humidity factor and the studios ambient temperature. One question I have is this: With acrylics you need a minimum studio temperature of 9 degrees C / ideally a temperature 16 Degrees C. What action do you recommend for the Winter months? Use of a small heater/humidifier perhaps.
Hey Garry, yes, ideally just to raise the temp a bit to get a good paint film, you might find this article of interest about some of the quirks with certain mediums : Painting in the cold
Will
Many thanks for your website Will. I’m a beginner in acrylic, and have been struggling with painting mangos. Two issues: blending colors without a bright line showing up, and painting light reflection on the fruit surface. In your paintings (apple and cherry), are you diluting the paint with lots of water to enable you to blend the colors before the paint dries? Also, I have tried to add a bit of a reflection on my fruit, and either get a big ugly white blob, or some pale looking white mess. Any tips? (I’m happy to upload a photo of my mango work as an example of that helps).
Hey Doug, I don’t use much water when diluting for the apple and cherry lessons, more just to get the paint flowing nicely. The main thing if often to have a thicker application of initial paint so there is a larger volume to stay workable. For creating a reflection on a mango, if you have the paint thicker inn the centre, then a little more transparent around the centre. This is a good example here.
Cheers,
Will