Downloading the reference photograph
The photo below can be ‘right clicked’ and ‘Save image as’, so you can use it as a reference image, print it out and follow along with the video above.
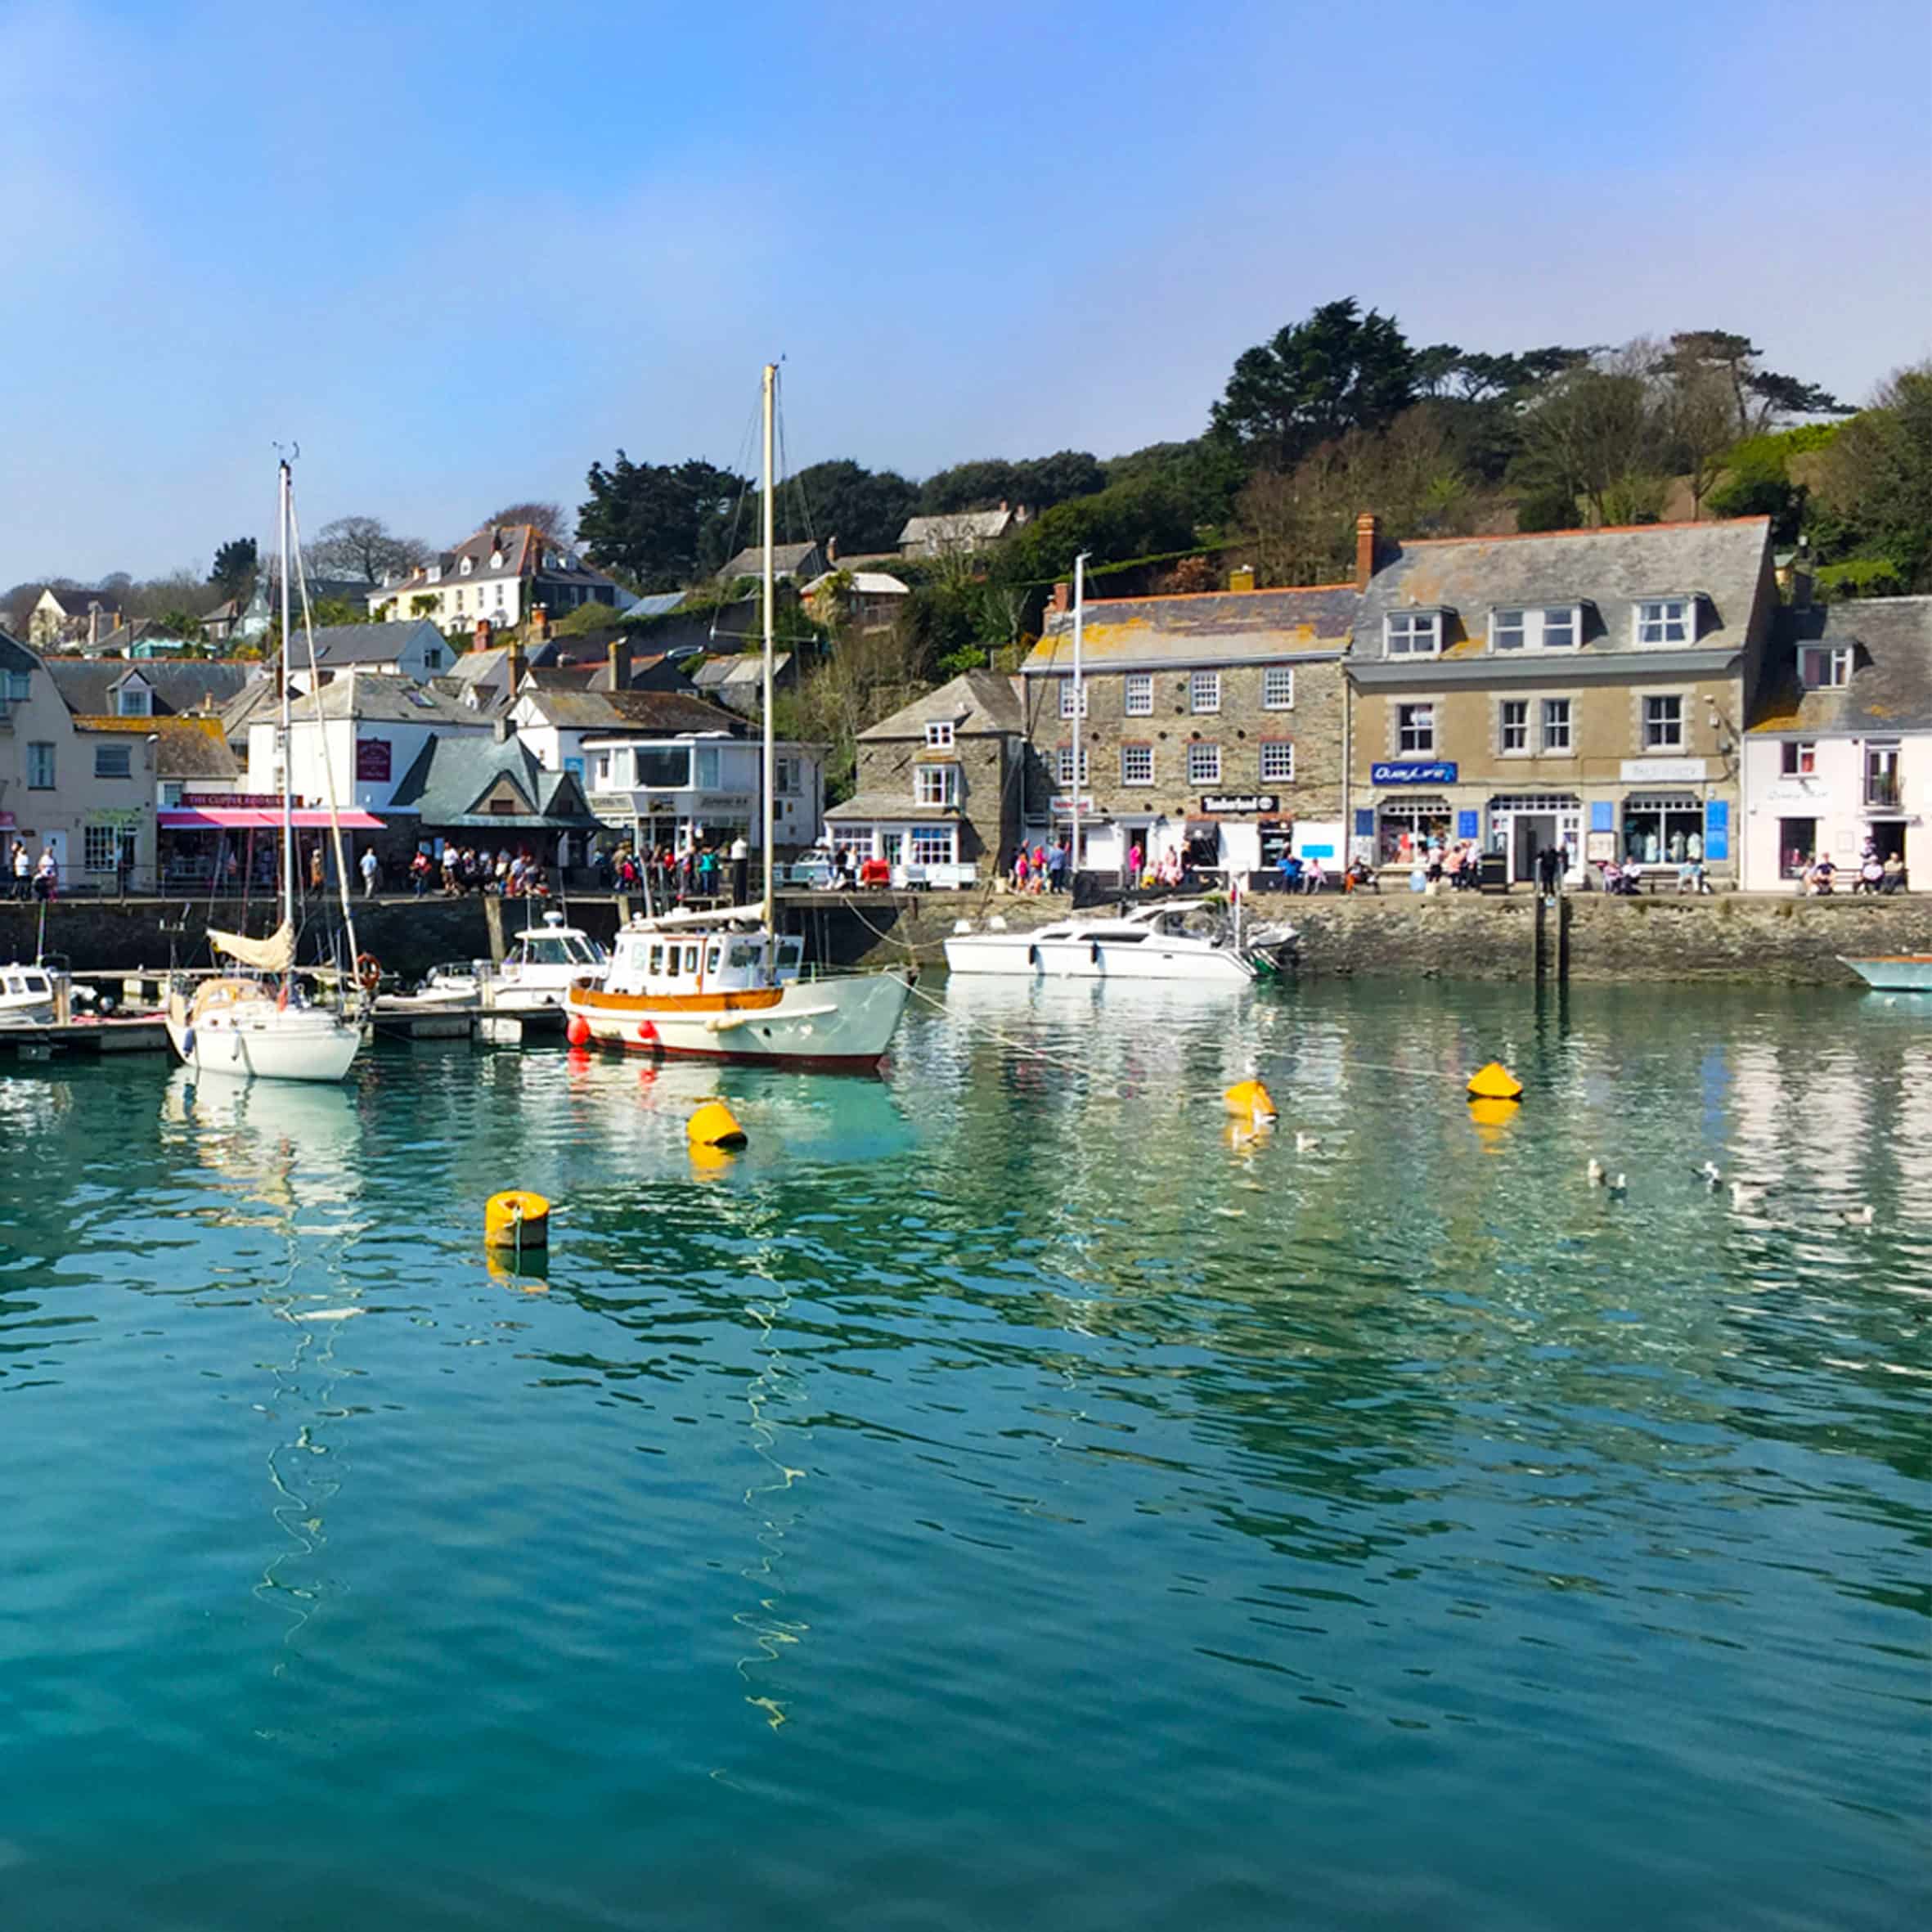
You can also download a High-Resolution Image here...
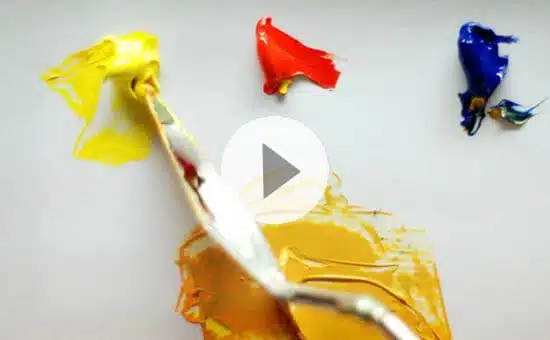
Materials you will need:

Palette Knife
- Medium size, Diamond-shaped, cranked (angled) handle. I usually use an RGM 45. I don’t paint with the palette knife in this tutorial; I just use it for putting out the paint.
Brushes
- 1/2 inch Flat brush (I say 1/4 inch at the beginning of the video, but it’s actually a 1/2 inch) The brand I demonstrate with is a Synthetic Proarte Prolene series 106. It’s designed as a watercolour brush, so it works well for these initial wash like layers.
- Small round brush – Rosemary & co Series 344 size 4
- Medium filbert – Isabey Isacryl Filbert Series 6572 size 6
Support
- 12 x 12 inch (30 x 30 cm) canvas that has 2 coats of white acrylic gesso applied.
- Kitchen roll/paper towel
- Clean water
- Tear-off palette or stay-wet palette (I demonstrate on a tear-off palette)
Paints – The colour palette
Artist quality acrylic colours (I’ve used a mix of Golden Heavy Body colours & Winsor & Newton Artist Acrylic)
- Titanium white
- Naples Yellow
- Raw Umber
- Phthalo Blue (Green shade) – a cool blue such as Cerulean Blue would also work.
- Cadmium yellow light – or any Cadmium/bright yellow
- Alizarin crimson permanent (Winsor & Newton) – a Cadmium red would also work.
- Ultramarine blue
Mediums

Acrylic Flow Release – Golden Paints – not essential but can be handy for adding staining effects when working in thin layers on a surface that is repelling the water. It is convenient on pre-primed canvas boards, which often have a very shiny surface applied in the manufacturing process.
Step 1. – Drawing out

I’ve drawn out a rough sketch directly onto the white canvas. Usually, I work on top of a coloured ground but wanted to show how I would approach adding colour to certain areas of the painting on top of a white canvas. The sketch can be done with an HB, 2B or 3B pencil, depending on how the graphite goes down onto your painting surface. Don’t go too heavy with the drawing because the graphite will mix in with the watery paint in the next stage of the painting.
I want the focus to be on the white boat in the centre, so it’s a great subject to keep white and keep that luminosity from the white gesso ground showing through.
Step 2. – Blocking in the Yellow tones.

I start with a Naples Yellow.
Naples Yellow has got this lovely warm quality to it and works especially well as the basis for paintings of sand or blue-based seascapes. It’s often labelled as ‘Naples Yellow Hue’ as the modern paint is a non-toxic version of the original lead-based paint. It’s made of synthetic iron oxide pre-mixed with Titanium White.
Pro tip: Naples Yellow can also be a fantastic colour for portrait painting if you’re finding yellow ochre a bit too strong. If you don’t have Naples Yellow, you can mix a very similar colour by using Yellow Ochre mixed with white.
For the first stages of the Harbour painting, I’m just looking for an underlying yellow hue to the picture. Then I can vary the paint’s consistency to a subtle or more intense area of your choice. For example, the houses on the right can take an opaque covering of Naples Yellow, whereas the sky on the left would be better having a light covering because it’ll eventually become quite a warm blue.
I’ve added a few drops of acrylic flow release to the water; this helps to disperse the surface tension and give the paint more of a staining effect. You don’t have to use it, but it can work well if your canvas surface is repelling the water. Be careful not to over mix it in the water because it can easily foam.
Step 3. – Adding Raw Umber

For establishing the darkest darks, I’m using a Raw Umber. This has a cooler, greener tone than Burnt Umber, so it works really well with general cool blues in the painting.
I again change the consistency of the paint with the water, and I’m using the half-inch square-edged flat brush.
Using the flat square brush is very handy for drawing and painting buildings and a good way to practice brush skills because you can draw thin lines and sharp edges of buildings.
Step 4. – Adding White

I now introduce a Titanium White, which helps to mix some lovely greys between the Naples Yellow and Raw Umber. This works well for shadows in white buildings in sunlight because it still has that nice warmth.
This stage of the painting can start to feel slightly sombre and muted, but it’s easier to put in these subtle tones now and then creep up on the brighter colours. If you can resist going for the vivid colours, in the beginning, your painting will come together really easily in the next few steps.
Step 5. – Adding Phthalo Blue
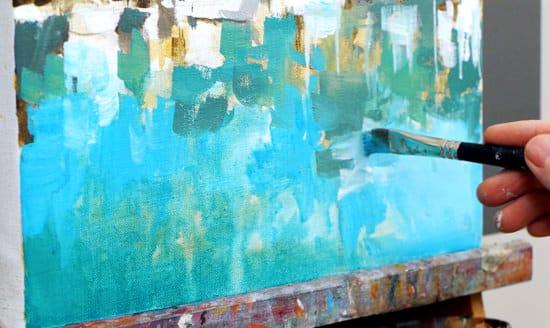

Once we’ve got the tones working in the middle of the painting, we can start to go in with some bright blue. Phthalo Blue (Green Shade) is such a great colour for creating powerful green blues. It’s a strong pigment, so you have to be very careful when mixing with other colours because it can easily overwhelm your mixes, but for creating a Turquoise blue, it’s fantastic.
I start to wash in the colour just diluted with the water, and you’ll notice how the optical effect of the blue over the Naples Yellow gives a nice green effect on the sea.
I’m keeping the bottom of the painting a cool green-blue so it will contrast with a warmer blue in the sky.
Step 6. – Adding a glaze to the sky.

The right-hand side of the sky has got this lovely warm red undertone to it. By applying a thin glaze of Alizarin Crimson Permanent, it gives a nice transparent stain of colour.

I can then work over the top using a mix of Ultramarine Blue and Titanium White. I want to keep the sky smooth and clean in comparison to the more painterly foreground. I’ve also swapped to a number 6 Isabey Isacryl Filbert brush for a more ‘scrubby’ technique to the sky.

Step 7. – Adding brighter pigments.
Using a Cadmium Yellow Light mixed with the Phthalo Blue, I can add some brighter, greener blues into the water and add some greens to the background trees.

Swapping back to the finer round brush, I now add details to the boats and buildings, painting more vibrant yellows, oranges and reds from my extended full palette.

Having the reds and yellows in the middle ground add interest to the main focus of the painting and keep the strong turquoise of the sea separate.
You can watch the full video tutorial (45min) below. Enjoy!
How to paint a Cornish Harbour in Acrylics
You Might Also Like:
1. Painting, Pasties & Padstow – A Cornish Painting Trip
2. Painting Fishing Boats in St Ives
3. Capturing Winter Light in Cornwall


Thank you Will! I SO look forward to your lessons! Thank you so much for sharing it for free! :)) God’s blessings, Lisa
You’re welcome Lisa, really hope you enjoy the turorial.
Cheers,
Will
Beautiful Will. Can’t wait to begin.
Good one Greta, hope you enjoy it.
Will
Hi Will,
Excellent demo…Loved watching this …so relaxing as well!
Best Wishes
Adrienne
Thanks Adrienne, nice to hear from you, really pleased you enjoyed it.
Will
Great demo! I’ve been making the transition from oils, and it feels like it’s breaking my brain at times! Your detailed explanations regarding manipulation of acrylics, mediums, etc., are so helpful. — Jessie
So pleased to hear it Jessie, glad you enjoyed it.
Will
Totally fascinating to watch the video. Learning a lot through observation is fantastic. thank you so much for sharing…
Pleased you enjoyed it Pauline.
Will
Thank you for sharing the video.x :-) Jan
You’re more than welcome Jan.
Cheers,
Will
Wow Will, this is beautuful! Can I do it in oils? Will it work!
Hi Mariette, yes you could do the painting with oils and it would work well. Just the stage with the red glazes in the sky would need a bit extra drying time but apart from that it would work great.
Cheers,
Will
Loved the tutorial. Itching to get started, Thank you.
Good one Maura, looking forward to seeing your painting.
Will
Thank you so much for sharing your knowledge. So helpful and motivating.
You’re welcome Sharon.
Will
‘Thank you Will – rewarding. A comment or two more on the consistency of the various paint applications would help – it’s not obvious using canvas as a support, even ‘sealed’, how thick a mixture works best.
Again, thanks. Regards,
Tony.
Hi Tony, it’s best to try and mimic the consistencies by mixing the paints on your canvas. It’s a fine line with consistency between too thin or too thick and the consistencies vary depending on the brush you’re using. The best way is to mix the paint too thin, so it runs down the canvas, and then add from there, you should be able to see it clearly in the video
Hope this helps,
Cheers,
Will
Thank you so much! This helps me see to do shapes not details. So hard for me. I will keep this reference in my pocket of goodies. God bless. Linda
Thanks Linda, yes, big shapes first and then add the finer details towards the end. Hope you enjoy it.
I always get excited to see another tutorial from you! I can’t wait to begin!
Great to hear it Debbie, hope you enjoy it.
Cheers,
Will
Thanks Will for sharing the lesson, fab picture!
Anisa
Cheers Anisa.
Tanks! Will…For sharing your wonderful trip and photos…..GREAT! tutorial.
Pleased you enjoyed it Ellen.
Cheers,
Will
Thanks Will for sharing your trip and for the tutorial, it is greatly appreciated!
You’re more than welcome Rose.
Will
Thank you Will:
I love your tutorials and will certainly try my hand at painting this scene.
I wondered why you chose not to paint the sky before adding the treeline.
Hi Hilary, for this scene the sky peaking through the trees is the Naples yellow colour, you’ll often see a yellow base to a blue sky so the painting will still harmonise together.
Cheers,
Will
Love, love, LOVE this Will! Thanks so much for the demo. I paint in oils and this will be challenging wet-on-wet, but I am going to try it! Thanks again!!! -Anne
Good one Anne, looking forward to seeing how your oil version turns out, should work well.
Cheers,
Will
Hi Will. Many thanks for yet another inspirational tutorial packed with hints and tips. Looking forward to having a go when I’ve finished the current project.
All the best,
Peter B.
Hey Peter, nice to hear from you. Hope you enjoy the painting.
Will
Thanks so much Will – Very grateful.
Hope you enjoy it Lisa.
Hi Wiil. Love this painting. Will it be possible to do the same colours
Just in oil!
Sure would Mariette, oils would work great.
Will
There you go again Will. Hitting the right spot with your tutorial in Padstow. Recently stayed there at the Majestic and enjoyed the expensive Rick Stein restaurant. After all it was our 45th wedding anniversary. Watched the video through before I get down to the job of putting it to canvas. Thanks again Will – you never fail us.
Charles
Hi Charles, well a 45th wedding anniversary, congratulations! Hope the tutorial reminds you of your visit.
Cheers,
Will
Lovely tutorial Will. Thank you so much!!
You’re welcome Lauren, hope you enjoy it.
Will
Love Love Love this tutorial! You have such a gift, not only as an artist, but as an instructor. I can’t wait to try this. I do wish you had your inspiration photo within view to see what you are seeing as you paint. :)
Hi Suzilee, pleased you enjoyed the tutorial, you can print out the reference image to work from and then refer to it when watching the lesson.
Cheers,
Will
Thank you Will. I love your painting techniques. I pick up something every time I watch a video or read a blog from you. You are generous in your information and teach it so clearly. You and Vanessa might need to paint the California coast and come visit!
Good to hear it Sue, pleased you enjoyed the tutorial, I’m sure Vanessa would love the idea of California!
Cheers,
Will
Hi Will,
Just to say, thanks for your tutorials, I have dabbled in art most of my life and since watching your tutorials I have learned loads! many thanks, Liam
Really pleased to hear it Liam, much appreciated.
Cheers,
Will
Love the tutorial videos, Will; but, do you have a tutorial that is easier and takes less patience? lol . . . I enjoy watching you do all the work, but for me, I’d just not have the patience it takes. I also appreciate the fact that you show your palette so I can see how you mix the colors, etc. That helps me learn a lot more. Thanks again, Renee
Ha, ha, it comes together quite well this tutorial Renee. The final result appears more complex than the separate parts. Just take it one colour at a time and you might surprise yourself.
Cheers,
Will
Hi, and thanks for the wonderful guide to painting a Cornish harbour. I have learned so much from watching you and can’t wait to have a go myself.
Good one Dulcie, hope you enjoy it.
Will
Success!! Your tutorial has enabled me to do a fair attempt at the Harbour in acrylics
I would post it here but don’t seem to be able to.
Thanks again, Dulcie……………..what’s next??
Brilliant stuff Dulcie, you can email me a picture of your painting via the contact page.
Cheers,
Will
Thanks for posting this video and sharing your visit to Cornwall.
Got me to thinking about getting out my acrylics again!
My daughter has friends who live in Shaugh Prior…small world!
I will share this with my daughter and her friends.
Thanks Ellen.
Will
LOVE your tutorials! Watching a master work! Love the water colory (sp?) feeling of the acrylics! You are an excellent teacher and appreciate your generosity of your knowledge! My first tutorial and I’ve learned so much. Want to start soon……..Many thanks again
Pleased to hear it Joan, great that you’ve learnt lots from the lesson.
Cheers,
Will
wowww…. just amazing…
Thanks Ripal.
Will
Hi Will,
You are a wonderful artist and teacher. Thanku could u explain when u would use thalo blue red shades and green shades
Hi Genia, the green shade is best for brighter Turquoise colours and the red shade is in-between a Phthalo blue Green shade and Ultramarine blue, just with a bit stronger intense colour than the Ultramarine blue.
You would choose between the two depending on the range of hues within the image or view you’re working on.
Hope this helps,
Cheers,
Will
thank you for shareing your professional art secrets with us.
My pleasure Maryam.
Thanks, Will. Going to try your method while painting plein air this morning. Loved it!
Good one Debbie, hope your plein air session goes well.
Will
Thankyou very much for the video of Cornwall. I shall have a go at painting it. I have enjoyed your courses and learnt so much and gained confidence as well. Cheers viv
Hi Viv, nice to hear from you, really hope you enjoy the tutorial.
Will
One learns so much. Thank you
pleased you enjoyed it Claude.
Will
Your video is fantastic.Always look forward to seeing more. I am learning so much each time I see another segment of your terrific videos. I really like the tiny streets and architecture of the towns you visit. Thank you so much for sharing.
Thanks Diane, pleased you enjoyed the video.
Will
Thanks for sharing. I´am going to follow your tutorial this week I hope! My garden is longing for my help so I have to wait some days. Your way of teathing is so inspiring!
Cheers, Inger
Greetings from Canada, Will. Thank you for the tutorial and the beautiful photos of your trip to the Cornwall region. I often have difficulty choosing an underpainting colour. I understand your use of Naples yellow here…you mentioned that there’s a yellow undertone to a blue sky sometimes (sunlight, I guess)…and that here the yellow works well with blue to produce turquoise and other greens. Do you have any general tips for choosing a underpainting colour? Thanks again!
Hey Oksanna, nice to hear from you, the undertone is generally dependent on the mood, feel and colours you’re trying to capture. You might find this article on artist studio wall colours helpful as the exact same principles apply.
Cheers,
Will
Thank you…that article is very helpful.
Hi Will really enjoyed your painting video will have to give this a go I hope you dont mind me saying but when in the video you where outside painting and you were wearing a hat I thought there was a resemblance between yourself and Vincent Van Gogh!! keep up the good work
Not at all Lesley, pleased you enjoyed the lesson.
Cheers,
Will
Hi Will,
Thanks again for sharing your journey and video to the Cornwall area. Looks like a must for anyone travelling to England. This is just a general question about the positioning of your palette… do you have it beside the piece you are working on for demonstration purposes so it can be “on camera” or is it your general preference to have it on the same line as the painting. Thanks.
Cheers, Allan
Hi Allan, it’s a bit of both. Having the palette next to the easel is primarily done for demonstration purposes, but it can also be an effective method of painting, especially on smaller scale pieces. For larger scale works I would usually have the palette to my side or in my hand so I can step back from the canvas, adjust the mix and then paint.
Hope this helps,
Cheers,
Will
Hi Will
I love love love your lessons:) I’ve been watching them but not done much painting yet:( I have little kids so it’s for sure once I start painting I am not be able to continue long time and stop little while than continue later on or another day. What would you suggest me to use in order to keep my paints -especially mixed colors- wet so I won’t waste them. I don’t have much space to keep all material in same place so I have to hide them from kids and bring them back when they are in sleep:)
Thanks in advance !
Thanks Cara, if you’re painting with acrylics using a stay-wet palette will keep the paints wet for a few days. Good luck with your painting.
Cheers,
Will
Thank youWill .another great lesson. Always look forward to seeing your work.
Shirley
You’re welcome Shirley.
Thank you for this video Will, I really love the colours used. I’m trying to break my ‘being a neat freak’ thing and trying to embrace and learn to use imperfections, as I know it’s imperfections that create interest in a piece, not organised lines. So I’m going to give this a go, and really try hard not to be a neat freak about it, I think it will be a good exercise for me :-) It’s rather different too with not having a solid coloured ground on, and putting the stain over the drawing, I can see how much it adds to the painting, so I’m going to give it a go! Thanks Will. Glad you enjoyed the trip, it looks ace. Kara x
Hey Kara, great to hear from you, yes it’s nice to experiment with a stain, it’s more of a watercolour approach but works well if you’ve been sketching with watercolours on location, hope you enjoy the tutorial.
Cheers,
Will
Hi Will, enjoyed your tutorial, getting back to painting after flirting with (and still enjoying) all things digital…great job
Thanks Marty, pleased you’re enjoying your painting.
Cheers,
Will
You make an enchanting scene positively magical, through your painting. I always learn a lot through your blogs and videos.
Thanks!
Very kind of you to say so Greg, pleased you enjoyed it.
Will
Another brilliant tutorial Will, you make it look so easy !! Thank you so much you are such an inspiration
You’re welcome Cath, hope you’re keeping well and really hope your painting tuns out well.
Cheers,
Will
Your painting is interesting, vibrant, and expressive! You added a new painting chapter to my internal book of knowledge. I’ve never painted in this style, but look forward to developing some paintings using this method. About 2 hrs. from where I live is a quaint little town called Beaufort, NC. My heart lives there although my body doesn’t. Your painting reminds me of Beaufort. Maybe you and your wife can come visit sometime and paint along the NC seashores, ride a ferry, enjoy the Hatteras Lighthouse and others, watch the wild ponies and enjoy some Southern NC food! We’d love to have you, Will!
Thanks Carol for the kind offer and really pleased you enjoyed the lessons, the Southern NC food sounds great!
Cheers,
Will
Thanks very much for another lovely tutorial! :) As a beginner getting started, seeing how you mix the colours and reasons for doing so have been very helpful. I find it a bit more difficult to sketch things out rather than doing the actual painting. I hope with more time and practice, I’ll be able to see the shapes better and sketch them down on the canvas!
You’re welcome Nicole, really pleased you enjoyed it.
Will
Thank you Will for all your videos and tips. I look forward to painting this. Thank you.
Cheers Violet, hope you enjoy it.
Will
This is so inspiring , will., keep it going!
Thanks Diana.
Loved it and learned so much. Thank you
Thanks very much Rubie, so pleased you enjoyed it.
Will
Thanks so much for this tutorial, Will/Vincent ;-)
Do you or have you worked with water-mixable oilpaint? Like Cobra from Royal Talens? I would like to know how you think about that kind of paint in comparison with acrylics or normal oil paint. Thank you for your time.
Hi Ine, water mixable can work well if you adopt the right techniques, in terms of drying times its half way between acrylics and standard oil paint.
Hope this helps,
Cheers,
Will
Thank you so much for sharing your fantastic gift with the world. It makes my soul sing. I look forward to trying to paint this scene of Padstow.
Really hope you enjoy it Sue.
Will
Beautiful painting, good and easy instructions. I have been watching it over and over. Thanks for sharing
Margarete
Thanks Margarete, pleased you found the lesson easy to follow.
Cheers,
Will
Thanks for another great tutorial! I do have a couple of questions:
Do you gesso pre-primed canvases or canvas panels?
How do you decide on the colors for the initial underpainting? If left to my own devices, I am not sure I would think to use Naples yellow just from looking at the photo. I may have chosen a pale blue (because of the sea and sky) if I didn’t have your fabulous guidance. Any pointers?
Thanks again, Will!
Hi Pat, ‘pre-primed’ is just another way of saying ‘pre-gessoed’ so it already has a couple of coats of gesso on the surface. Deciding on the colour of the underpainting is a case of trying to look ‘underneath’ the image to find a colour that will harmonize with the whole of the painting and help with your colour mixes later on in the painting. It’s a case of thinking a few steps ahead in your paintings progress before you begin.
Hope this helps,
Cheers,
Will
Hello .thank you so much for your video.l learn really good tips in your lesson.thank you.
Thanks Tareneh, pleased you enjoyed the lesson.
Will
Beautiful, loved watching the painting come alive, thank you!
Thanks Sue.
Your trip looks to have been wonderful. I loved seeing this painting emerge. I’m going to give it a go! As always, Will, you’re the best!
Good one Martha, hope your painting turns out well.
Will
Thank you Will such a talented teacher and painter. Thanks for your generosity.
You’re welcome Mim, pleased you enjoyed it.
Cheers,
Will
Hi Wil,
Thank you so much for sharing your passion. You’re an inspiring artist and instructor. I’m glad I’ve stumbled onto your website. How does one cultivate such patience like yours? I’m so tempted to just paint an abstract painting with these colors. Must I learn to paint realism before going abstract?
Btw, do you always add the acrylic flow medium into the water when painting acrylic? Thanks! God bless your gift!
Hi Catherine, pleased you’ve been enjoying the lessons, you can go straight into abstract, but personally I would always go from realism through to abstract as it will make your abstract paintings much more successful. I don’t always use the flow release, only if I want a stain effect or the surface is particularly water repellent.
Cheers,
Will
Will, many thanks I’m learning more and more and falling deeper and deeper into this amazing journey with Colour. You are a wonderful teacher and give me the courage to keep trying . The under painting helps so much !
Thanks Cathy, yes having a strong base can really help with the later stages of the painting.
Will
I found your wonderful art lessons by accident. AND what a find that is… I really appreciate all the information you share.. Especially about limited palette..I love working in acrylics. I paint quickly and have tried oil painting… Acrylics seem to work best for me… Watching your tutorials have helped me in the blending process of acrylics… Your demo of the apple was most helpful…. How many times I have painted an apple, but never as well as after painting along with you… I am exploring plien air painting and hope to find more landscape tutorials on your wonderful web site…THANK YOU SO MUCH FOR YOUR TIME, EFFORT AND SHARING….. Miki
Hi Miki, pleased you’ve been enjoying working with acrylics and have found the apple tutorial helpful.
Cheers,
Will
Will, like everyone else, I really appreciate your tutorials. Your free lessons make purchasing the at cost ones a no brainer, and I have done so on a few occasions as of now. My rendering of this harbor was the most fun and turned out to my best painting yet. I’d like to submit it to you to have a look is there a way to do so?
Cheers!
Hi Greg, nice to hear from you and brilliant to hear the Harbour scene turned out to be your best yet, yes, would love to see your painting. Click on the ‘CONTACT’ tab on the top bar and send me a direct email with the image attached.
Cheers,
Will
Will,
Thank you for your tutorials and detailed instruction (love the music, too!). Your website is great.
I am not a trained artist, only one watercolor class in college in th 80s. But I’ve tried to continue watercolor and in recent years, acrylics which I enjoy as a hobby, in between work, family and life. Your instruction is very helpful. I haven’t painted on large canvases, but have taken on A Cornish Harbour, a great subject. My challenge is moving to a larger image and drawing. I sketched it out and tried not to get overly detailed. Any suggestions? Thanks for what you do.
Hi James, pleased you’ve been enjoying the website, when mocking up in scale the most common issue is getting pulled into the details because you have the space to paint more in. Think about the viewing position/ distance most people will be looking at your work and keep on moving back from the easel to judge the painting from that distance.
Hope your painting goes well.
Cheers,
Will
Will,
Thank you for your advice. Very helpful. I’d like to show you my work, but it doesn’t appear I can do that here. If there is a way and it’s appropriate please let me know. Thanks for what you do!
Jamie
Hi Jamie, pleased the painting went well, you can attach an image and send me a direct email (details on the contact page)
Cheers,
Will
Will, Very excited to start on this beginning of July. Retiring end of this month so I finally will have time to experiment with acrylics.
Roll on July eh Eileen! really hope you enjoy the tutorial.
Cheers,
Will
Thanks Will. I am definitely going to try this. You can’t believe the mess I manage to make. All the wrong colours!
Good one Shirley, hope you enjoy the lesson.
Will
Hello Will,
Do you recommend using a textured canvas? I have been reading
about doing this but know nothing about when to use it.
I’m watching your Cornwall Harbour video for sixth time . Thank you so much for making and sharing it with us. You are very much appreciated,Will.
Hi Susan, pleased you’ve been enjoying the video, I demonstrate on a medium textured canvas, all canvas will have a slight texture to it, usually the finer and smoother the texture is used for a more detailed smoother surface of the painting.
Cheers,
Will
Will, how long will the tutorial be up? I am retiring next week & am dying to get started working on it.
Looks wonderful.
Eileen
Hi Eileen, the course will be available for a while, really hope you enjoy it.
Cheers,
Will
Hi Will,
Great harbour tutorial, Thankyou for sharing.
Peggy
Thanks Peggy, really pleased you enjoyed the tutorial.
Cheers,
Will
Dear Will Kemp,
I have a house portrait to paint and the roof is shingled. In the photo the shingles show up clearly.
Please would you tell me a way to paint these shingles? I use acrylics and am enjoying painting this wonderful harbour.
Sincerely
Susan Smith
Hi Susan, just paint a few of the details of the shingles, you don’t have to paint them all, just a few indications of a roof can give you a good effect, you might be interested in this roof painting tutorial I painted.
Cheers,
Will
I’m fascinated with the way your rooftop painting is developing. It’s stunning.
I forgot to ask you about the paper palette. Do you put it there for us to see how you mix the paints or do you work that way always. I ask because it looks much easier than taking one’s eyes away from the painting to pick up paint from a large palette on the table.
Sincerely
Susan
Hi Susan, it’s a bit of both, for smaller works I’ll often paint this way as it can be very effective for colour mixing because the same light is hitting the palette and the painting surface, and it also makes it easier for students to see the mixes directly next to the painting. Pleased you enjoyed the tutorial.
Cheers,
Will
My Dear Will – I have to say that as I endeavor to pick up painting again (BFA ’73 – UF), I am learning more from you than my art professors at UF. No offense to them (LOL!), but I’m afraid they kept many techniques to themselves, selfishly perhaps, that could have helped to make me a better painter. Life got in the way of art, and now that I’m a grandmother, I am picking up the brush again. After just three attempts, using your videos the entire way, I am very pleased with the results. I plan to keep at it as a source of pleasure and inspiration, hopefully into a very old age. With you, it’s like having a friend ‘hold your hand’ throughout the process. And I never tire of your voice and affectation. Thank you so much for the gift you give freely. Regards, Kathy M., Lakewood, CO
Hi Kathy,
Nice hear from you and fantastic to hear that you’re finding the techniques helpful in your journey painting again. Thanks for your kind words on the lessons, pleased that you’re finding them easy to follow.
Cheers,
Will
Thankyou for such a great lesson. You are truly talented. I’ve learned so much from watching your youtube videos. Lots of love from Newcastle
Good one Fatima, really pleased you enjoyed the lesson.
Cheers,
Will
New to the painting world and have a beginner question for you. I am trying a Monet style painting of this playhouse in my backyard using your video as a guide. When it comes to painting the fence and the playhouse how can i make sure that they don’t just blend together without really changing the color of one or the other?
Also the videos are awesome! I enjoy spending my afternoons after work watching and painting as they go. Thanks for making them easy to follow!!!
All the way from the Lone Star State, Lauren W
Hi Lauren, pleased you’ve been enjoying the videos, to differentiate the fence and playhouse if you’re using similar colours the easiest way would be to change the actual application marks. So the fence could have a more ‘pointillism’ series of dots, whereas the playhouse could have more gestural, flowing marks.
Hope this helps,
Cheers,
Will
Thanks for sharing the photos and the Video. I also love the stories and historical information you tell to go along with the trips you share with us. I find that you explain the technique so clearly and I’ve learned a lot from your instructions. I always turn to your site when I have questions.
It’s a great tutorial can’t wait to try it.
From Long Island, NY
Ramonita
Thanks very much Ramonita, nice to hear from you and hope you’re keeping well, so pleased you enjoyed the article. Good luck with the painting.
Cheers,
Will
Thanks a lot for sharing your video,I hope I can start one
Good one Bella, hope your coastal painting turns out well.
Cheers,
Will
Hello Will,
I have just joined an Art group in my village this Wednesday I am learning to use
Acrylic paints, your tutorial has helped me to understand how to apply the Acrylic paints which I have not used before. Thank you so much I really enjoyed the video, you have inspired me to have a go with confidence.
Kind regards,
Kathy
Hi Kathy, really pleased you’ve been enjoying the lessons and gaining more confidence with Acrylics, hope the class goes well on Wednesday.
Cheers,
Will
Hi Will
Thank you very much for your videos! They are what got me to initially try painting.
Quick question because I feel like there are a lot of conflicting messages. I see some artists commenting that using too much water in acrylic is bad for the painting long term. That said, I notice you use some very wet washes. Is this something to be worried about? I was thinking about picking up acrylic medium because I heard it has the same effect as water, but without damaging the paint.
Thanks again for all you do!
Hi Thomas, pleased you’ve found the lessons helpful, have a read of this article that has a quote from the Golden paints technical services supervisor Sarah Sands, about the water to paint ratio for Golden paints, here’s a brief section:
Hope this helps,
Will
Dear Will
Thank you for sharing your knowledge and experience in art.
I love your videos and your art style its very beautiful and vibrant.
I have a question regarding choosing the color of the base layer for your canvas, how do you determine that color? I used to paint my canvas black before starting with the painting but it darkens my paintings and if I leave it blank I always get empty spaces between objects!
Regards,
Leena
Saar, Kingdom of Bahrain.
Hi Leena, pleased you’ve been enjoying the lessons, you can change the coloured ground depending on the mood and feel you’re after in your paintings. It can be a good experiment to paint a small study of the same scene but use different coloured backgrounds to tune your eye to determine the colours you prefer.
Cheers,
Will
Thank you so much for your reply, will try to experiment and see how it goes :)
Regards,
Leen
Wow! This is amazing. Thanks so much for sharing your knowledge, Will.
Cheers Jane, really pleased you enjoyed it
Will
Terrific!
W
Your paintings are so soft and your ability to capture light are amazingill
Wonderful, thank you Will, very informative.
My pleasure Denise, pleased you enjoyed it.
Will
Thank you for your inspirational tutorials Will. I learnt a lot and am really looking forward to trying it out. Your knowledge is exceptional as is your generosity.
Thank you.
Best Wishes
Deepak
My pleasure Deepak, so pleased you’ve been finding them inspirational to your paintings.
Cheers,
Will
LOvely loose and exciting technique
Cheers Geoff, pleased you enjoyed the lesson.
Will
Great..
Hi Will. I love your lessons, and your follow up advice to those of us who comment. For someone using rectangular canvasses, what advice do you have for cropping or stretching your square picture?
Hi Roeland, if you crop a little off the top and a little off the bottom that would work well.
Cheers,
Will
Thanks so much Will – another great tutorial with so many helpful tips. You are so generous with your talents and that is much appreciated!
My pleasure Mary, really pleased you’ve been finding them helpful.
Will
There are so many people offering tuition online, but I have now found anyone who teaches as well as you. I love your videos and plan to treat myself to your beginners course soon. I did this painting, my composition was good but my brush technique is nowhere near, please tell me it’s just practice? Your finished picture is so beautiful and mine had amateur all over it ☹️
Hey Abigail, so pleased you enjoyed the tutorial and thanks for your kind comments on the teaching style. It has quite a few elements all working together with this tutorial so glad the composition came together well for you.
Will