
Absolute Beginners Oil Painting Course
(Scroll down ↓ to Add to Cart)
Have you ever wanted to start oil painting but don’t know where to begin?
What materials do you need? How do you clean your brushes? How long do oils take to dry? How do you avoid muddy colours?
You are not alone. Oils can feel confusing at first.
I help complete beginners learn to paint using classical techniques, and I want to give you a clear plan so you can start oil painting with confidence.
Oil paints are a fantastic medium. They dry slowly, giving you more time to refine shapes, create smooth transitions, and build subtle shifts in light. With the right foundation, you can avoid the usual frustrations and enjoy the process.
As a beginner, it’s important to understand traditional oil painting principles, from choosing the right approach to using mediums and materials effectively, so you can give yourself the best chance of creating great works.
On this Beginner’s Oil Course, we’re keeping it simple and practical, designed to work at home.
You only need a small brush kit, a limited palette of pigments, minimal tools, and a safe home setup. The short video lessons show each stage step-by-step so you can follow along without feeling overwhelmed.
You will learn how to prepare a canvas, see values, avoid muddy colours, control edges, and create the right consistency for your paint.
We cover the essentials of traditional oil painting: Underpainting, fat over lean, glazing, simple colour mixing, and when it comes to materials, I want you to understand the options available, from quick-drying oil paint to creating your own medium recipes.
You will complete five guided studies using downloadable reference images.
- We begin with a wipe-out study that lets you carve out the form like a sculptor.
- Then we move onto a limited palette jug study, a thin couche layer that allows the paint to blend and flow across the surface.
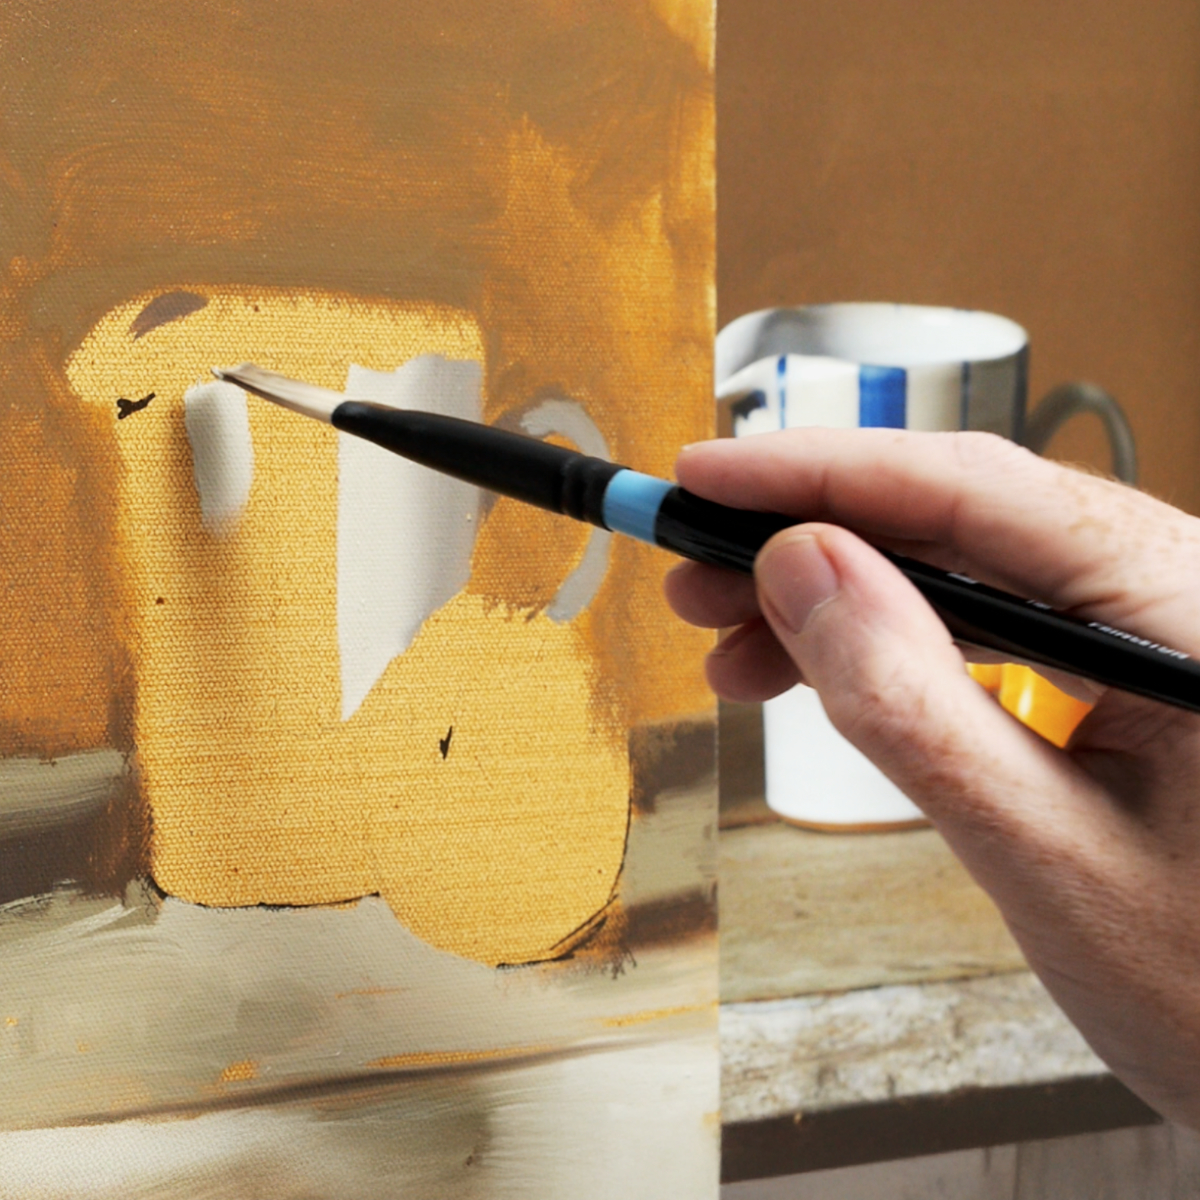
- In the monochrome cup study, you learn the importance of value and brush choice using an alla prima approach.
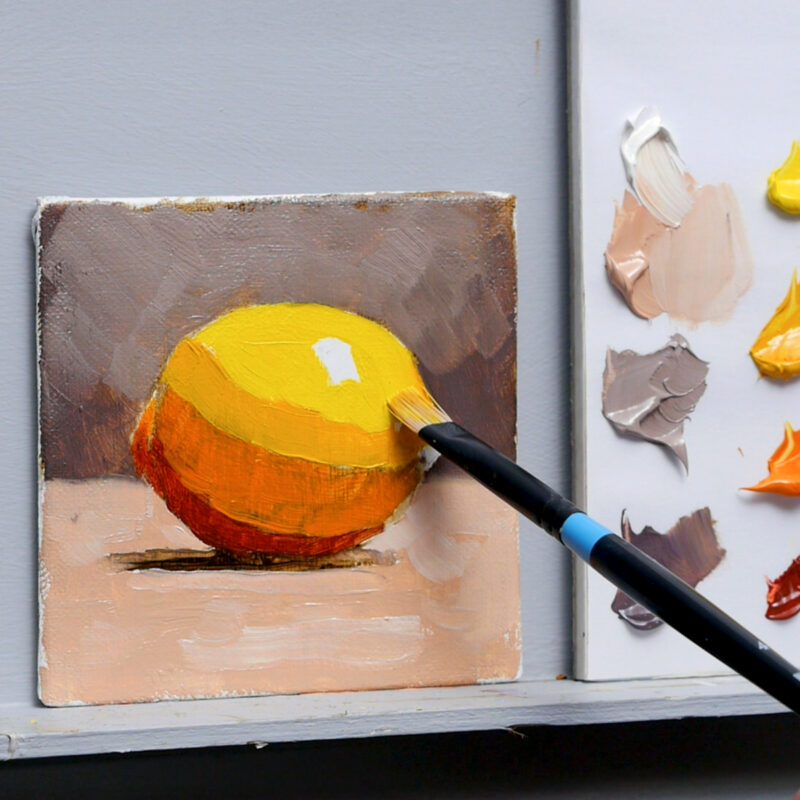
- The lemon study introduces a four-stage, layered, indirect approach using the fat-over-lean method and teaches you to think ahead to make the most of your glazing.
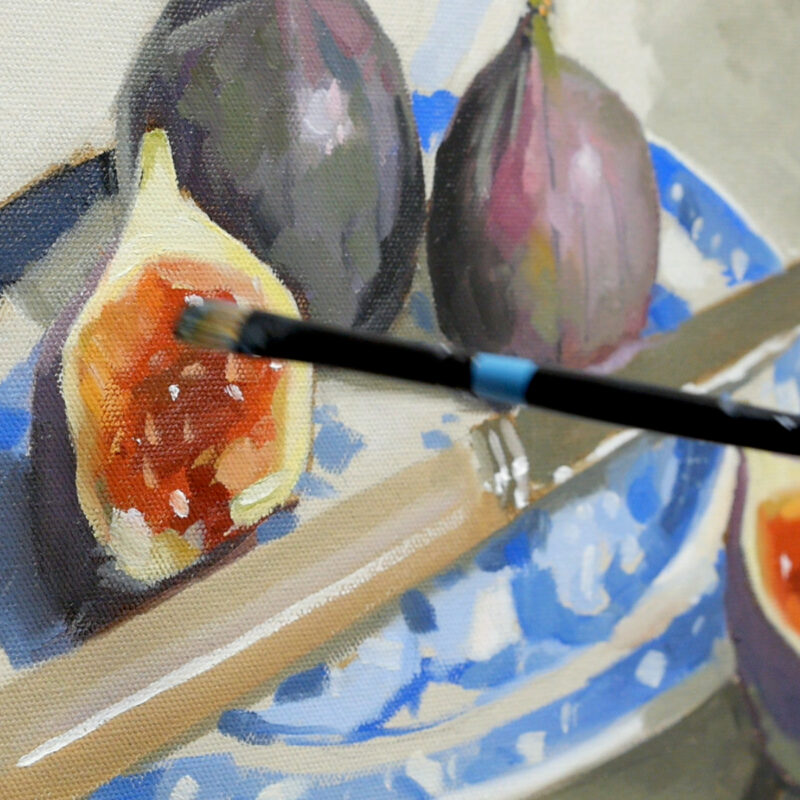
- Our final study is a classical still life of figs on a plate. This tutorial enables us to build layers and expand our colour mixing, working with a split primary palette and balancing realism with impressionism through painterly brush strokes.
Each study builds on the last and teaches a different approach, from direct painting to an indirect classical method.
What makes this course different?
- A calm, methodical approach that builds skill in the right order.
- Real-time decision making explained clearly as you paint with me
- Simple printables and references, so practice is easy to repeat.
- Both alla prima and indirect methods are taught.
So grab a brew, maybe a couple of biscuits, and join me on this Absolute Beginner’s Traditional Oil Painting Course to explore the magic of oils and surprise yourself with what you can create.
£75.00
Description
When you’re first starting with traditional oils, there’s a lot to take in. So to avoid overwhelm, in this course, I want to address some of the most common questions to help aspiring oil painters understand the theory and practice of painting in this medium.
Each of the 5 painting studies builds on the last and teaches a different approach, from direct painting to an indirect classical method. By focusing on still life subjects, you’ll gain confidence with setups that you can easily find at home to continue your studies.
I trained in classical oil painting in Florence, Italy, and have over 15 years of online teaching experience and more than 300,000 YouTube followers. My focus is always on practical methods that give repeatable results.
Designed with the home studio oil painter in mind
If you work from a small room at home, the idea of Traditional Oil paints and the use of strong-smelling solvents and mediums is a real consideration.
But you do not have to use solvents! You can paint with oils straight from the tube and add nothing to them.
Mediums and solvents like turpentine or odourless mineral spirits are optional; they simply change how the paint behaves. So you could dilute with a natural oil, like walnut oil, or with a solvent-free gel.
Think of them as ways to tweak consistency rather than requirements; it’s about balancing paint handling, drying times, sensitivity and where you are painting.
In the course, I demonstrate using a low-odour solvent and work in a well-ventilated space. Throughout the course, I’ve tried to cover less toxic alternatives. Here’s an Oil Painting Safety Guide to a safe working studio.
Over 5+ hours of tuition
This is a simple, easy-to-follow downloadable video course with over 5 hours of tuition where you will discover the essentials of how to create an oil painting using both a direct impressionist Alla-prima method and an in-direct classical approach, both aimed at the absolute beginner.
It has been designed as a step-by-step, rounded learning experience that brings together all my knowledge as a student, painter, and teacher.
What’s in the Course?
- 5 x traditional oil painting demonstrations, taking you step-by-step from preparation and mixing and matching colours through to the final brush strokes. ✅
- 16 downloadable video lessons, split into separate chapters that follow on sequentially.✅
- Over 5 hours of detailed video instruction so that you can follow along at your own pace.✅
- Downloadable reference JPEG images, line drawings, and a full materials list.✅
- Lifetime access, downloadable on separate devices.✅
You receive more than five hours of video lessons, reference images, my drawings, colour swatches, and lifetime access with a one-time payment.
Learn at your own pace and complete your first oil paintings with a clear and structured approach.
COURSE DELIVERY
I’ve taken care to film everything from my perspective so you can see exactly what I’m doing as we go through the entire painting process in real-time.
The courses are delivered by a series of downloadable video links that you need to download to your computer.
There is also a downloadable zip file that contains all of your reference images.
- Downloadable Video files
- Downloadable Full-colour reference photographs
- Downloadable Line Drawings
- Downloadable Materials Lists
This course has been developed with a beginner in mind, carefully going through the steps at a pace that introduces new methods and techniques slowly.
How is the course delivered?
When you purchase the course, you will receive an email with all the downloadable video links to the course. You then have to download and save the Video Lessons onto your home computer/iPad.
15 Downloadable Step-by-Step Video Lessons.
With over 5hrs+ hours of detailed video instruction, once downloaded, you can access the lessons anytime, anywhere.
- A downloadable materials list.
- JPEG reference image, a copy of my pencil sketch for the line drawing.
The video files are large (5.5GB), so you need a broadband internet connection and enough space on your computer’s hard drive.
Please note: You will not receive a DVD.
Cut by the Artist
I filmed, edited, and coloured the course myself (with a little help from Vanessa!) rather than working with a production company. Artists have different needs than editors, so I wanted to cut the course like an artist, showing you exactly what I wanted to see when I was learning. I show all the real-time brushstrokes for the paintings so you don’t miss a step.
There are 3 main camera views I cover:
An over-the-shoulder view of the work – so you can see how I build up the painting as if you were standing behind me in the studio.
A close-up of the brush contacting the canvas – with extreme close-ups, so you can see the grain of the canvas and the bristles in the brush.
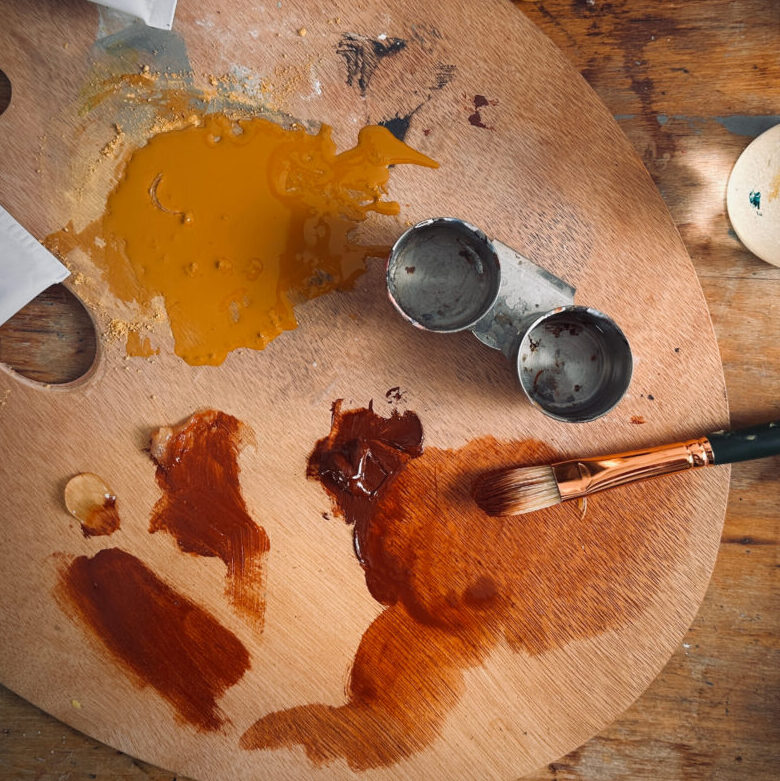
Stable shot of the palette for when I pick up paint – see exactly how I mix colours. There is nothing worse than when the brush disappears from view, only to reappear with some fantastic new colour. Where did that colour come from?! How did it get mixed?
The palette view is very important, not just at the beginning of the video. I want to show you every single mix I make, so I film with the palette directly next to the painting; then, you can see shots of the palette throughout the course and gain a sense of my approach to colour mixing.
Colour Corrected Footage
Filmed under constant colour-balanced conditions, the paint colours are as accurate as possible. (Computer monitor screens and print-outs can vary)
Real-time filming – No long jumps in progress
I don’t like long jumps in progress when the paintbrush goes off-camera, the shot changes, and suddenly the picture seems to improve drastically.
I include all the stages so you can clearly see the piece’s progress.
COURSE REQUIREMENTS
Requirements for the Course
A broadband internet connection – the file sizes for the video lessons are quite large (5.5GB in total) so can take a while to initially download (depending on your internet speed.)
Once downloaded, they are yours to keep forever, watch without buffering or take to the garden and watch away from an internet connection!
Enough free space on your Computer or iPad – The video files are 5.5GB. You can download the files to a separate USB stick if you need extra storage.
A Colour Printer—to print out the reference images or access a Print Shop. If you have a separate device, you could have the reference image on that.
Photo Printer Paper – I use Epson Photo Glossy.
Have a read through the Oil Painting Safety.pdf – Water-mixable oils and low odour thinners do not present any major dangers when used with care and common sense. However, as with any products, high standards of general hygiene should be adhered to. This safety guide is intended for traditional oils, but please read it through. It covers ventilation, sensitivities, and safe studio practice with oils.
A love of Tea & Biscuits – Optional, but some might say essential tools!
FAQs
Absolute Beginners Oil Painting Course
The shopping cart will convert to your local currency. You can use a currency converter to get an idea of the current exchange rate: https://www.xe.com/currencyconverter/
Yes, you can from another screen, such as an iPad or a desktop. That will let you keep the reference image visible while you follow the lesson.
However, in some of the lessons, I physically test colours directly on the printouts. This can be very helpful when you are first learning, because it makes colour matching clearer and easier to judge.
No. This course focuses on traditional oils and uses solvents and mediums that contain VOCs. If you prefer a low solvent/toxic-free option, I have a full beginner’s cours: Absolute Beginners Water-Mixable Oils Course. It’s designed with acrylic painters in mind and walks you through the differences and similarities between the two mediums.
Forever! Once you download the lessons, you have lifetime access ✅
If you ever misplace the links or your computer or laptop fails, just send me an email and I will send you fresh download links.
Yes, you can follow along with the lessons with WMOs. Ideally, you’d use a water-mixable thinner and water-mixable linseed oil so you can mix and match the mediums demonstrated in the course.
