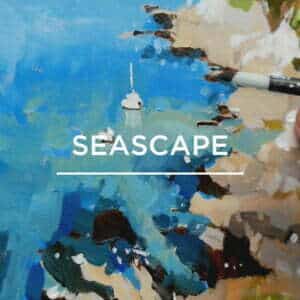
Coastal Canvas – Beginners Impressionist Seascape in Acrylics
(Scroll Down ↓ to Add to Cart)
Morning class, I’m Will Kemp from Will Kemp Art School, and welcome to Coastal Canvas, Mastering Impressionistic Seascapes in Acrylics for Beginners.
This impressionistic seascape is all about simplicity.
It has been designed with short 10 – 20 minute ‘micro-learning’ lessons, so you’ll build your knowledge, even if you’ve never painted seascapes. The project is so simple that you’ll have a finished painting in a few short sessions.
In this course, we view the coastal path across gentle waters, where sailboats are harboured up or just coming into the dock.
Set in the early evening golden hour light, the foreground has a secluded coastal garden with pink hydrangeas in full bloom; the greens are dark, cool and olive in tone and frame the passage of the sea.
Then, in the far distance, you’ve got a warm headland of pastel yellows and greens glowing from the golden light, creating a contrast of values and tones of greens from the foreground to the background, and then just a glimpse of a white lighthouse in the far distance.
Loosen Up Your Acrylic Painting
Many beginners think that painting the sea is too hard or that getting a convincing perspective is beyond them and that they need special drawing skills. But in reality, all you need are simple shapes, scale and a framing shift when mixing your colours.
This course is designed for beginners, with a simple subject (even if you’re brand new to drawing) and a limited palette of colours.
Learn how you can keep your brushstrokes simple and the subject fresh to create an impression of a scene rather than a photorealistic rendering. (You could also follow along with Watermixable Oils or Traditional Oils.)
I’ll walk you through how to mix colours, analyse pigments and distil your subject into a compelling painting. We’ll cover the preparation of your surface & drawing out, observing the composition with sketching and scale, and keeping the boats in scale to give that sense that they’re in the distance.
Inky Depths to create realism.
Change the intensity of the greens by changing the pigments, lose the fear, and embrace black in landscapes and seascapes. You’ll discover you don’t need to go bright with your greens in order to make them feel realistic. In fact, less is more; the more darker and muted your greens are, the more realistic they will read in a landscape painting.
When capturing coastal light, sea and sky, understanding the undertone and colour bias of the different blues to achieve the glimmering reflected lights.
When it comes to the details of flora and focal points, we keep things gestural and impressionistic, looking for passion, not perfection.
By the end of this course, you’ll have that insight into the hidden under-workings of a painting, teaching you classical painting skills alongside impressionistic brushstrokes.
Gained confidence that you could create a painting from a simple subject, motivating you to tackle different, more challenging views from your own photo library.
Capture the Essence, Not Every Detail.
- Learn how to paint realistic headland by controlling your colour intensity
- How to create a ‘vignette’ with your foliage to frame your view
- How to paint the sea by using colour strings
- How to control water flow and absorption
- How to select an image that will translate well to paint
- How to check if a subject will make a compelling painting subject (by creating a postcard prep study)
There are some intermediate lessons where we expand the colour palette, but each step is described clearly and succinctly.
What’s in the Course?
- 1hr 45min+ Hours Self-Paced Downloadable Video Course
- 1 x Seascape Painting subject from start to finish, working from a reference image.
- 8-step-by-step video lessons (split into ‘micro-learning’ sections.)
- DRAWING TEMPLATE – line drawing to follow to help you overcome the blank canvas
- TOOLS & MATERIALS: Downloadable Materials List PDF
- REFERENCE IMAGES: Downloadable Line drawings.
Study at your own pace ✔
1 hour 45 minutes of detailed video instruction ✔
Full Lifetime Access to the Lessons ✔
One-time Payment ✔
Who this course is for?
A beginner to acrylics who wants to gain confidence in their painting by following a step-by-step proven plan. An aspiring artist who loves the sea and the coast and has folders of photos they would love to capture in paint but are unsure of the best approach.
£35.00
Description
I’ve developed this painting course to show you how simple landscapes and seascapes can be!
Working through this acrylic course, you’ll learn classical painting skills alongside impressionistic brushstrokes, the importance of scale, simple composition, colour bias and colour harmony.
By the end of this course, you’ll have a finished seascape painting and have gained the confidence that you could create a painting from a simple subject, motivating you to tackle different, more challenging views from your own photo library.
In this course, you will learn:
- Simplification of shapes & subject
- Understanding pigment choices by creating a postcard study
- How to prepare your canvas using a coloured ground.
- Simple drawing techniques to conquer depth and perspective
- Brushwork to add life to your painting
- How to use acrylic mediums to control paint flow
1 hour 45 minutes of video tuition, you will learn how to mix the perfect green, choose a compelling composition, and create an impressionistic seascape.
- 8 LESSON VIDEO COURSE Study at your own pace (with lifetime access to these recordings)
- LIFETIME ACCESS to downloadable video lessons
- DRAWING TEMPLATES Line drawings to work from
- REFERENCE IMAGE
- MATERIALS LIST Tools and materials list to help match colours and tonal value
So, if you want to learn how to paint with passion, not perfection, your impressionistic journey begins here.
LESSON BREAKDOWN

Lesson One
Composition, Sketching & Scale
How to use the rule of thirds to simplify your composition (and drawing out) and create depth in your landscapes.

Lesson Two
Value Mapping for Depth & Realism
Using a classical oil painting technique we’re going to map out our values (lights & darks) to give us a structural foundation for our painting.

Lesson Three
Embracing black for Seascapes
Black makes painting dark and muddy right? Maybe, maybe not. Learning how you can use black as a key element to creating fabulous realistic greens in your landscapes.

Lesson Four
Warm Greens for Coastal Landsccapes
Learning how to use different yellows to create the perfect green to give that glow of early evening light.

Lesson Five
Capturing Coastal Light
How do you paint the sea with just a few brushstrokes? how light or dark is the sky? this lesson looks at the colour bias of blues to create the perfect hue for your seascapes.

Lesson Six
Flora & Focal Points
Adding in more colours to push the vibrancy of the flora and using impasto marks to focus the viewer on the sailboats.
COURSE DELIVERY
Course Delivery
I’ve taken care to film everything from my perspective so you can see exactly what I’m doing as we go through the entire painting process in real time.
The courses are delivered by a series of downloadable video links that you need to download to your computer.
There is also a downloadable zip file that contains all of your reference images.
- Downloadable Video files
- Downloadable Full-colour reference photograph
- Downloadable Line Drawing
This course has been developed with a beginner in mind, carefully going through the steps at a pace that introduces new colours and techniques slowly.
How is the course delivered?
When you purchase the course, you will receive an email with all the downloadable video links to the course. You then have to download and save the Video Lessons onto your home computer/iPad.
8 Downloadable Step-by-Step Video Lessons.
With 1hr 45min+ hours of detailed video instruction, once downloaded, you can access any time, anywhere.
- A downloadable materials list.
- JPEG reference image, a copy of my pencil sketch for the line drawing.
The video files are large (3.5GB) so you need a broadband internet connection and enough space on your computer hard drive.
Please note: You will not receive a DVD.
Cut by the Artist
I filmed, edited, and coloured the course myself (with a little help from Vanessa!) rather than working with a production company. Artists have different needs than editors, so I wanted to cut the course like an artist, showing you exactly what I wanted to see when I was learning. I show all the real-time brushstrokes for the paintings so you don’t miss a step.
There are 3 main camera views I cover:
An over-the-shoulder view of the work – so you can see how I build up the painting as if you were standing behind me in the studio.
A close-up of the brush contacting the canvas – with extreme close-ups, so you can see the grain of the canvas and the bristles in the brush.
Stable shot of the palette for when I pick up paint – see exactly how I mix colours. There is nothing worse than when the brush disappears from view, only to reappear with some fantastic new colour. Where did that colour come from?! How did it get mixed?
The palette view is very important, not just at the beginning of the video. I want to show you every single mix I make, so I film with the palette directly next to the painting; then, you can see shots of the palette throughout the course and gain a sense of my approach to colour mixing.
Colour Corrected Footage
Filmed under constant colour-balanced conditions, the paint colours are as accurate as possible. (Computer monitor screens and print-outs can vary)
Real-time filming – No long jumps in progress
I don’t like long jumps in progress when the paintbrush goes off-camera, the shot changes, and suddenly the picture seems to improve drastically.
I include all the stages so you can clearly see the progress of the piece.
COURSE REQUIREMENTS
Requirements for the Course
A broadband internet connection – the file sizes for the video lessons are quite large (3.5GB in total) so can take a while to initially download (depending on your internet speed.) Once downloaded, they are yours to keep forever, watch without buffering or take to the garden and watch away from an internet connection!
Enough free space on your Computer or iPad – You can download the files to a separate USB stick if you need extra storage.
A Colour Printer – to print out the reference images or access to a Print Shop. If you have a separate device, you could have the reference image onto that, but it can be harder judging colours from a backlit computer screen vs a paper printout.
Photo Printer Paper – I use Epson Photo Glossy.
A love of Tea & Biscuits – Optional, but some might say essential tools!


