
Essential acrylic painting starter set!
This is the final part of the painting and we can start to reap the rewards from our careful underpainting and patience.
If you’ve just stumbled on the tutorial you can catch up below:
- Part 1 & 2 of the French cafe painting tutorial
- Part 3 French cafe painting tutorial
- Part 4 French cafe painting tutorial
This week we start to introduce a brighter red and a yellow.
A step-by step French Café Scene acrylic painting
Materials you will need for this stage of the painting:
- 12mm Acrylic brush – Pro Arte Prolene – flat
- Size 4 Kolinsky sable from Rosemary & co – round – (any small round will be fine)
Paints (All Golden Heavy body acrylics unless stated)
- Artist quality Titanium white
- Burnt Umber
- Phthalo Blue (Red shade) or (Green shade) – I demonstrate using Phthalo blue green shade
- Cadmium Red Light
- Cadmium Yellow Light or Cadmium Yellow Medium
- Permanent Alizarin Crimson (Winsor & Newton Artists’ Acrylic)
- Naples Yellow (Winsor & Newton Artists’ Acrylic)
Other materials used
- Kitchen roll
- Jam jar for cleaning brush.
- Small dipper for diluting paint
- Stay-wet or tear off palette
- Palette knife – 45 RGM

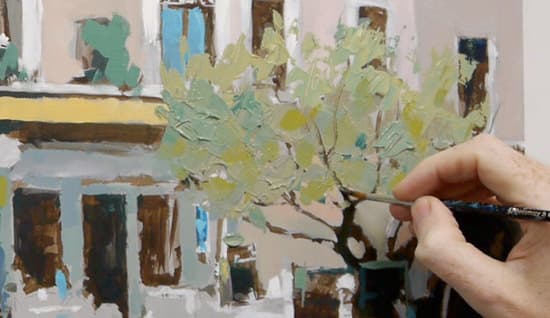
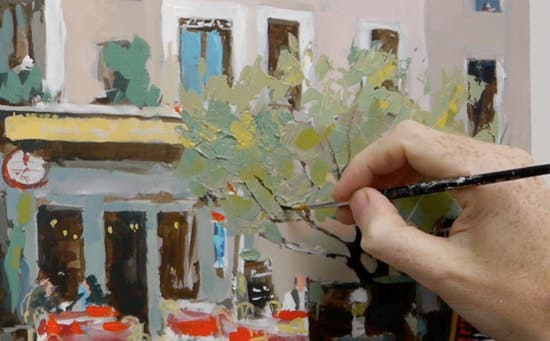
Step 1: Mixing brighter greens
I start to mix in some cadmium yellow with the green, this will give it some more punch so the impression of the leaves will start to stand out.
If you’re using Phthalo Blue red shade your green will be slightly duller than the Phthalo Blue green shade.
(I list both Phthalo Blue green shade & Phthalo Blue red shade as sometimes they can be hard to track down).
I also paint over any branches that may have been lost in the application of the paint with the palette knife.
Using a watery mix of the Permanent Alizarin Crimson I start to wash in the red colours of the tablecloth.
I also add some of the Titanium White so I can clearly see the differences in tone between the tables.
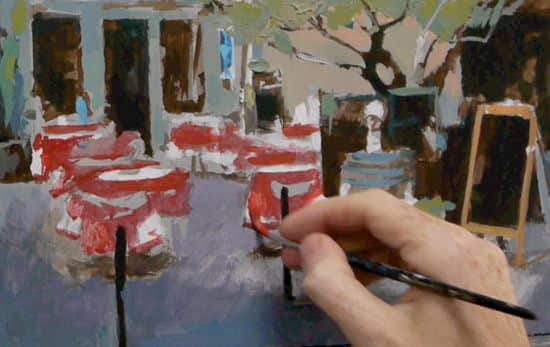
Step 2: Using an opaque Red
Now I introduce a more opaque red, a Cadmium Red Light.
You’ll notice when painting with these two reds the big difference in coverage.
The Permanent Alizarin Crimson is perfect for glazing applications, and tinting whites whilst the Cadmium reds are so good at covering over colours to give a bright finish.
I use the square brush to apply the paint more thickly.

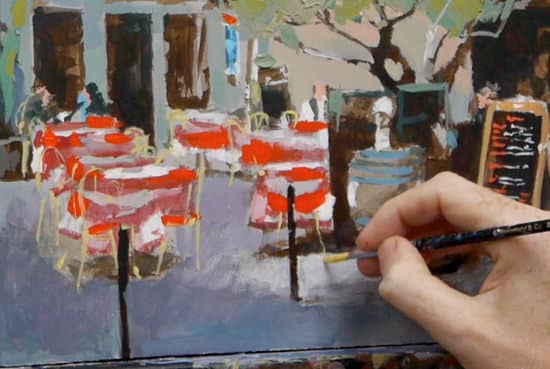
Step 3: Adding the Details
Then, by loading up the small round brush, I paint the ‘menu’ on the board, squint your eyes at the image to try and simplify the shapes, hold the brush loosely so the marks aren’t too stiff.

I use the same squinting technique when painting in the figures, I don’t want too many details, just an impression so keep the brush marks flowing.

The same technique that was used on the menu is used again here when painting the chairs.
Pro tip: If you have a student quality yellow it’s a little more tricky because it might not cover over the existing paint aswell, just add a bit more Titanium white to your mix to give you some more opacity.
Then a few more dots of lights in the windows to balance out the yellow we’ve painted on the chairs.
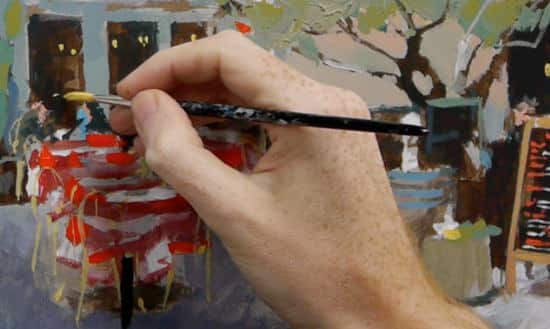
Adjust any drawings or add any details you can see in your painting just to bring it to more of a finish.
French Café scene Acrylic painting – Free video Course |Part 5
Click the video below to watch the tutorial.
Here’s the finished painting:
Hope you enjoyed the series, let me know how your painting turns out.


i love it fantastic good work
Thanks Leslie,
Will
thanks so much for this tutorial was very informative
greetings from australia
may GOD bless you in CHRIST JESUS
blessings
john
Hi John great to hear you’ve found the tutorial informative,
Thanks again,
Will
Absolutely stunning! Love your details.
Thanks Hafsa, very kind of your to say so.
Cheers,
Will
thanks learnt a lot
Pleased to hear it Helen,
Thanks,
Will
Hi Will,
Had to laugh at your ‘hope you’re keeping well’ message – I had a recent fall and am now on crutches! Still, a good reason (as if I needed one) to get down to some painting!
Regards
Elaine
Oh dear Elaine, sorry to hear that, sounds like the perfect time for tea.
Will
Love your little French Pastry in the “Essential acrylic starter painting kit” list. I wondered what it was at first and on closer inspection realised that you were having a laugh, like it!!”
Cheers Isabel
Cheers Isabel, I hope you agree that a Pain au chocolat is essential!
Will
p.s. No pastries were harmed in this photograph
Really lovely painting, very informative and well instructed. This tutorial has given me lots of ideas for Italian paintings I put to one side you have given me confidence to finish one I have started.
Thank you Will, warmest regards, Joyce
P.S keep me signed in, look forward to more.
Thanks Joyce, great to hear it’s inspired you to tackle your Italian paintings again!
Cheers,
Will
Like all talented artists you make this look so simple. I am trying to be much looser (is that spelt correctly!) with my work and this is exactly what I would like to achieve. Thanks for the tuition – I shall look forward to your next email.
Cheers Steve, pleased you’ve found the lesson helpful.
Will
Hi Will
I didn’t do any careful underpainting… and I have no patience. So now I’m having to face my art teacher tomorrow and own up to having created a disaster during the week between lessons!
But at least it wasn’t your cafe scene! Now I will put my seascape aside and concentrate on following your instructions for this one to the T (tea?) and pain au chocolat!
Best wishes
Abbie
Hey Abbie,
It can be hard not to want to rush ahead to the ‘fun’ bits of the painting, but the advice of ‘starting slow so you finish quick‘ can really help your paintings success.
Cheers,
Will
Hi
Enjoyed the tutorial on French Cafe scene .completed the painting very pleased how it came out .thanks again .Will post you an image.
Hi Nuala,
Great to hear you’re pleased with how your painting has turned out. Looking forward to seeing it.
Cheers,
Will
Hi Will,
That’s a super painting ! Thank you for a splendid tutorial and your tips on color layering . You made it look so easy with this simple approach of not using too many colours. Yes, we do tend to get carried away in rigidity, in strictly following a model composition. I need to try out this lighter, spontaneous technique.
Thanks for your gracious help.
Ghazala
Hi Ghazala,
Thanks for dropping by and your kind comments on the painting.
if you try holding the paintbrush with a lighter grip can be very helpful in ‘loosening up’ your painting.
Pleased you enjoyed the series,
Cheers,
Will
Lovely, you make it look so easy!
I need to watch it again to see what colours you used for flesh tones and also wondered what’s the Fortnum’s box for in your essentials kit? Thank you for the tutorial. Catherine
Cheers Catherine, The Fortnum’s box held essential tea!
Hi Will.
Greetings from the US.
I am so happy to have come upon your website. The French Cafe tutorial has been most enjoyable and informative. Especially helpful to me is the burnt umber underpainting method. It helps me so much!
I am retired and have been trying to paint (by trial and error) for about 10 years now.
Do you do workshops or offer private instruction? I am an inveterate Anglophile and travel to the UK often. I look forward to more great videos.
John
Hi John,
Nice to hear from you, pleased you’ve found the French Cafe series informative.
I don’t currently run live classes due to time commitments with my painting practice but if do run some in the future I’ll post details on the blog.
Cheers,
Will
Hi Will, I found the tutorial very informative.I can see the mistakes more clearly in my past works [oil ]and given me confidence.this is my first attempt in acrylics .thank you very much. I look forward to seeing more of your work.God bless. Daljit
Hi Daljit, great to hear you’ve found the tutorial helpful, and given you a fresh eye on your previous paintings.
Cheers,
Will
Hi Will .astonishing! how the brighter red and yellow look ok .thanks. daljit.
Počela sam pratiti vašu školu crtanja i oduševljena sam.
Započela sam crtafi “frech cafe” svakako ću vam poslati moj uradak. Hvala
‘I started to follow your school of drawing and I am thrilled.
I started the “French cafe” certainly will send you my artwork. thanks’
Hvala Gloria, jako drago da uživaš tutoriali!
Will
Thanks Gloria, really pleased you’re enjoying the tutorials.
Great tutorial. Simple, informative, step-by-step broken down nicely, something even I can attempt and not be intimidated.
Can’t wait to see it again next week from the start and follow along this time while I paint it.
Thanks for the effort to put this out there for us. Had to retire due to illness and painting I am finding allows me to be happier with my days, when am not dealing with other things.
Hi Kikt,
Thanks for your kind words, really pleased you have found the tutorial informative and are finding time to get the brushes out when you can.
Cheers,
Will
Hello from Puerto Rico:
Besides being a great artist, you are an excellent instructor. Hope I have the opportunity to take classes with you soon. Also I’ll hope to see more on the internet.
Thanks,
Maggie
Cheers Maggie, kind of you to say so, pleased you’ve been enjoying the tutorials.
Will
Hi,
I’m a new follower of your blog :) I just began painting with acrylics… I have few questions so.
1. As I said I Just began, I guess it will be a waste only if I start painting on canvas…so what kind of paper you suggest to use for beginning until I get well with it?
2. For some reason, I can’t make the shopkeeper understand what is grease-proof paper, maybe it’s not available. I didn’t go to other shops yet though. Any other ideas for acrylic palette?
3. Do I must need mediums? If yes, then how to determine which one?
And, let me say thank you. You are doing a great job really! Being such a big artist and still having time for teaching others – is really a big deal!
Thank you.
Hi Swapniel,
Nice to have you along, to answer your questions:
1. As I said I Just began, I guess it will be a waste only if I start painting on canvas…so what kind of paper you suggest to use for beginning until I get well with it?
A heavy NOT watercolour paper (300 gsm) or cartridge paper. The watercolour will be able to handle more watery washes. This article might help you.
2. For some reason, I can’t make the shopkeeper understand what is grease-proof paper, maybe it’s not available. I didn’t go to other shops yet though. Any other ideas for acrylic palette?
You can try painting without a stay-wet palette and still learn a lot about colour mixing etc.
3. Do I must need mediums? If yes, then how to determine which one?
You don’t need any mediums to start with apart from water, but one of my first picks would be ‘Acrylic glazing liquid gloss’ for thin applications of paint and blending.
Cheers,
Will
Hi Will,
Thank you for the advises:) I made the first acrylic painting on a pre-primed paper, I was told by the shopkeeper that it is for both oil and acrylic. Though I have both cartridge paper and handmade paper (rough and cold-pressed) in stock. I can try them now :)
Okay I will buy that gloss medium once I set up my hands in acrylics. I never tried anything other than watercolours – so I’m amazed to the acrylic’s effect :)
And for the palette; Because of unavailability of resources, I made something of my own – don’t know what it is. Lol. I took a tray and a handmade paper – this is to hold the water for longer, and above it a layer of parcel packing paper –its one side is like grease-free, and another side is rough… :D
I heard many uses a glass piece for beginning period too.
Hi Swapniel,
Sounds like you’re being creative with the resources available! the parcel packing paper is a good choice to try. Glass can be good for oil painting, but harder to scrape of with acrylics. If you do work on a glass palette, leave the palette in some water overnight and the acrylic will just peel off.
Cheers,
Will
Yeah I think I saw you using glass palette when you were painting the oil- self portrait…
By that I remembered, will you make an acrylic-portrait tutorial or it is pretty much same as Oil’s? :)
Oh I had another question…
We can understand the lights and shades well when we are painting or drawing from a reference…but when we draw/paint from mind or just pure imagination, how we understand the direction of lights, reflection and shadows on some object?
I find Oil paint is the best medium for beginners to portraits as the extra working time is crucial if you’re trying to create a realistic effect.
Cheers,
Will
Thanks for this tutorial; it’s very helpful to see how relaxed your painting process is. I gained a LOT of perspective by viewing the reference photo next to your video demonstration. In so doing, I see how you modify actual colors to serve your purposes, one of which is to mix colors than can be distributed throughout the composition. Very enlightening, Will, as always.
Questions on color mixing:
My acrylics dry darker than they appear when wet. Mine are Chroma Atelier Interactive paints, which are said to darken less typical acrylics, but I still see a BIG difference in tone between vibrant wet paint and darker dry paint (this applies to some colors more than others).
Q1. Do YOU experience this ‘darkened dry paints’ phenomenon?
Q2. Are there techniques to avoid it, such as using particular mediums, etc?
Q3. How do YOU overcome or accommodate it in order to mix accurate colors?
Hi Tom,
Pleased you’ve found the tutorial helpful in your painting, to answer your questions:
Q1. Do YOU experience this ‘darkened dry paints’ phenomenon?
Yes, there is always a slight darkening colour shift with acrylics.
Q2. Are there techniques to avoid it, such as using particular mediums, etc?
Not really, as it is the medium – the acrylic polymer- that causes the colour shift to happen.
Acrylic polymer is usually white when wet and then dries clear (like PVA glue).
Some of the best acrylics for a minimal colour shift are Winsor & Newton Artist acrylics. They use a clear acrylic polymer as the binder in the paint so claim there isn’t a colour shift. I personally still feel there is a slight shift, but very slight in comparison to some other brands (Golden paints also have a limited shift) I haven’t used Chroma Atelier Interactive paints extensively so can’t compare the different brands, maybe I’ll put together an acrylic paint shootout for the blog!
Q3. How do YOU overcome or accommodate it in order to mix accurate colors?
I suppose I’ve just become used to it when painting with acrylics, you can try mixing the colour you want and then adding a touch of zinc white to the mix, but in practical painting terms it can be a bit laborious.
Hope this helps,
Will
Thanks, Will. Your reply is most helpful and much appreciated, as always. Good of you to make the distinction between WHITE acrylic polymer vs. CLEAR paint vehicles. Now the ‘darkening upon drying’ makes sense. Unfortunately, it may be too late for me, as I’m addicted to the re-wettable aspect of the Chroma Atelier paints (grin) and probably incapable of using the other fine paints you mentioned.
I’m so pleased to have stumbled into your website (followed a Google link to your excellent ‘Black Paint Myths’ page). For me–and for many others, I’m sure–you are a truly reliable, good-natured and entertaining source of REAL WORLD painting information. So YEAH! I would LOVE to see you do a major manufacturer Acrylic Paints Shootout.
You’re welcome Tom, pleased it helped, I’ll look into the Shootout!
Cheers,
Will
Will-
This is not my style, but I thought I would give it a go. Must say it actually turned out better than I expected. The one place I departed from your lesson was in the leaves. Rather than using a knife, I use a hake brush and stippled. The most difficulty seemed to be in getting the correct perspective for the four tables to the left. I was off a bit at first, and the painting just looked strange. Thank goodness for acrylics. Let me paint over again. This was instructive and fun. Many thanks. (Hope to see you back at ArtTutor soon).
Cheers Mitch, pleased you gave yourself a challenge to paint something that wasn’t normally your style. The size in tables does change quite a bit for a percieved small distance.
Glad it turned out better than expected!
Thanks again,
Will
Hi Will,
I enjoyed the tutorial very much. It was interesting, well instructed and valuable lessons to me. Please keep me posted as l’m looking forward to hear from you again.
Hi Shannen,
Really pleased you enjoyed the tutorial and have found it valuable in your painting.
Thanks again,
Will
Hello Will,
I am your faithful follower since I stumble upon your website a few months ago when searching on line how to paint a picture in impressionistic style (my favorite). I have never painted or draw until 2 years ago when forced into early retirement and when an injury ended my joy of playing tennis. I have always enjoyed visiting museums and art galleries and because I needed a challenge I signed for an art class: acrylic painting in a local art center. I thought it was so very difficult but magical.
When I discovered your website I was amazed and thrilled how many information I could find about brushes, mixing colors, step by step tutorials and my favorite the advice how to conquer our fear. It gave me much needed encouragement and some confidence and as a result a lots of happiness.
I have done all the pictures from tutorials except the one with palette knife.Thank you for sharing your talents and knowledge. I appreciate it very much!!!!!!!!!! and I love to learn!!!
The french cafe picture came out darker than I anticipated. one reason being that mixing colors and paint consistency continue to be a challenge for me and I kept coming back with a “better color”(repainting) and in the process lost the under-painting tone as well as ended up with a darker shade.
Hugs, Krystyna
Hi Krystyna,
Lovely to hear from you, and so pleased to hear of your successes with painting and how the site has been helpful in your transition from racquet to brush!
Repainting over previously established colours is all part of the painting process, and consistency of the paint is a really underestimated skill, so it sounds like you’re on the right track.
Thanks again,
Will
Just finished your extremely helpful lesson in one sitting, took me all day! I enjoyed it very much and learned a lot.
Thank you
Good one Katie, so pleased you found the tutorial helpful in your painting.
Cheers,
Will
Dear will,
I’m throughly enjoying your teaching style. I’ve been watching tutorials everyday for 6 months, and your detailed examples are excellent and by far the best hands on learning style. I also like your good nature and happy disposition. I’m so grateful for your very generous time and god given talent. So very thankful, hopefully After watching, I will become a brillant painter as yourself. Many blessings to you,
Ally
Love these lessons, brilliant!!!
Hi Ally,
Nice to hear from you, and thanks for your kind comments. So pleased you’ve been finding the tutorials helpful in your painting.
Thanks again,
Will
Just finished the teapot painting! Loved how it turned out. I just finished watching this tutorial and found it very informative. I just love the way you explain things. This will be my next practice.
Great to hear it Ramona, would love to se how your painting turned out.
Cheers,
Will
Hi Will,
Thank you for the tutorials. I just finished this French café scene after finishing the still life cherry and apple tutorials. Not sure how I went but learning skills and improving as I go along.
Really pleased you’re enjoying them Giovanna.
Cheers,
Will
Great painting and tutorial Will. I decided to paint this one but I am still on the drawing stage. I find difficult the loosen and at the same time so accurate in details. But I will dare a try. You are the teacher that inspires me and improves my painting effort with your guidelines
Thanks for your kind works Katerina, glad you’ve been enjoying the tutorials.
Will
I wasn’t able to go to Art School, I had to go to Business School instead. I’m now in my 60s, and after a long career and large family, I’ve been able to take up my art again. You are now my Art School. I have done a couple of your courses, and just finished Portraits, which was very good. You have made me concentrate on my technique and colour mixing, and how to apply these in my work in a more disciplined way. The results have been amazing. Well, to me anyway. More courses please Will!
Hey Trisha, so pleased you’ve been enjoying the portrait course and great that you’ve been finding time for your art again, just working on an updated colour mixing course at the moment.
Cheers,
Will